Getting Started with the S12ZVMAEVB
Last Modified:
2020-05-28 08:03:00Supports
S12ZVMA DC Motor Control Evaluation Board
Contents of this document
-
Out of the Box
-
Get Software
-
Build, Run
Sign in to save your progress. Don't have an account? Create one.

Purchase your S12ZVMA DC Motor Control Evaluation Board
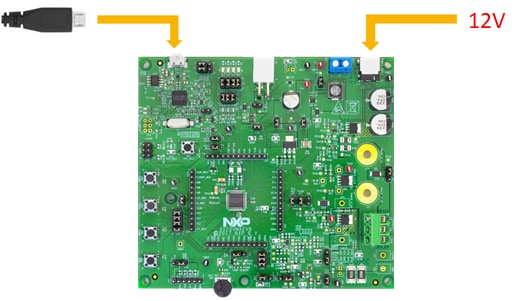
1. Out of the Box
Let's create the setup environment to use your S12ZVMA.
2. Get Software
2.1 Start your Design by Downloading the Quick Start Package
Start your design by getting started with the Quick Start Guide and JumpStart code within the Quick Start Package.
2.2 Install your Toolchain
CodeWarrior Development Studio for NXP S12Z microcontrollers enables you to build and deploy applications quickly and easily.
Get CodeWarrior Development Studio
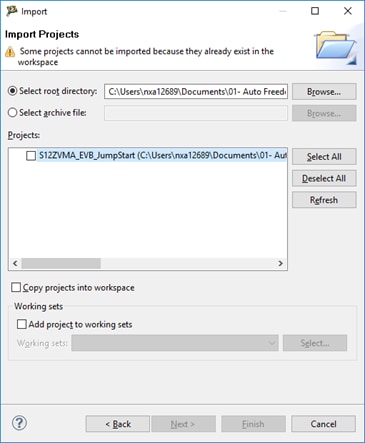
3. Build, Run
Learn how to create a new project in CodeWarrior v11 and the basics to create your own code by running an easy example code.