Getting Started with the SLN-TLHMI-IOT
Contents of this document
-
Plug it In
-
Get Software
-
Build, Run
Sign in to save your progress. Don't have an account? Create one.
1. Plug it In
Welcome to the SLN-TLHMI-IOT Getting Started guide. This guide walks you through the process of getting up and running with your SLN-TLHMI-IOT board. This guide takes you through the steps of unboxing your kit, running the out-of-box coffee machine demo application, as well as downloading, modifying and debugging the firmware source code for your kit.
Although the SLN-TLHMI-IOT supports multiple out of box applications (which can be selected by pressing and holding SW1, SW2 or SW3 on the back of the kit), this guide will focus on the Coffee Machine out of box demo.
The Coffee Machine application demonstrates not only traditional touch-based controls, but also the face recognition, multi-language far-field voice recognition and graphics capabilities of the kit.
Before we begin, make sure to check the box your kit came in for any marks or damage and should you find anything, be sure to report it to your local NXP representative.
1.1 Unbox
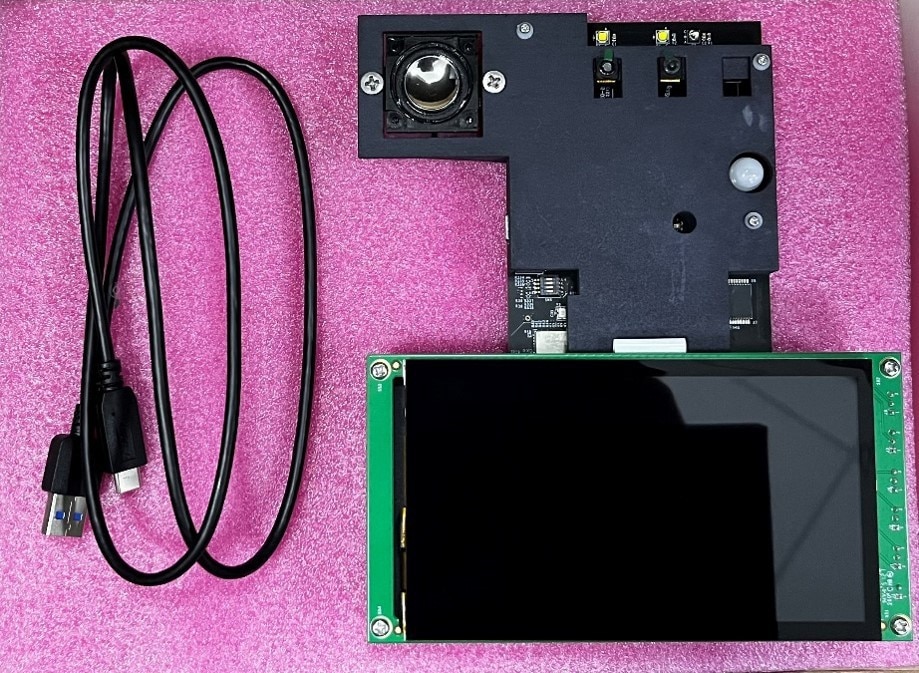
The kit your box arrived in with few different things, such as:
- A packing list paper
- Fully assembled TLHMI kit
- USB-C cable
1.2 Power On
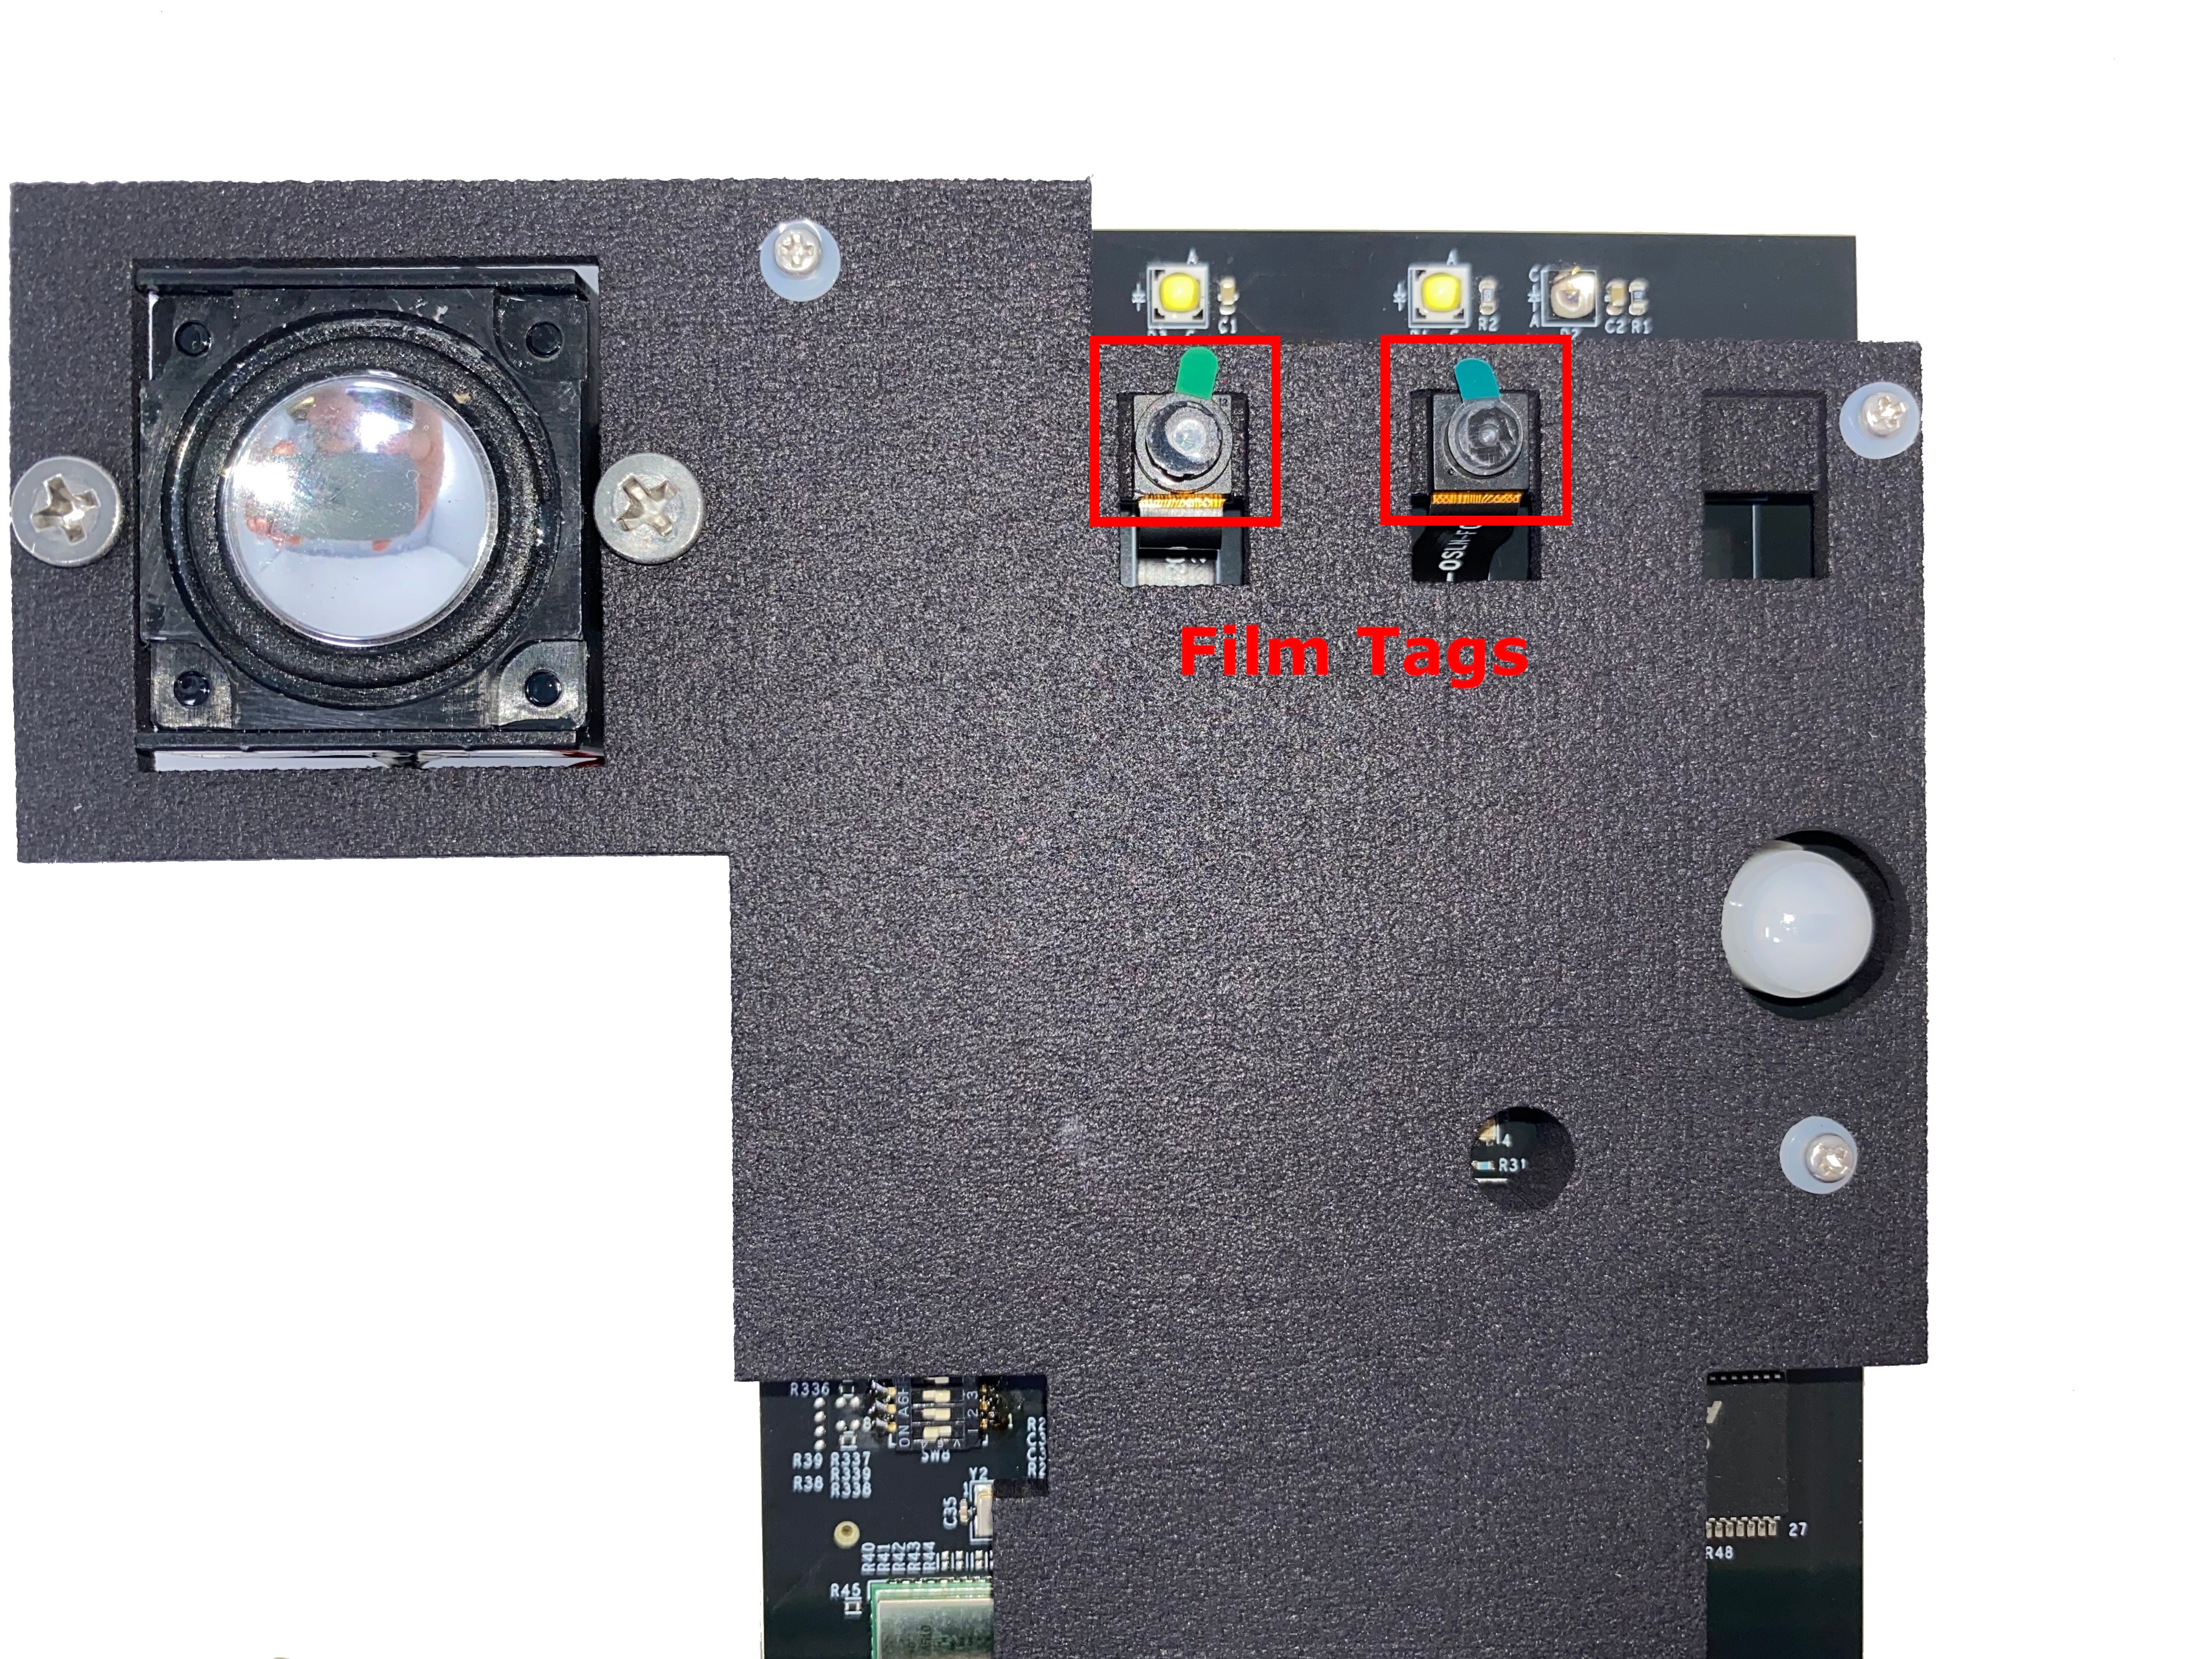
Before we begin, remove the protective film from the RGB and IR camera, as shown in Figure 2. This protective film is used to protect the lens of each camera during transport. However, failure to remove may cause the image capture not to work correctly.
To get started, follow the steps below:
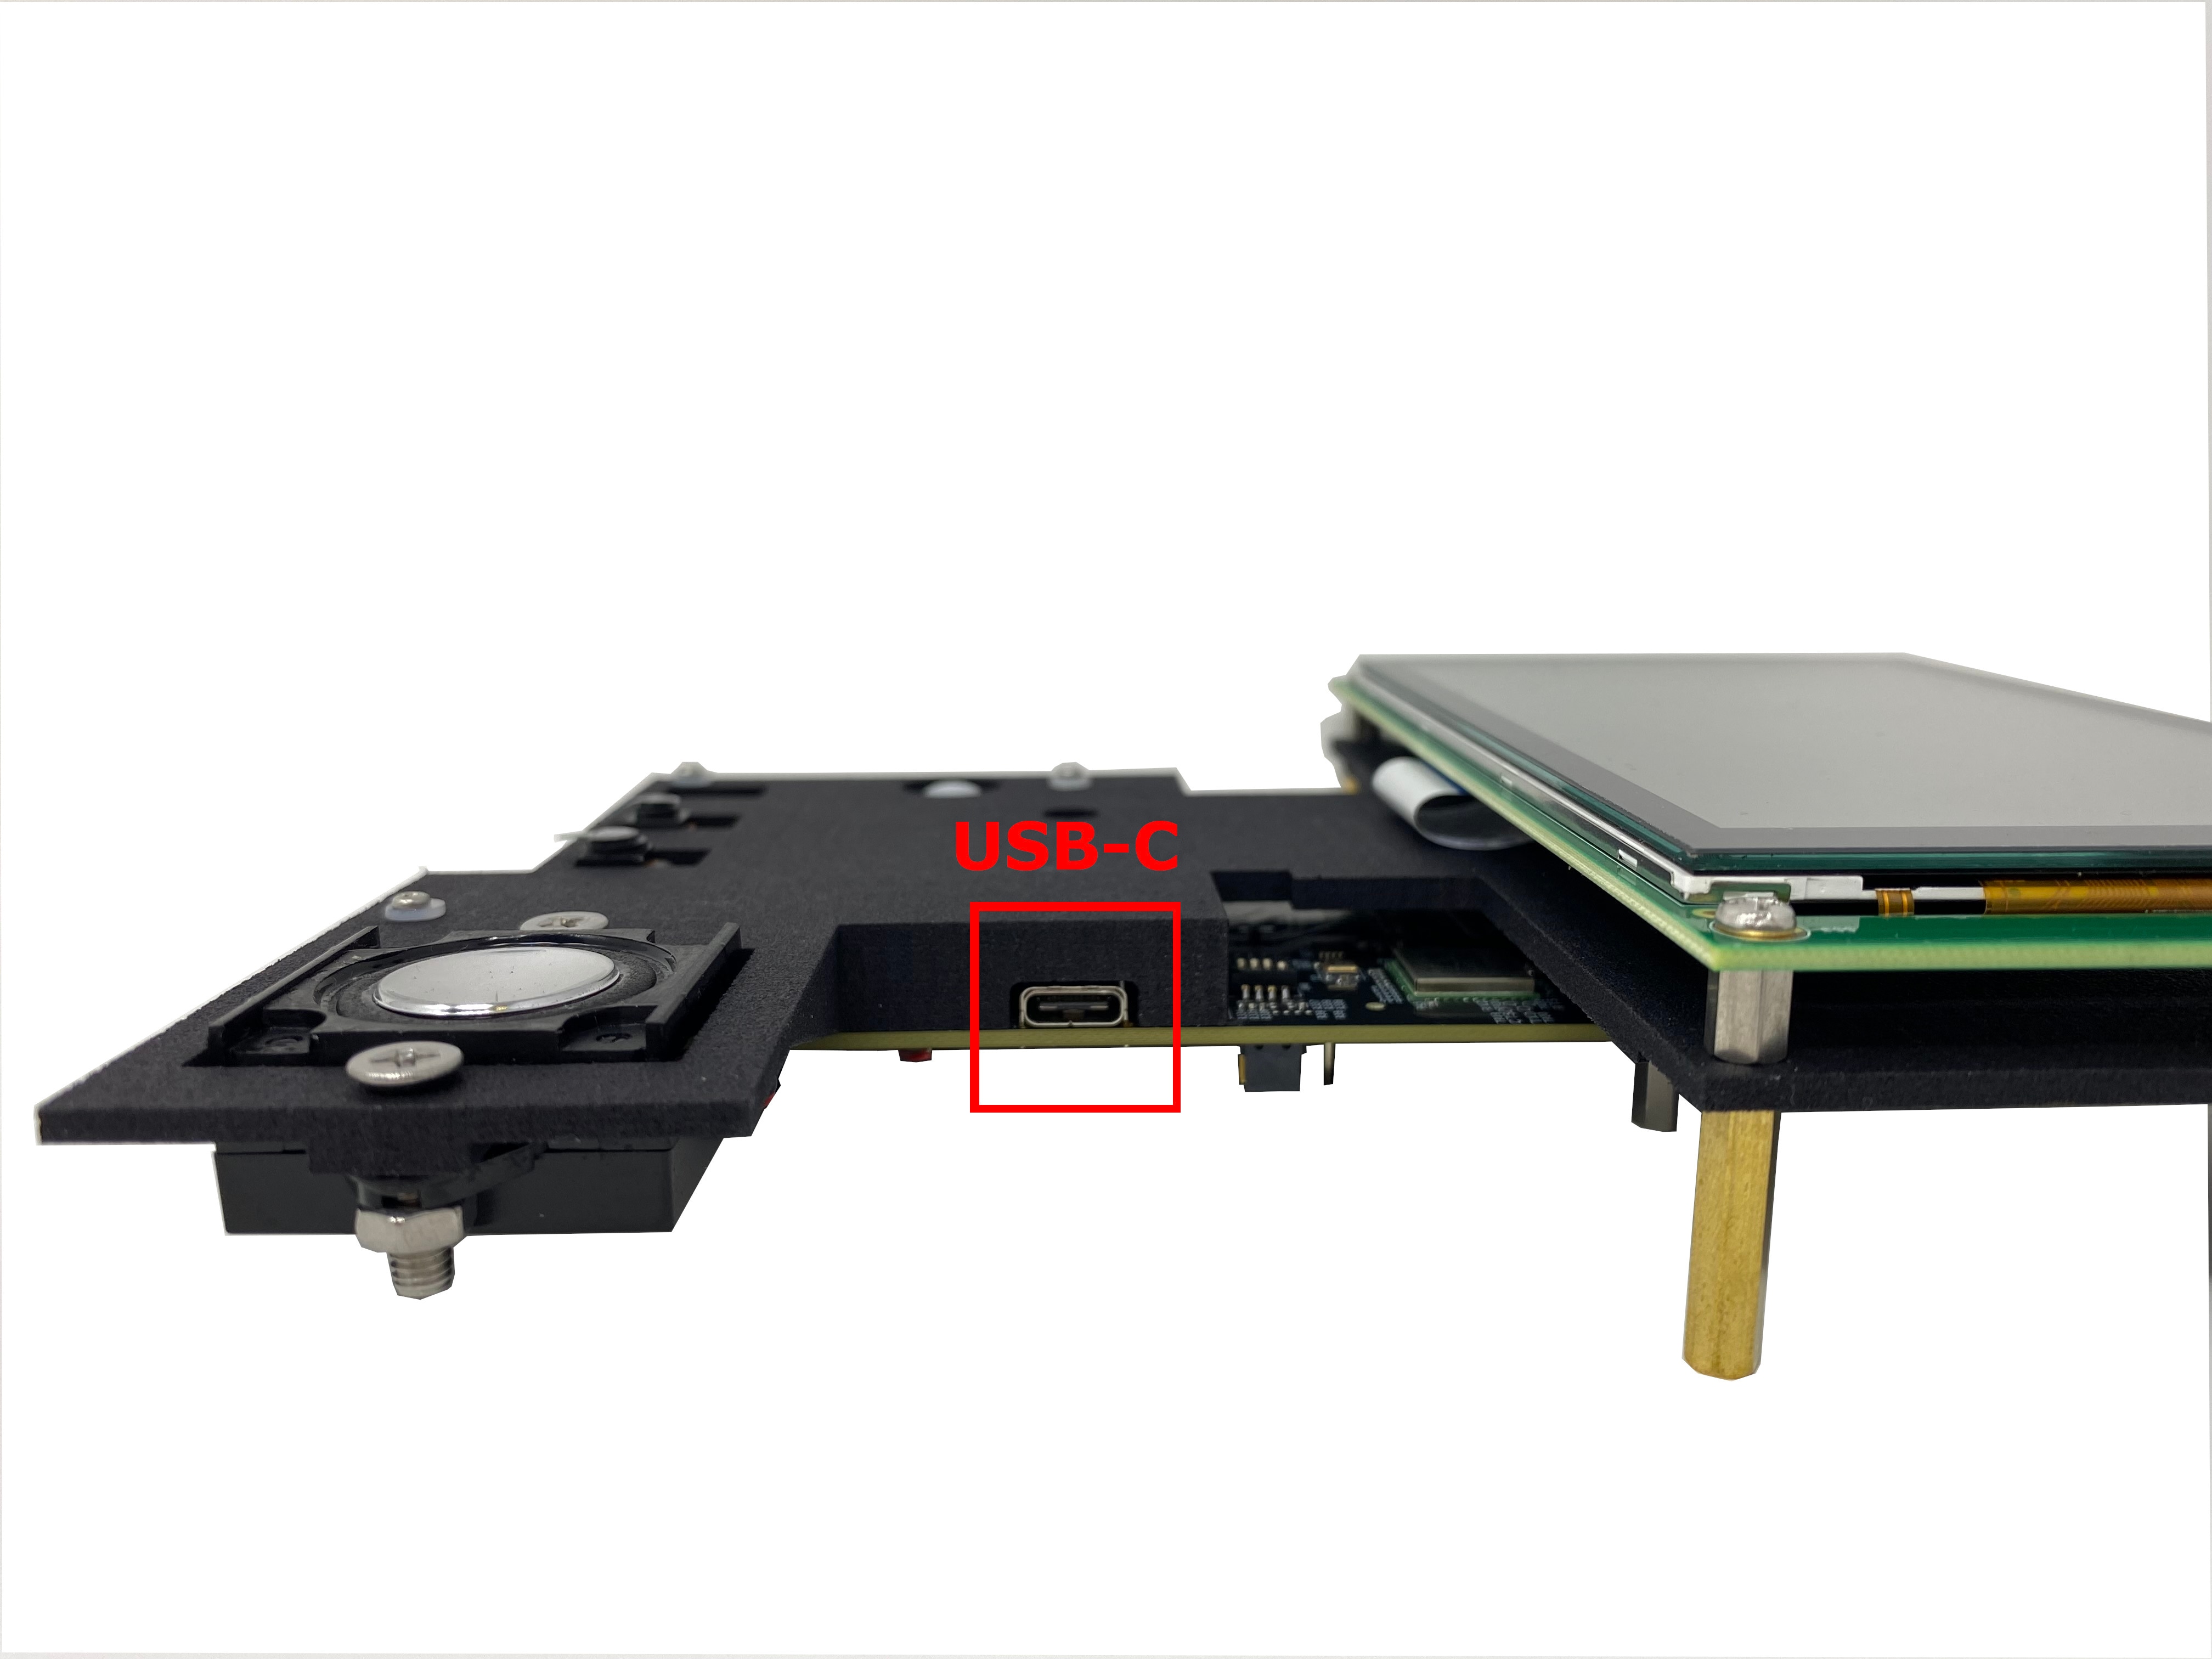
- Take the provided USB-C cable and plug one end into your laptop/PC
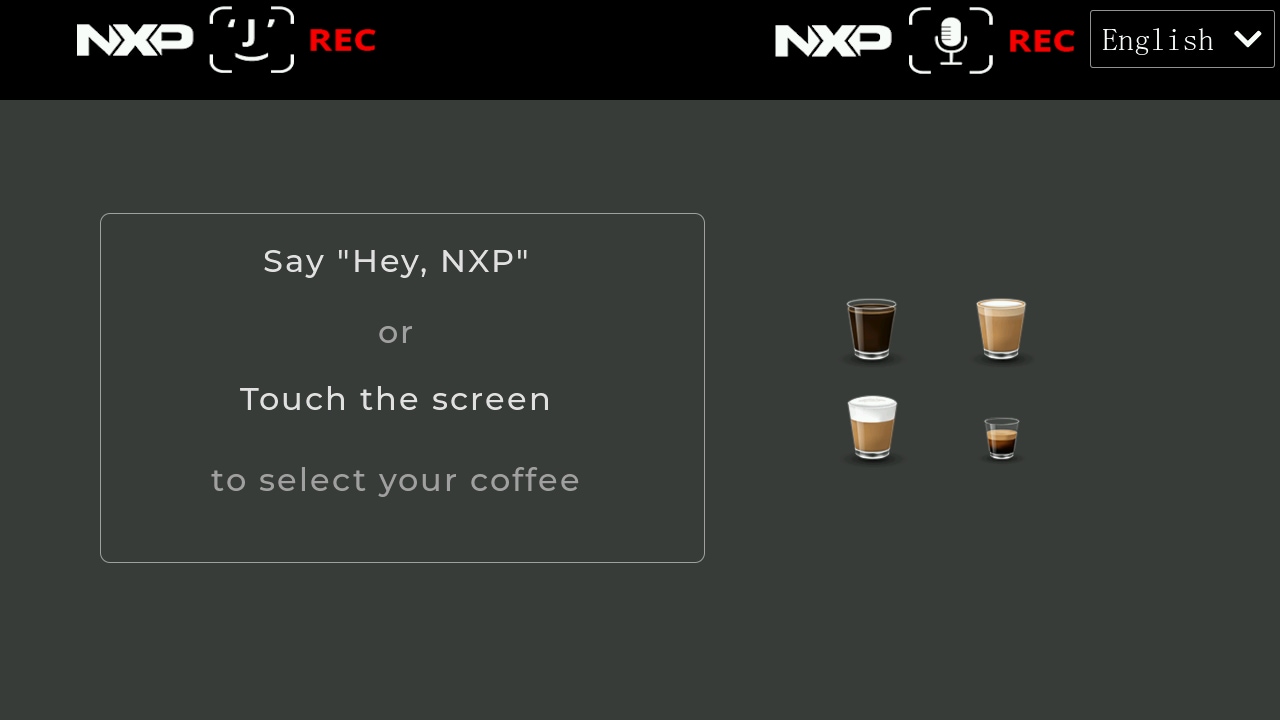
- Once successfully plugged in, the display shows a startup screen with the icon for the currently enabled application most prominently displayed. For the purposes of this guide, we will focus on the Coffee Machine application
- Touch the screen or wait a few seconds and the Coffee Machine standby screen will be shown. This screen is used as a screensaver to indicate the kit is waiting for user interaction. The standby screen is enabled when the board is first turned on, once a coffee is finished brewing and after a timeout period is reached without any interaction with the kit
- Once the Standby Screen is enabled, touch the screen one more time to begin using the Coffee Machine demo. Touching the screen will enable the Home Screen
1.3 Saving a New Face
Let us get started with a demonstration of this application’s out-of-box features.
To demonstrate the SLN-TLHMI-IOT's ability to create tailored custom experiences for each saved user, we are using our face to save a custom coffee profile.
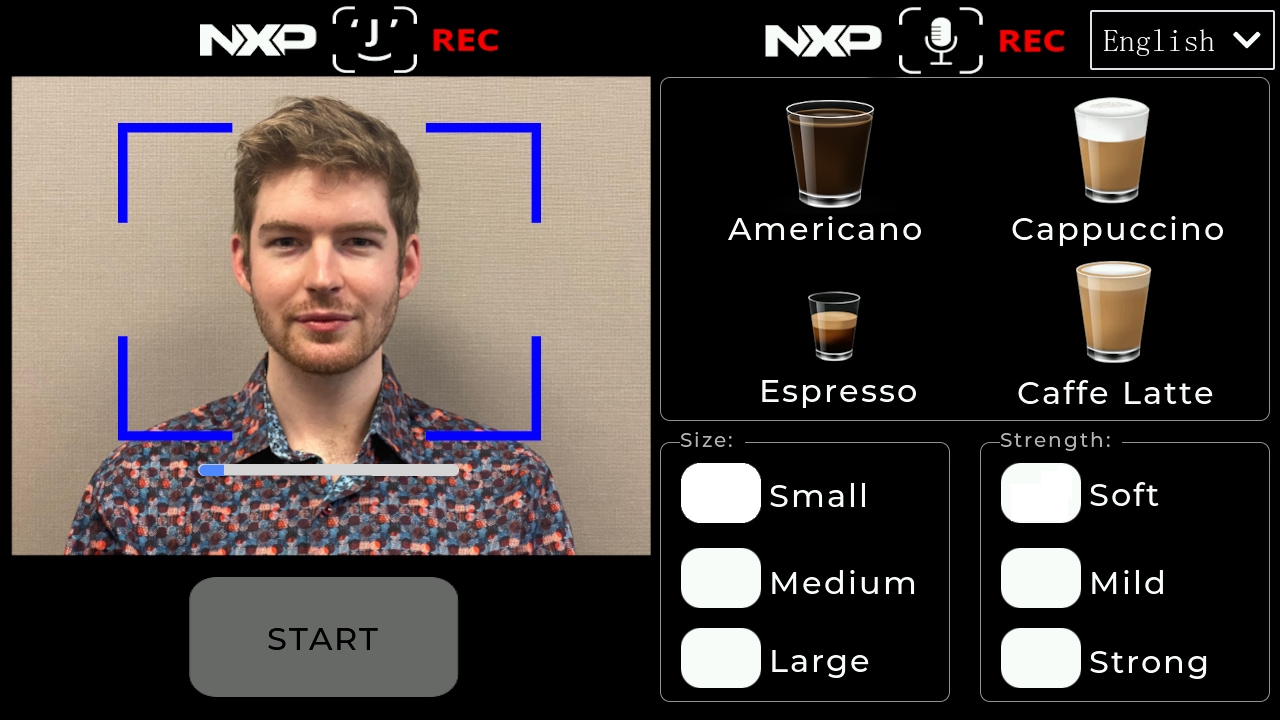
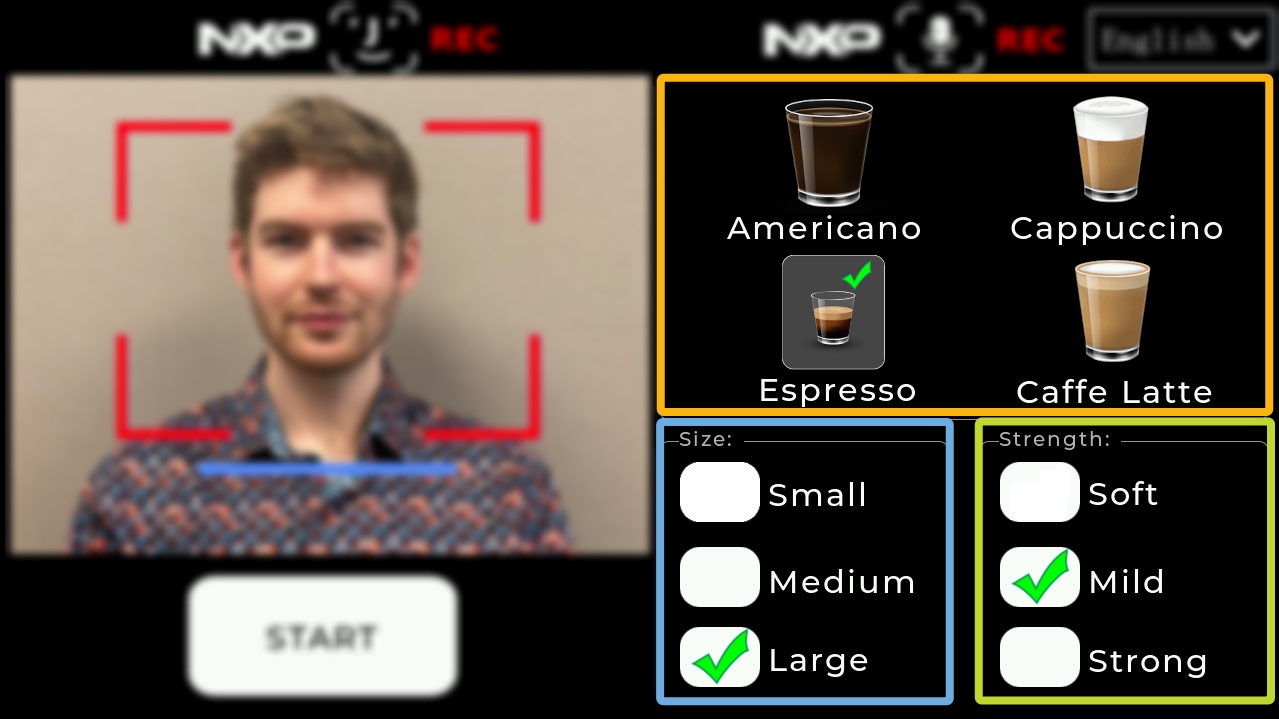
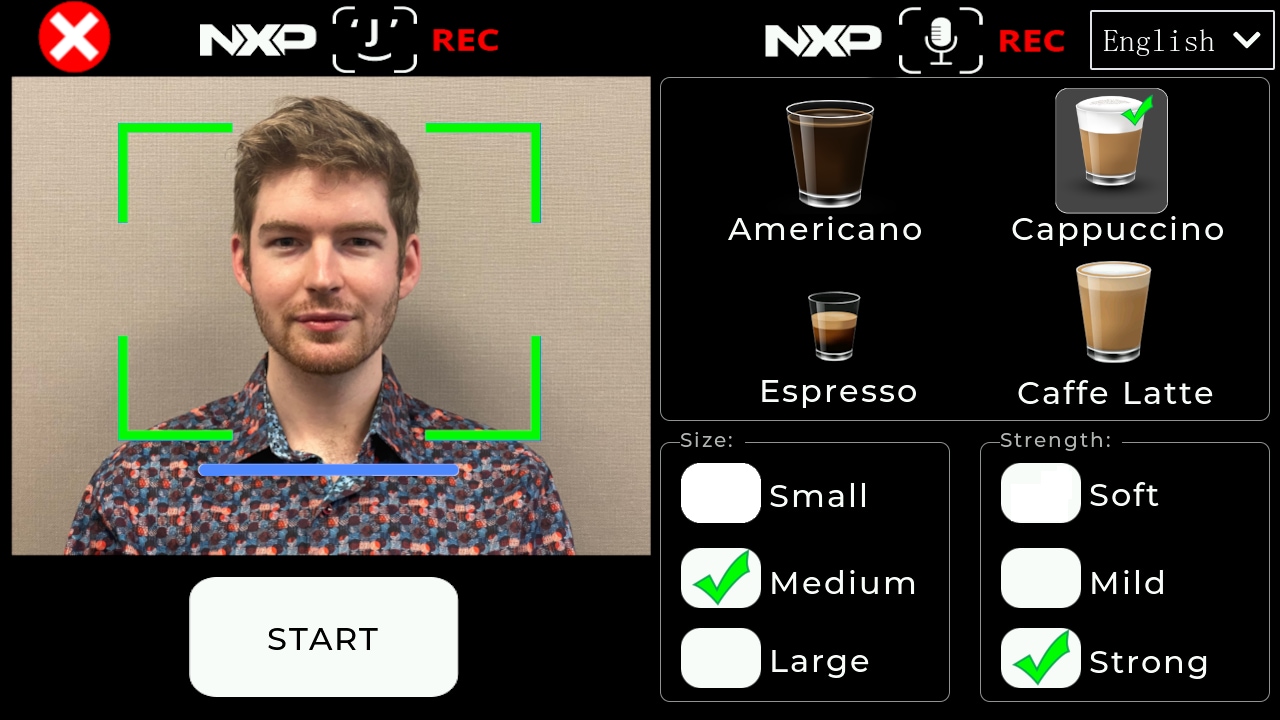
Before diving in, let us take a quick tour of the home screen layout.
The home screen is divided into two halves: the camera preview pane on the left, and the coffee selection menu on the right.
Additionally, there is a Start button in the lower-left corner of the screen and a language selector drop-down menu in the top-right corner of the screen.

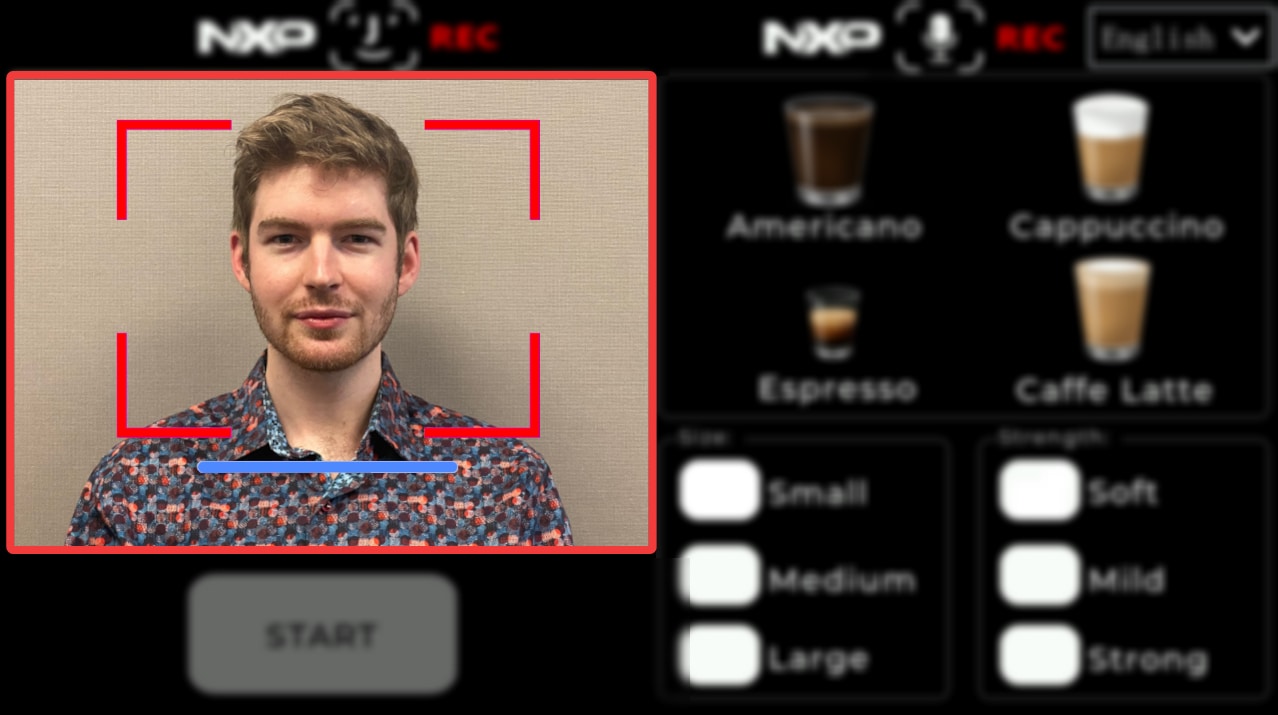
On the camera preview pane, a bounding box is provided to help you properly align your face so that it may be identified by the kit.
The different colors of the bounding box are used to indicate face recognition status. By default, the box is colored blue to indicate that no face has been detected.
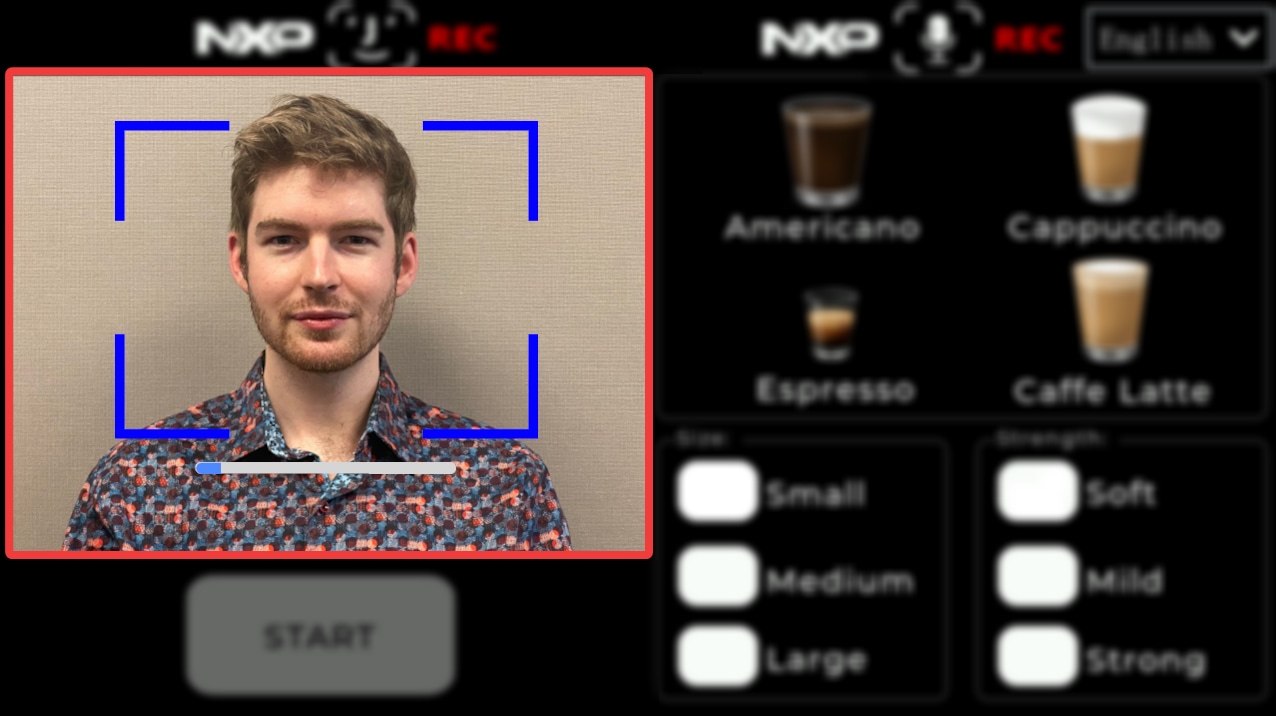
The color red is used to indicate that an unrecognized face has been detected. Align your face with the camera until the bounding box turns red. This should take < 1s if done properly
Once your face has been detected by the camera, it can later be used to associate with your preferred coffee selection.
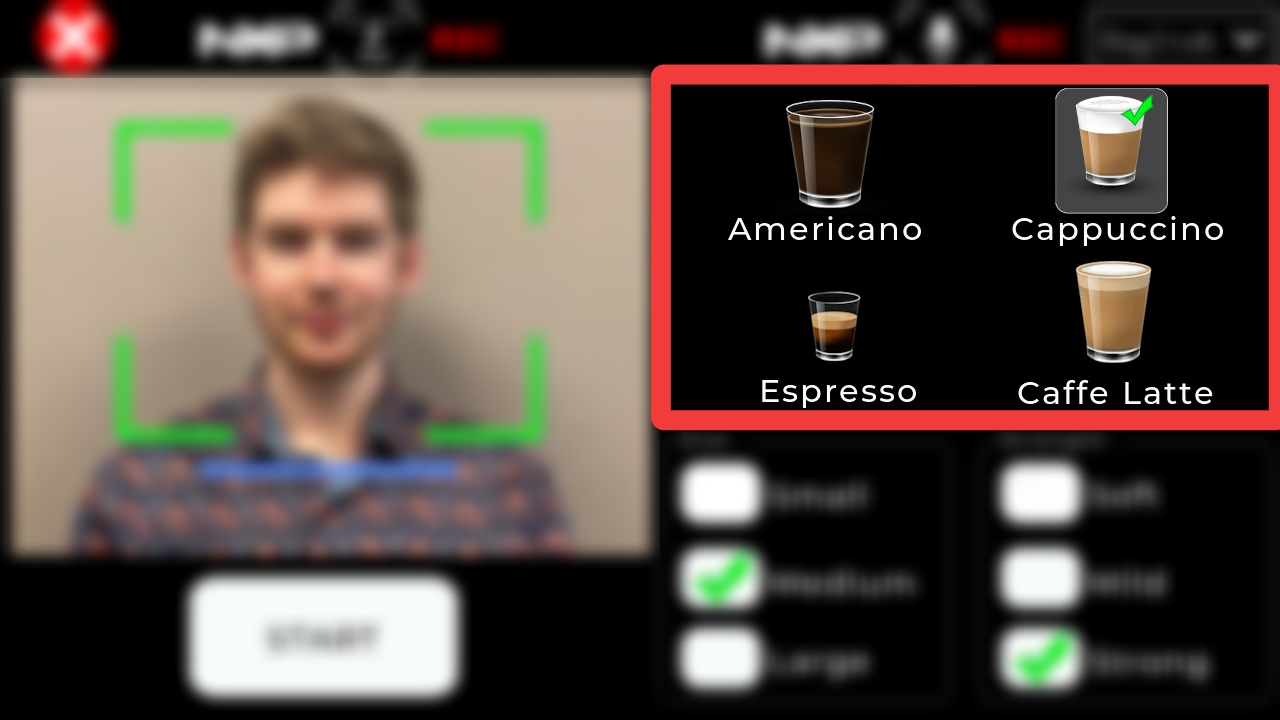
Now that your face has been detected, you are ready to select your coffee preferences. The coffee configuration options can be seen on the right half of the home screen as shown in Figure 10. These options include coffee type, size and strength.
To choose your coffee preferences, follow the steps below:
- Select the coffee type by pressing the icon associated with your preference
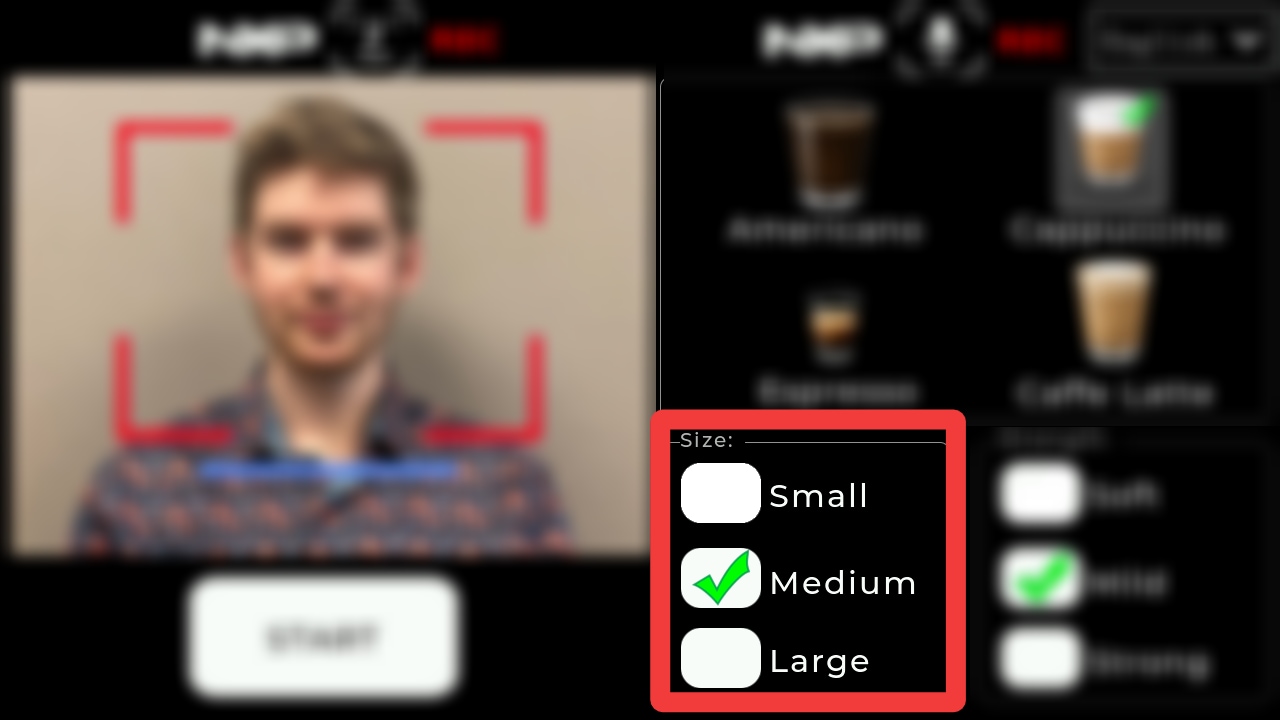
- Next, click the checkbox selector next to your preferred size
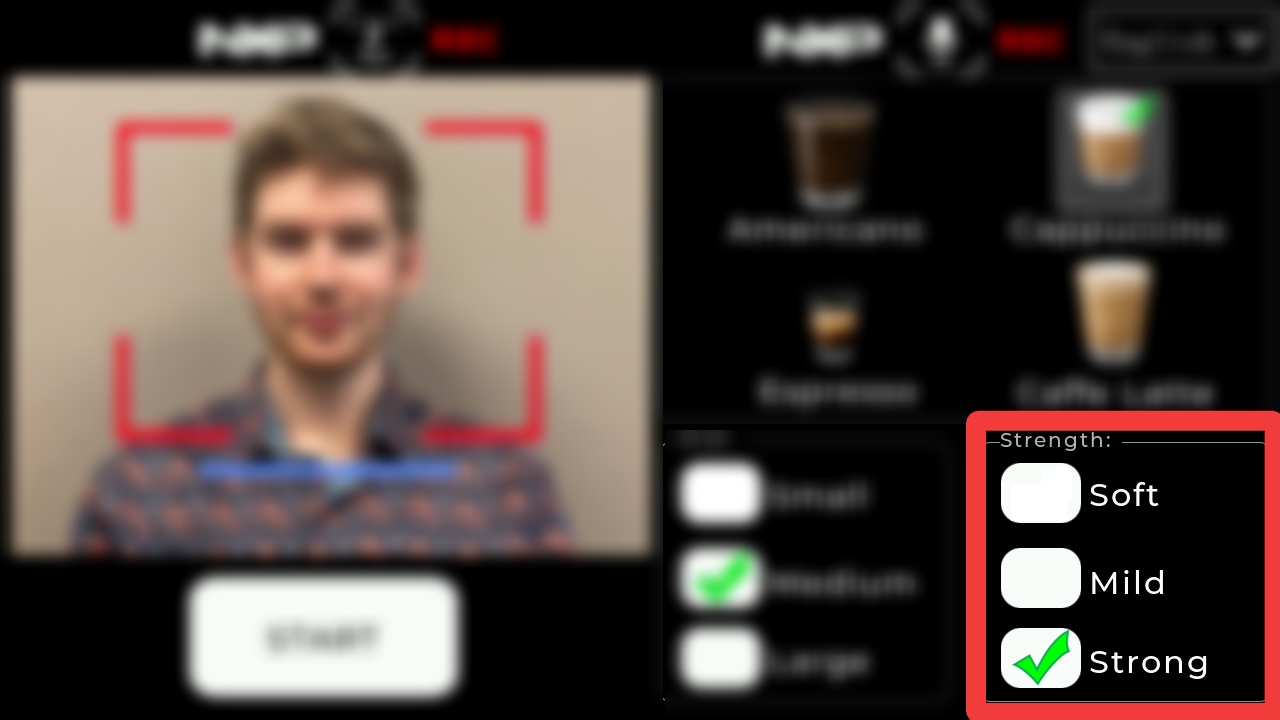
- Finally, select the checkbox selector next to your preferred coffee strength
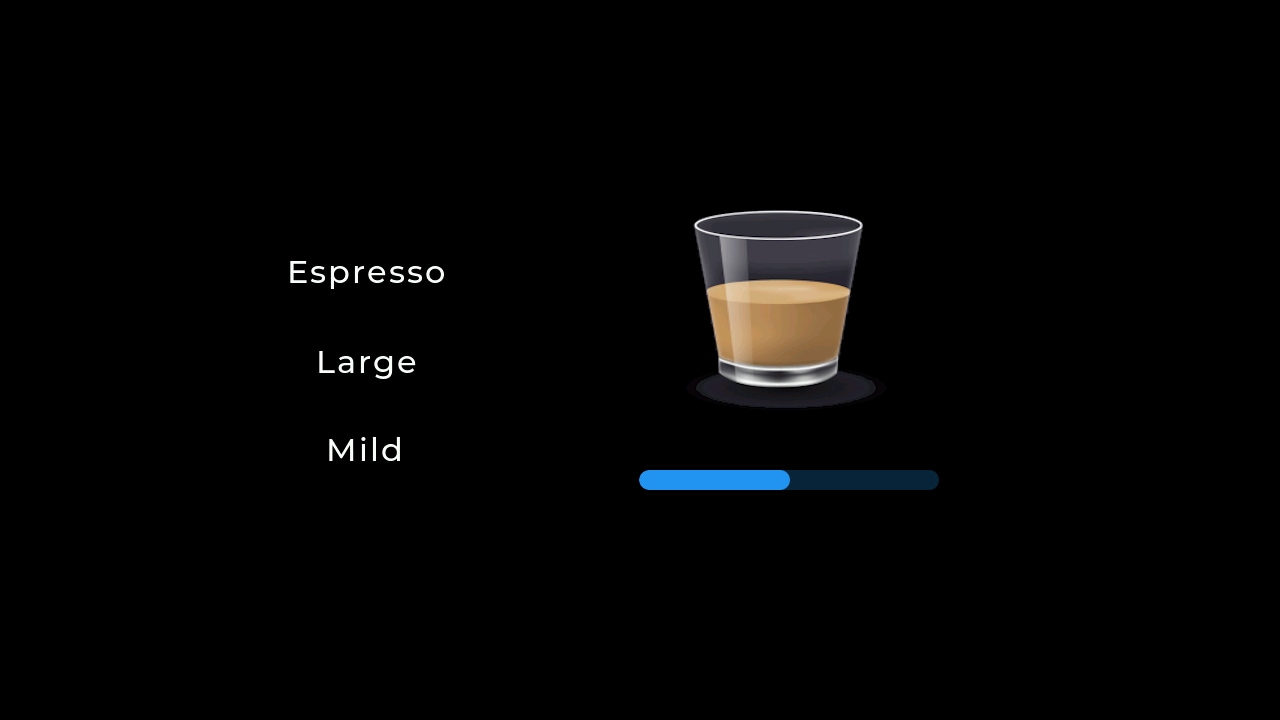
- The coffee selection has been customized. Before moving on, ensure that your face has been detected by the camera (indicated by a red bounding box) before pressing the Start button to begin brewing the coffee
- After pressing the start button, a brewing animation is shown. The brewing screen displays a progress bar and a summary of the chosen selections on the left
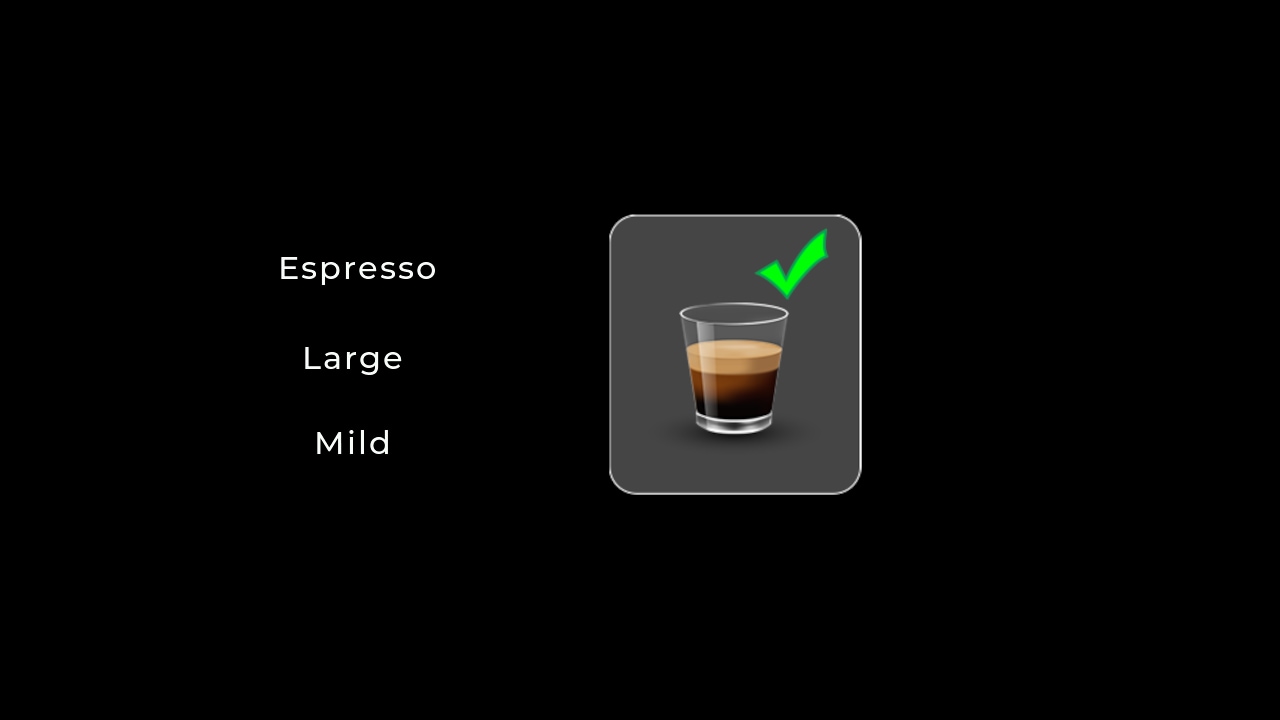
- Once the brewing animation is finished, the chosen coffee is shown on the final screen
- After a brief delay, a voice prompt plays via the onboard speakers, asking “Save your coffee selection? Confirm or Cancel.” Say “Confirm” to save this order. Answering “Confirm” associates the coffee that was brewed with your face. Next time your face is recognized, the coffee machine automatically asks whether you would like to reuse your saved order

After your order is complete and the prompt has been responded to, the device will automatically reenter the standby screen that was shown at startup.

1.4 Modifying a Saved Order
Now that we have demonstrated the core features using traditional touch-based controls, we will walk through the next generation hands-free voice control capabilities made possible by the processing power of the i.MX RT117H.
First, wake the board out of Standby mode using the “Hey NXP” wake word.

With the board active once more, align your face inside the bounding box until the color of the box turns green.
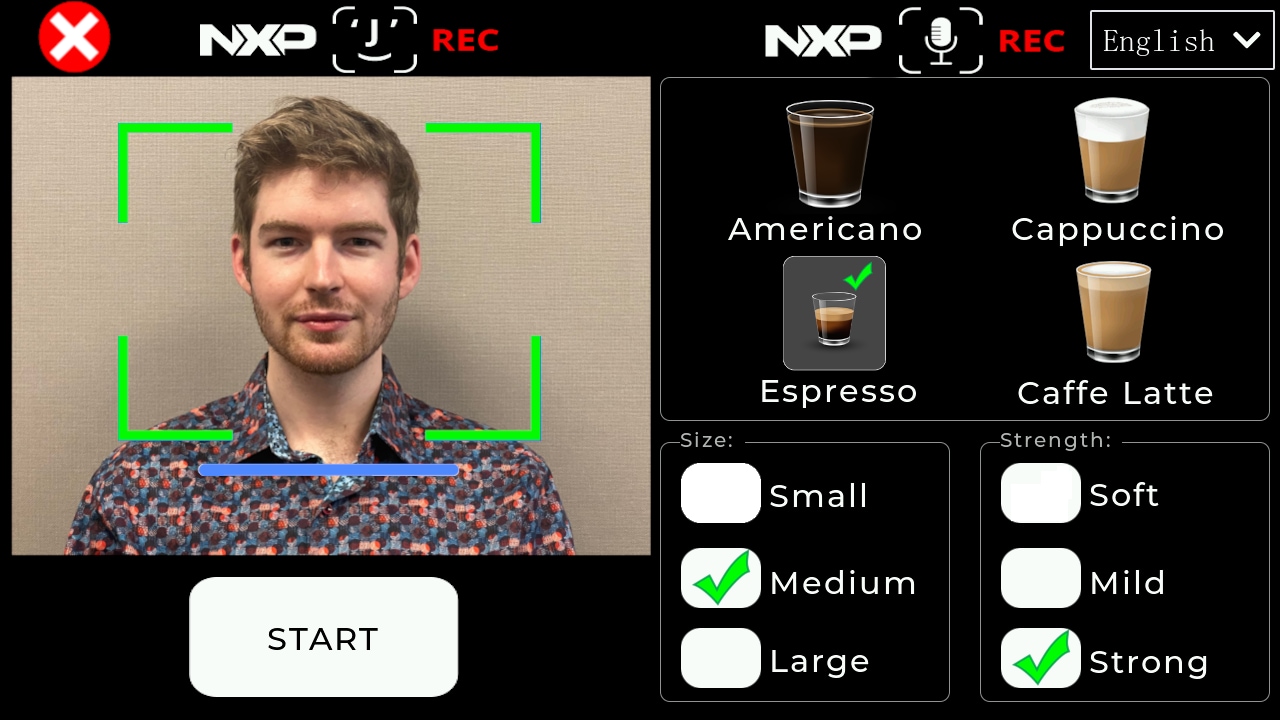
A green bounding box indicates that you are a recognized user. The coffee machine plays an audio prompt asking if you would like to order “another Espresso? Confirm or Cancel?”
Responding with “Confirm” immediately takes you to the brewing screen again, while “Cancel” can be used to choose a different coffee selection.
Instead of reusing our saved order, respond to the prompt with the “Cancel” voice command, allowing us to choose something different. This time around, however, we will use hands-free voice commands instead of the touch controls we used previously.
Follow the steps below:
- Set the coffee type by using the “Cappuccino” voice command. Successfully recognized voice commands are indicated by a green LED and brief audio tone
- Now, update the coffee size using the “Medium” voice command
- Set the strength to the maximum using the “Strong” voice command
- Finally, start the brewing animation again using the “Start” voice command
- Once the animation is completed, and the final screen is reached, you are prompted again to save your new order (replacing the previous order)

Responding to the prompt with “Confirm” overwrites your previously saved order with your latest selection. Now, the next time your face is recognized it automatically uses your updated order.
1.5 Deleting a Saved Face
Now that we have demonstrated saving a face and updating a coffee order, let’s finally demonstrate deleting our face from the local face database.
To do so, reawaken the board from Standby mode using the “Hey NXP” wake word and/or by touching the screen.
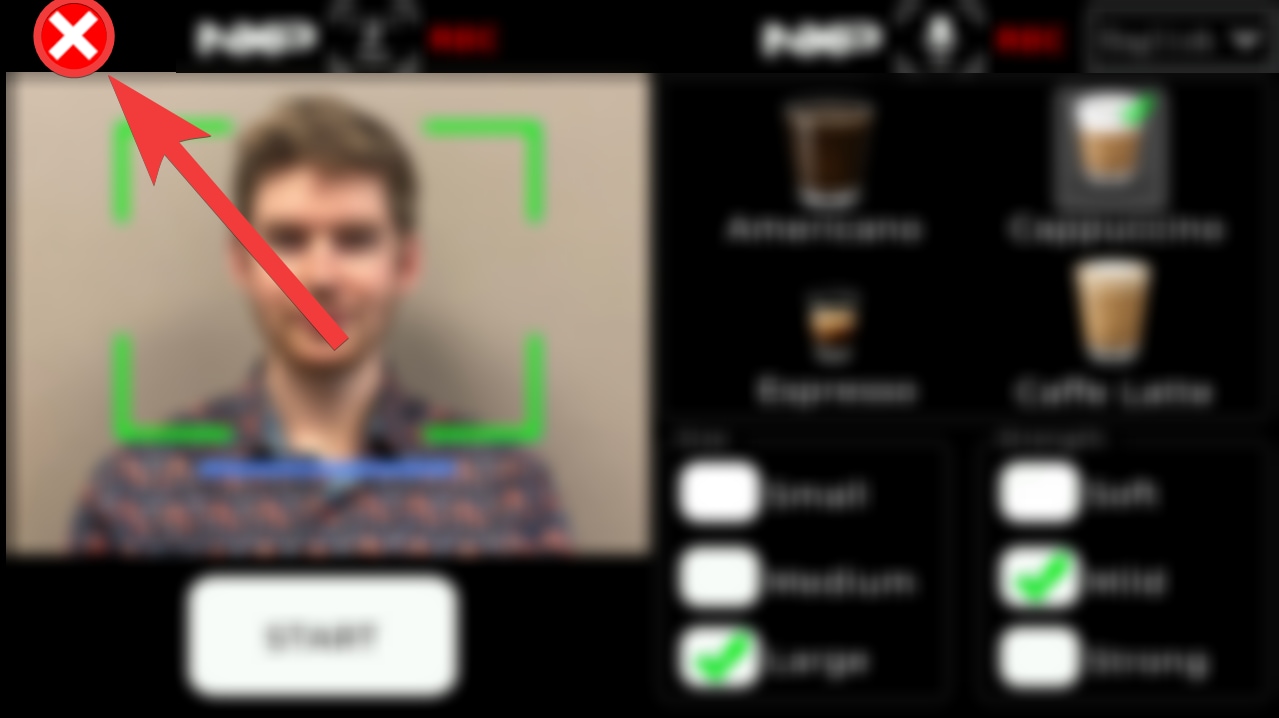
After the display turns back on, align your face with the onscreen bounding box. Once your face is recognized, use the “Delete” voice command to delete your face from the database. Alternatively, you can click the red X icon in the top-left corner of the screen to remove the recognized face.
After successfully saving a new coffee machine user, modifying and deleting the order, we have completed our introduction of the TLHMI coffee machine out-of-box demo experience.
Now that you are familiar with the basics, see the Smart HMI User Guide for a comprehensive list of all the outof- box features available in SLN-TLHMI-IOT. The guide also includes the additional demo applications available such as the smart elevator and smart panel applications.
2.Get Software
2.1 Getting MCUXpresso IDE
The MCUXpresso IDE brings developers an easy-to-use eclipse-based development environment for NXP MCUs based on Arm Cortex-M cores, including its general-purpose crossover and wireless-enabled MCUs.
The MCUXpresso IDE offers advanced editing, compiling and debugging features. It also offers MCU-specific debugging views, code trace and profiling, multicore debugging and integrated configuration tools.
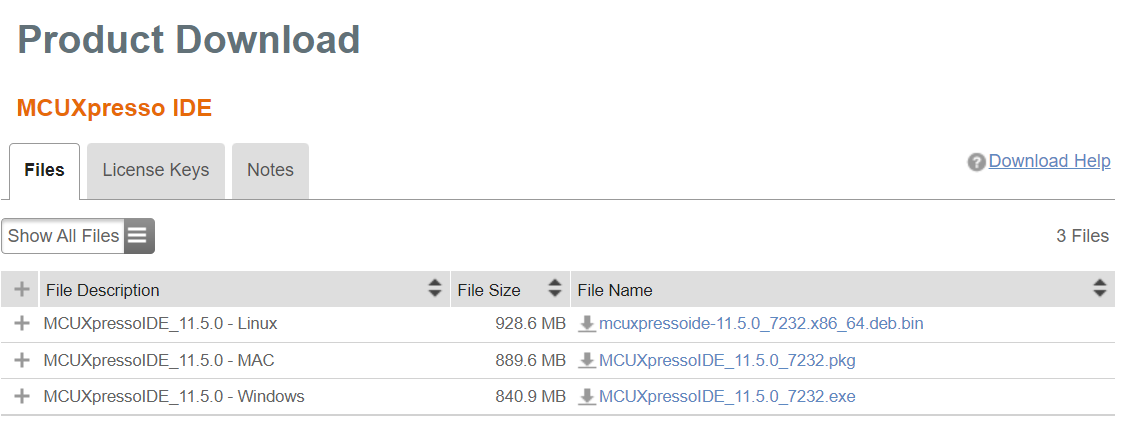
To download MCUXpresso IDE, follow the steps below:
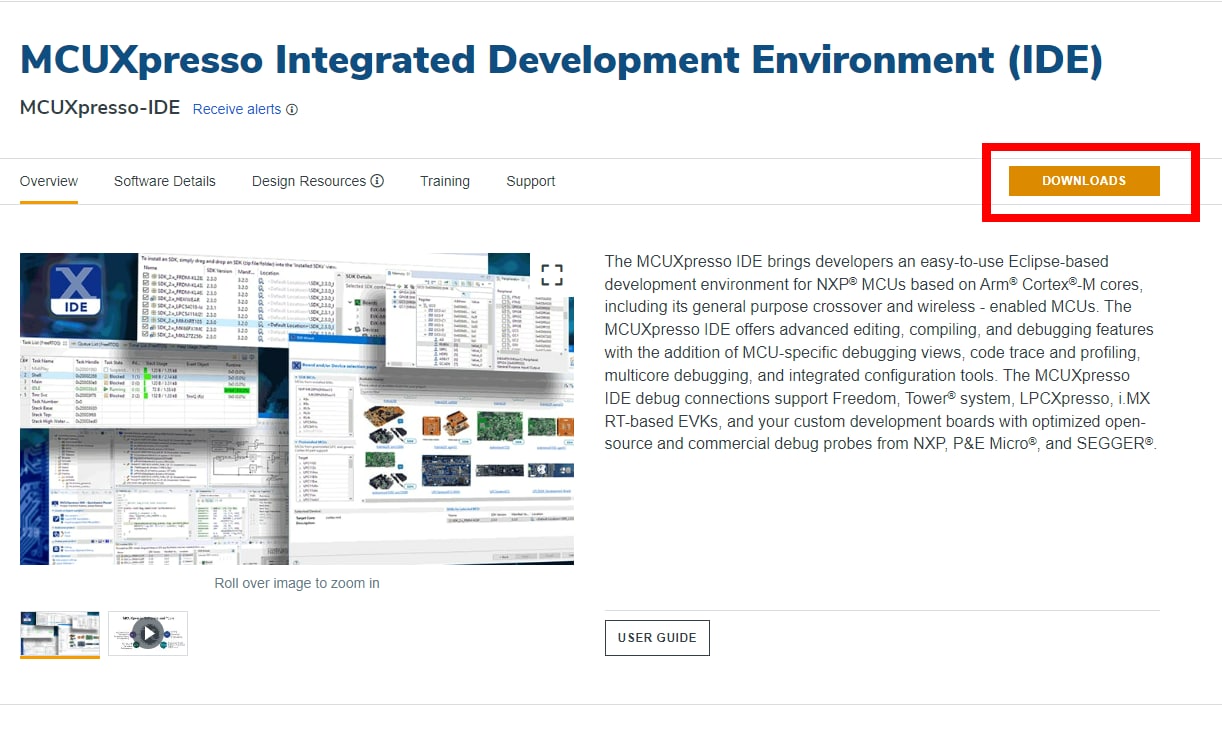
- Go to MCUXpresso IDE v11.7.0 [Build 9198] [2023-01-17] and click the Downloads button
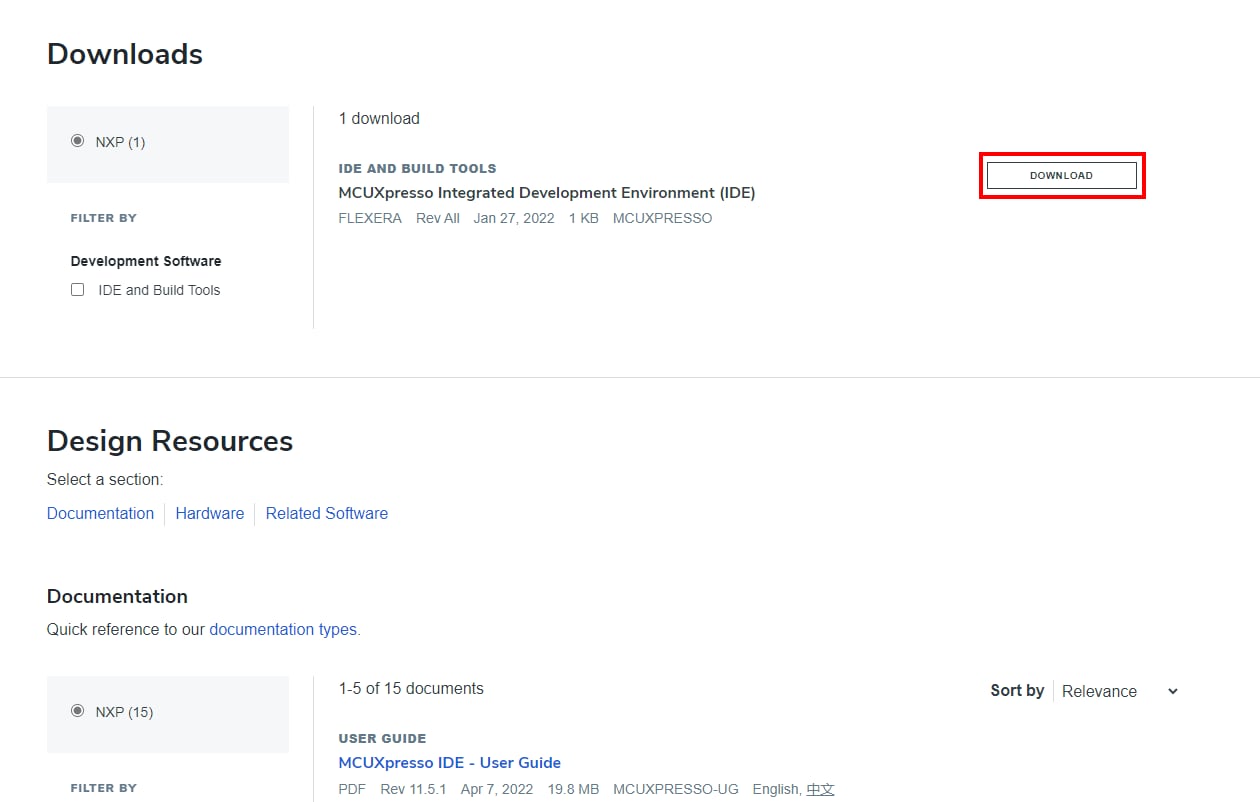
- The Downloads page appears. Next, click the Download button
- The Sign In page appears. Login with your credentials
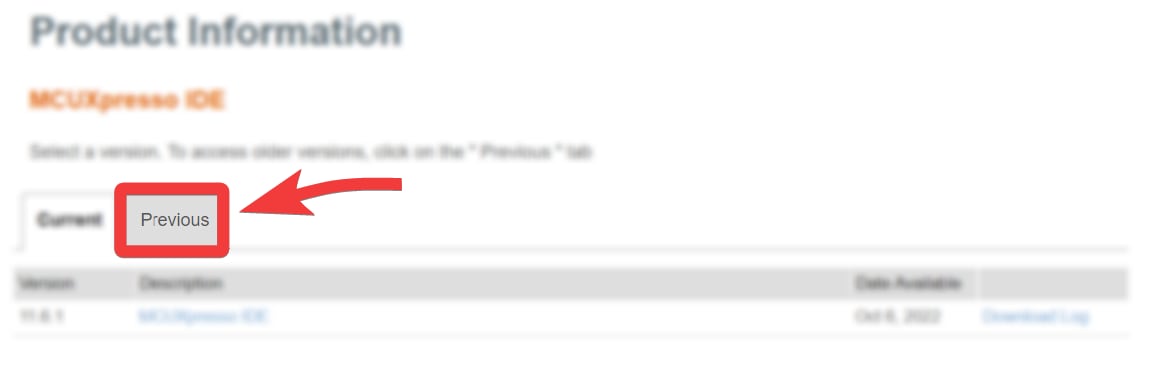
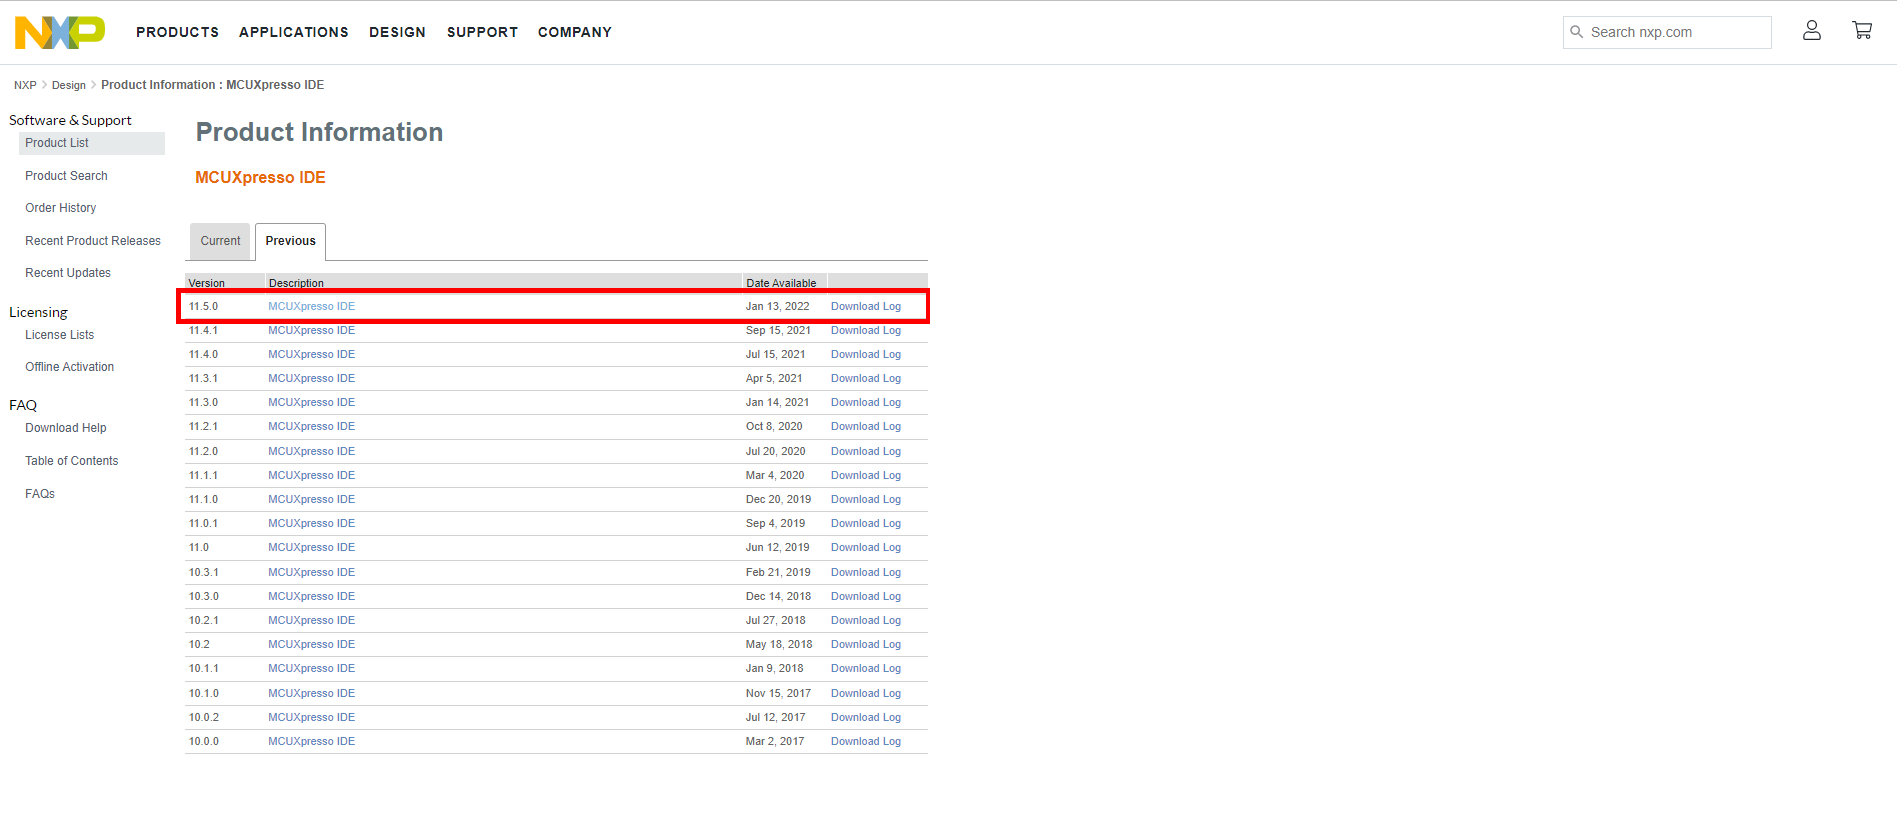
- Once you have signed in, select the Previous tab
- Select v11.7.0 (See the above note)
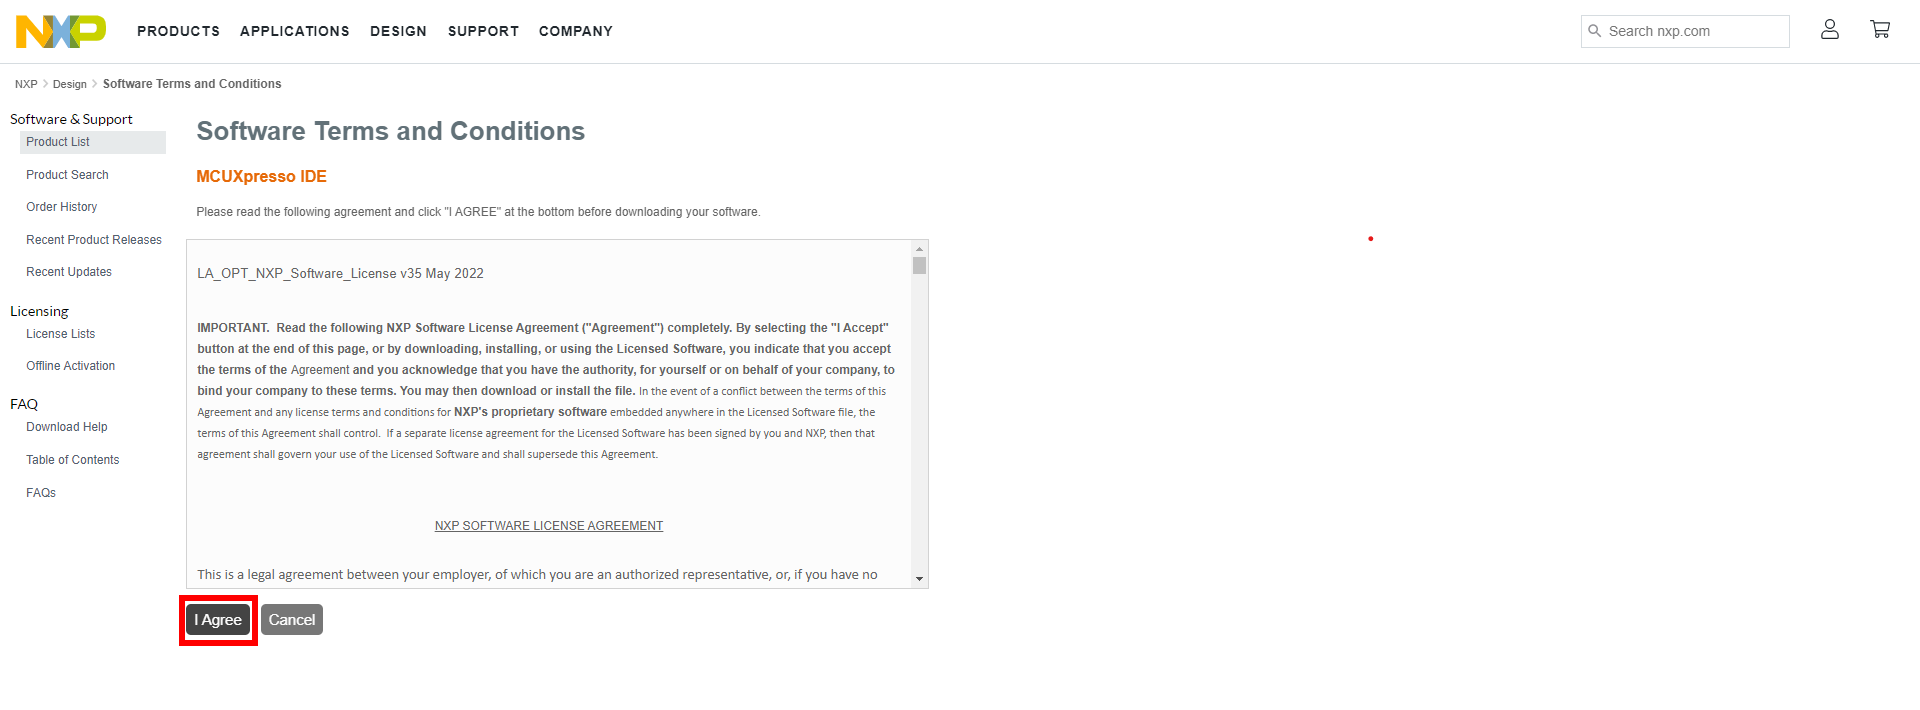
- The Software Terms and Conditionspage appears. Read the conditions and click the I Agree button
- The Product Download page appears from where you can download the MCUXpresso IDE. Download the appropriate version for your system
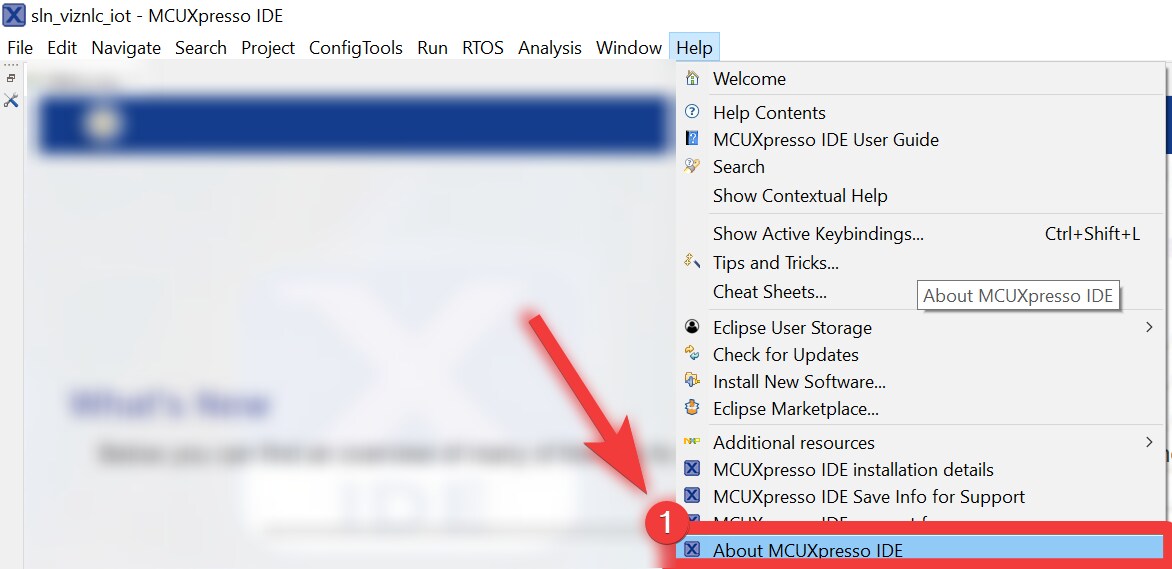
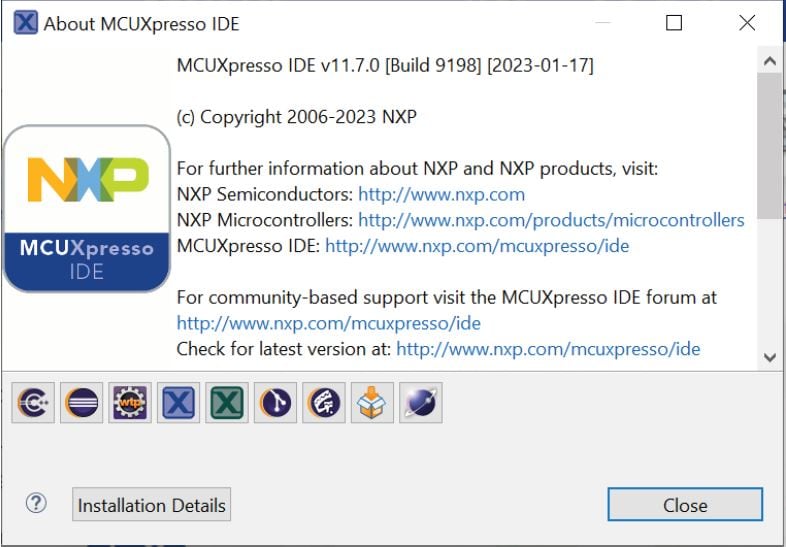
- Open the downloaded application and follow the instructions found in the installer. After successful completion of the download and installation procedure, verify installation of the proper version by selecting the “About MCUXpresso IDE” from the Help tab at the top of the IDE window
2.2 Installing the SDK
MCUXpresso SDK is a comprehensive software enablement package designed to simplify and accelerate application development with NXP's microcontrollers based on Arm Cortex-M cores. The MCUXpresso SDK includes production-grade software with integrated RTOS (optional), stacks and middleware, reference software and more. It is available in custom downloads based on user selections of MCU, evaluation board, and optional software components.
Before building the SLN-TLHMI-IOT SDK example projects, the target SDK must be imported into MCUXpresso IDE.
To install MCUXpresso SDK, follow the steps below:
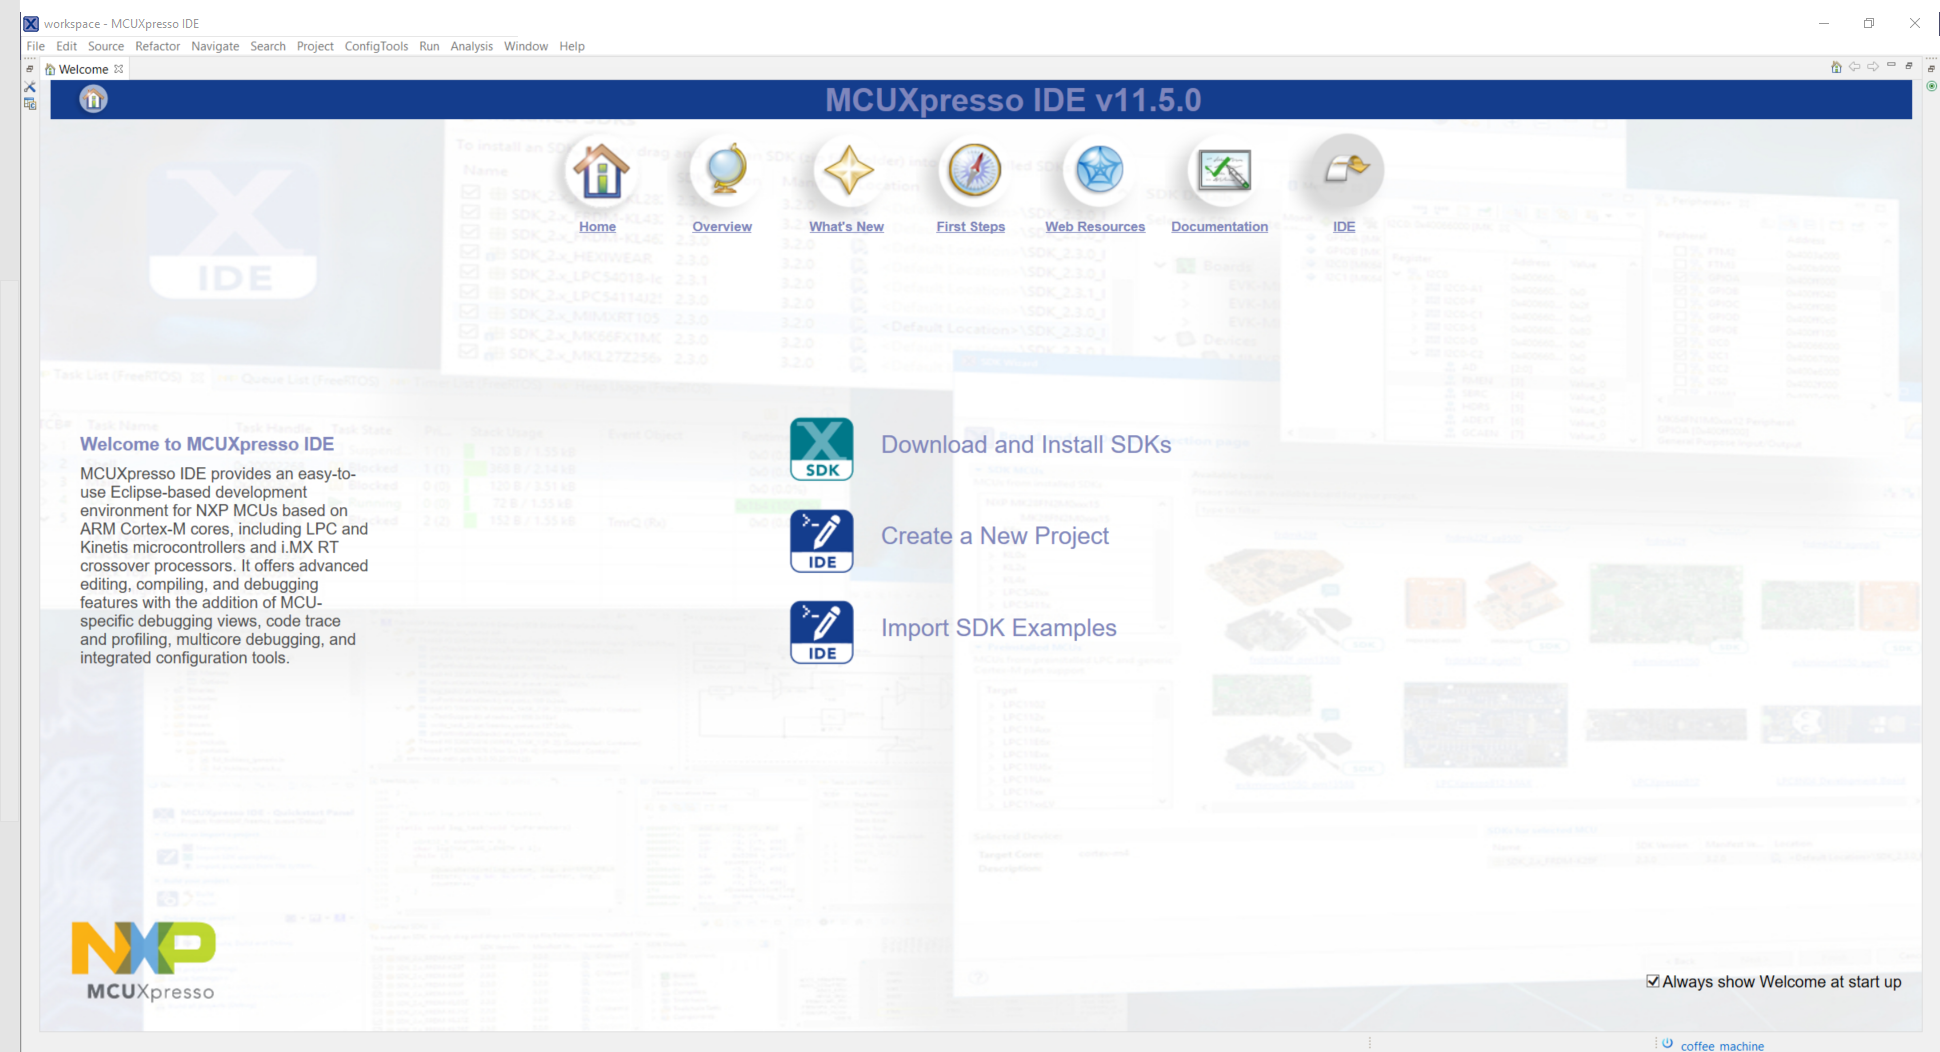
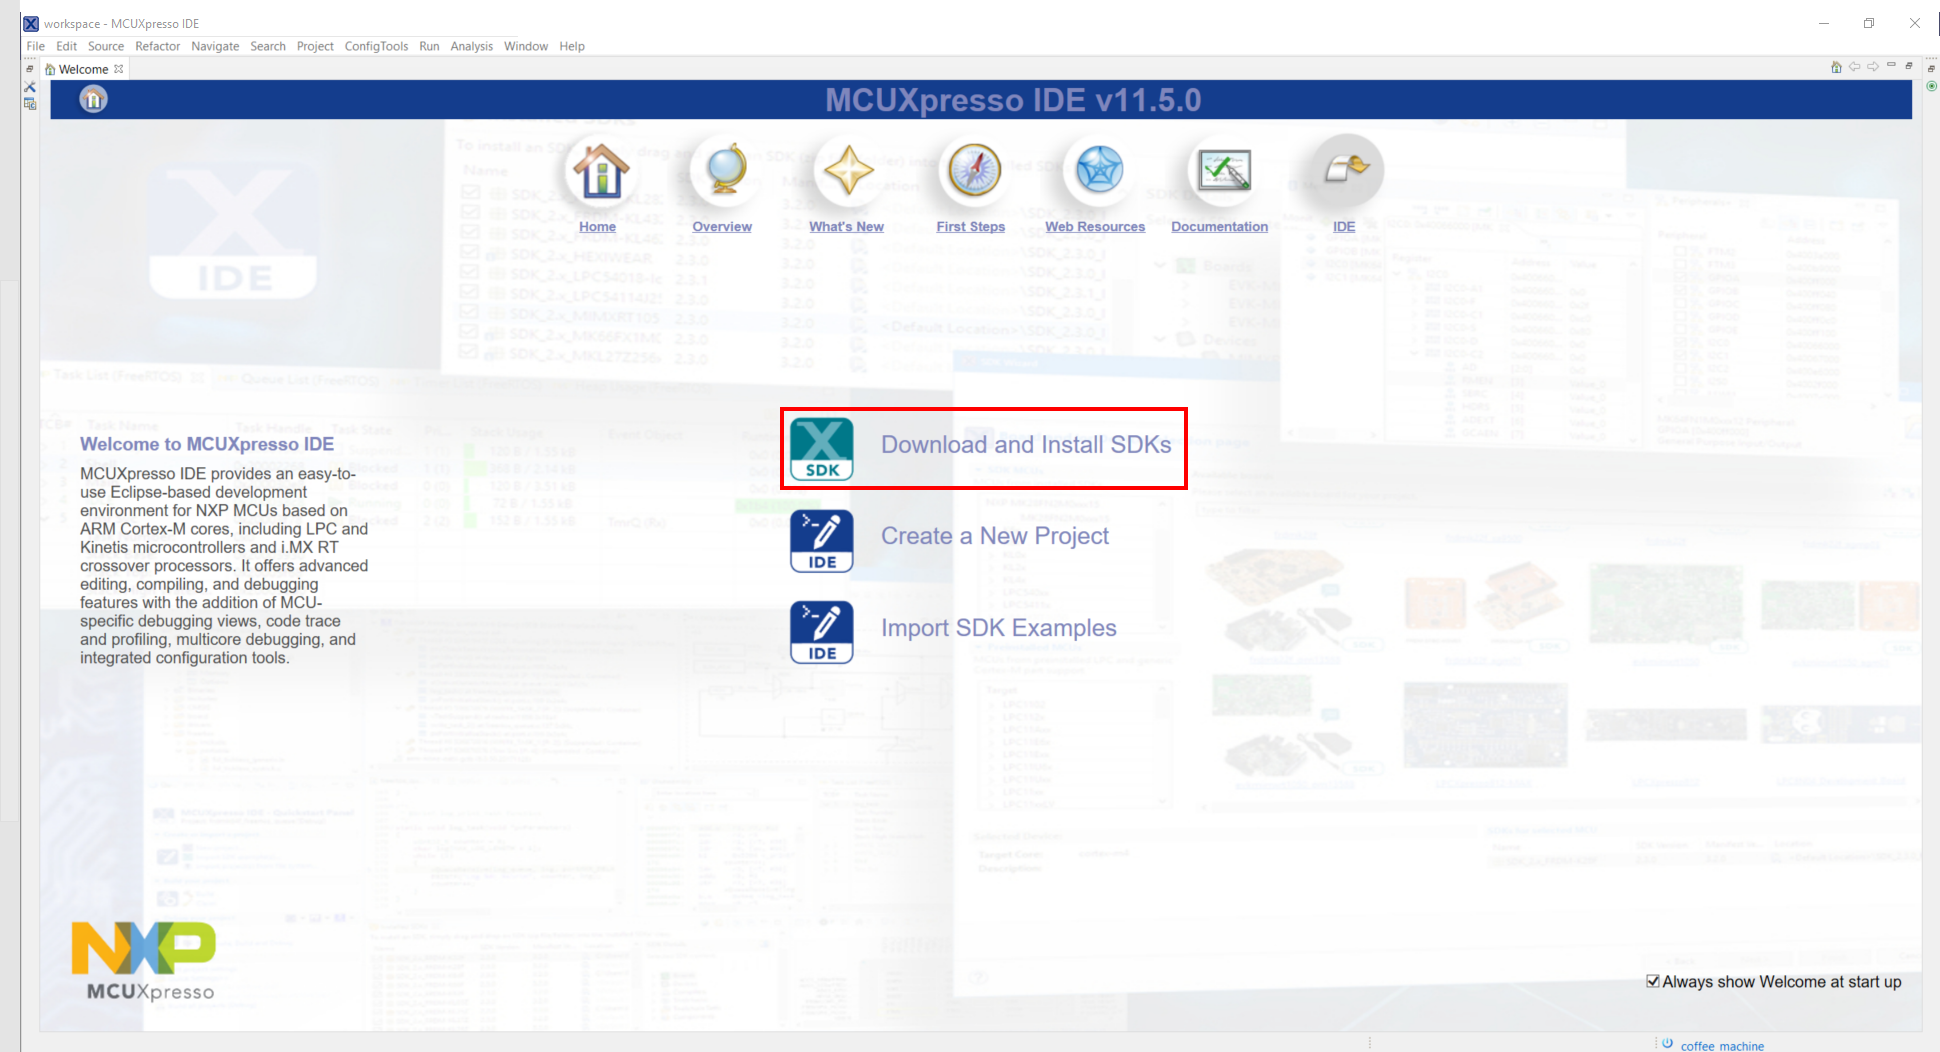
- Open MCUXpresso IDE. Upon opening the application, the MCUXpresso IDE welcome screen appears, as shown in Figure 33
- Click the Download and Install SDKs link
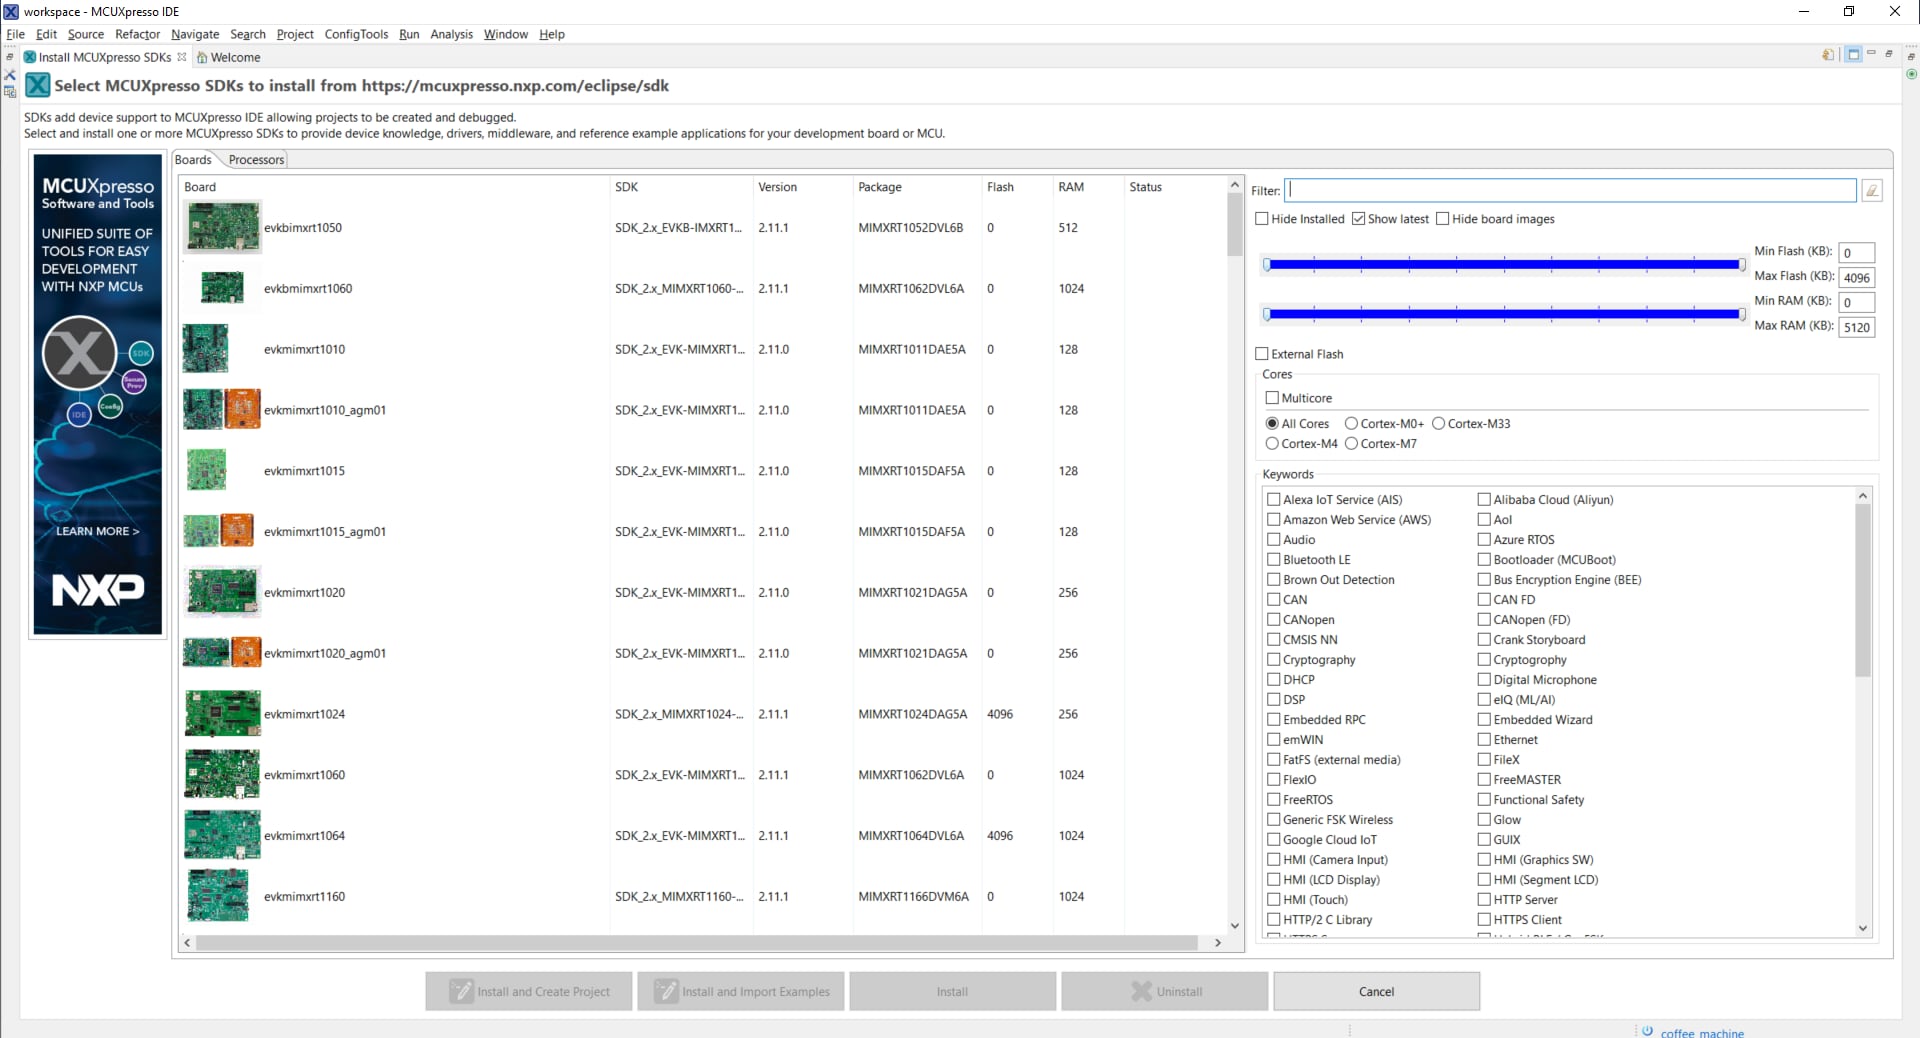
- You see a catalog of all the SDKs that can be downloaded through MCUXpresso, as shown in figure Figure 36. These SDKs provide device knowledge, drivers, middleware, and reference example applications for your development board or MCU
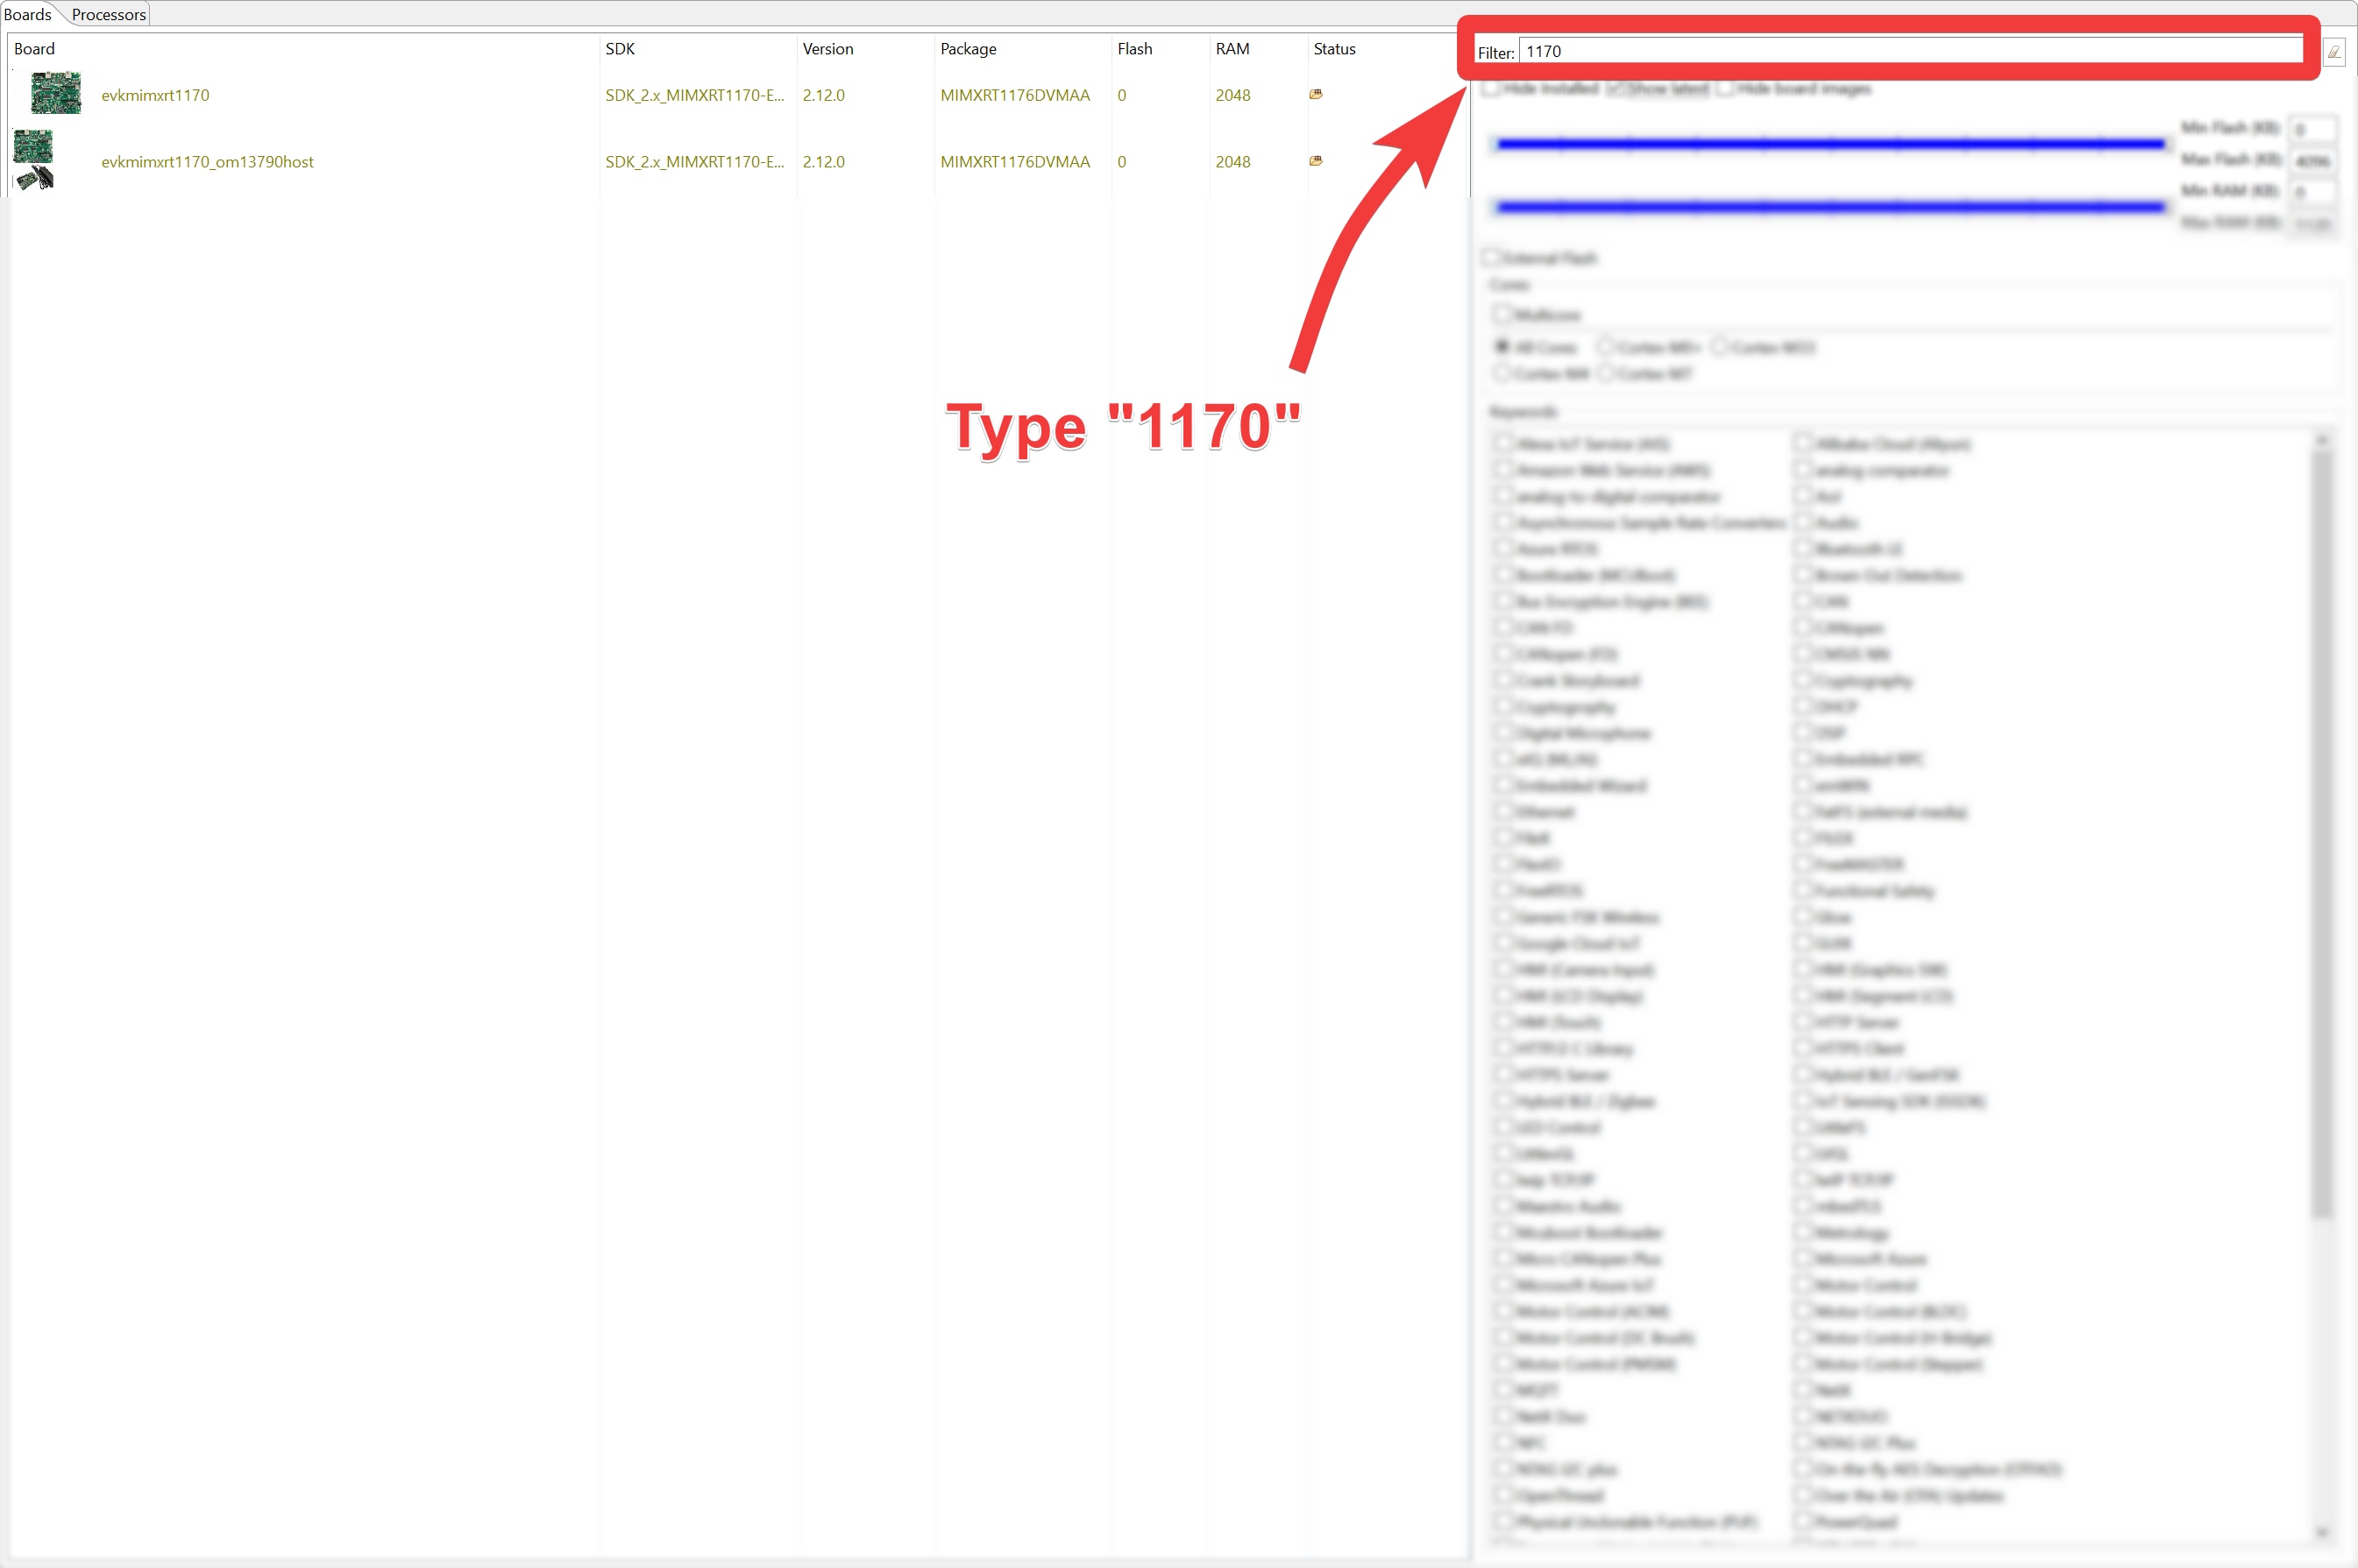
- Type 1170 in the filter section and select evkmimxrt1170, as shown in Figure 37
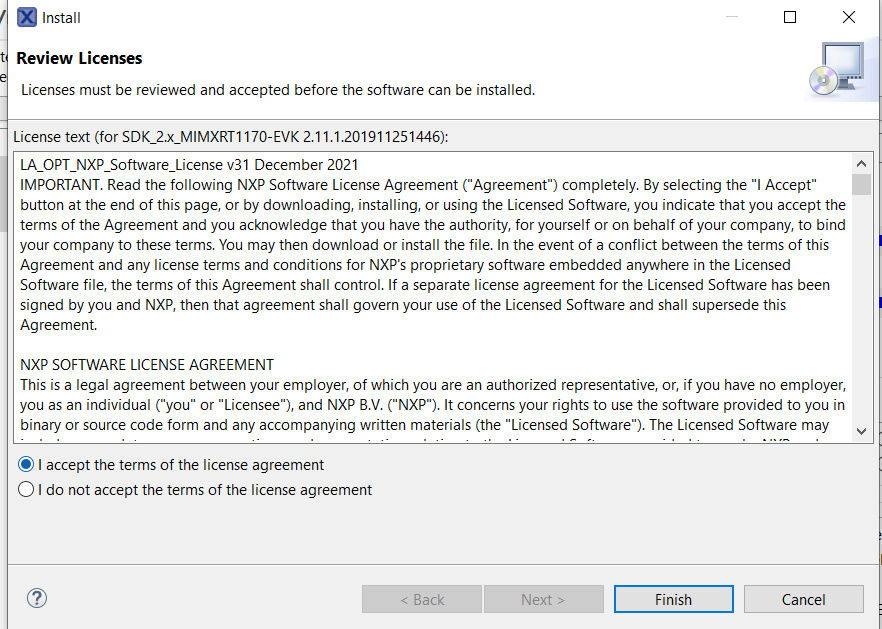
- The Review Licenses prompt appears. Accept the license agreement and click the Finish button
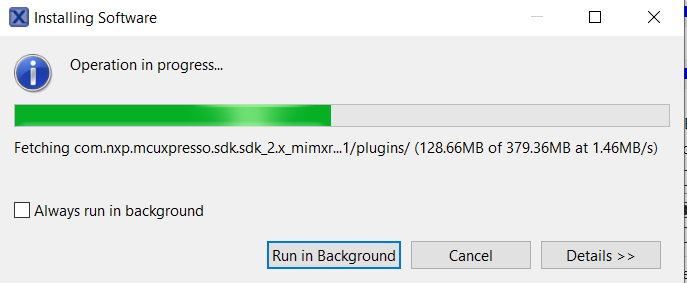
- The MCUXpresso proceeds to download the SDK
Note: Newer versions of the SDK (2.12.x and greater) are currently incompatible with MCUXpresso IDE v11.5.0.
2.3 Downloading SLN-TLHMI-IOT Projects
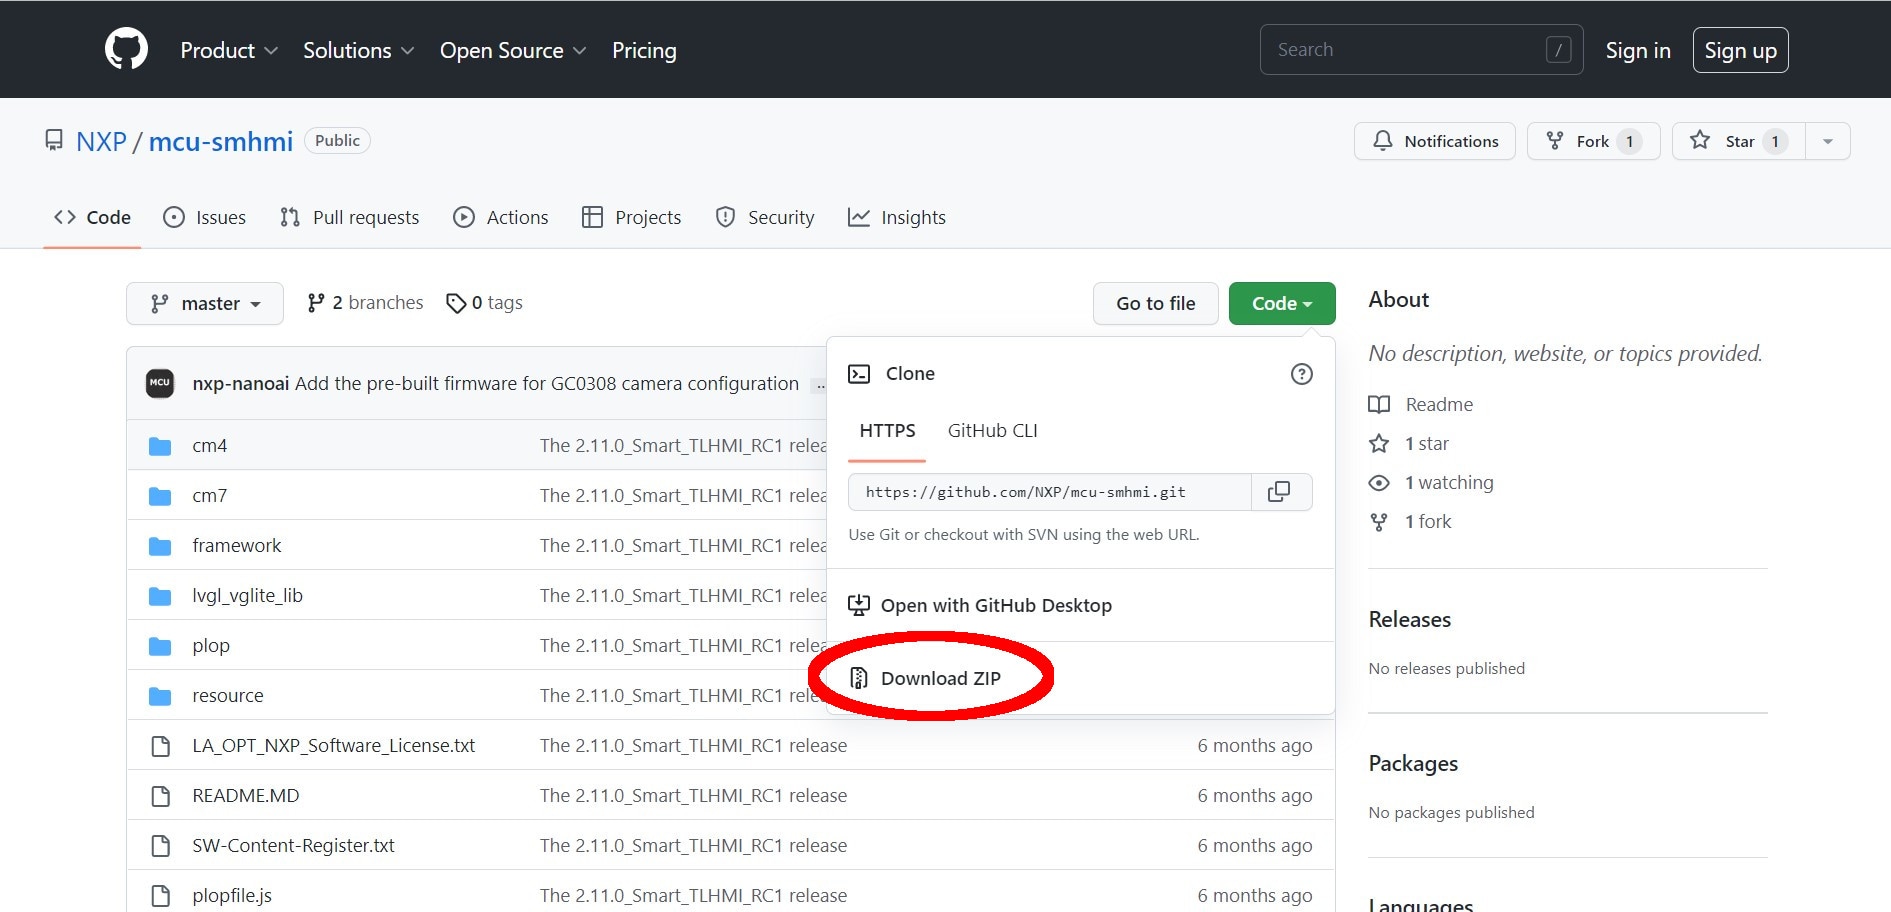
The SLN-TLHMI-IOT out-of-box projects are published under the NXP GitHub page . You can either clone the repository using Git or download a zip folder containing the source code from here .
If you are unfamiliar with Git, it is recommended to download the zip folder for now.
3. Build, Run
3.1 Importing SLN-TLHMI-IOT Projects
To import the projects we downloaded into the IDE, follow the steps below:
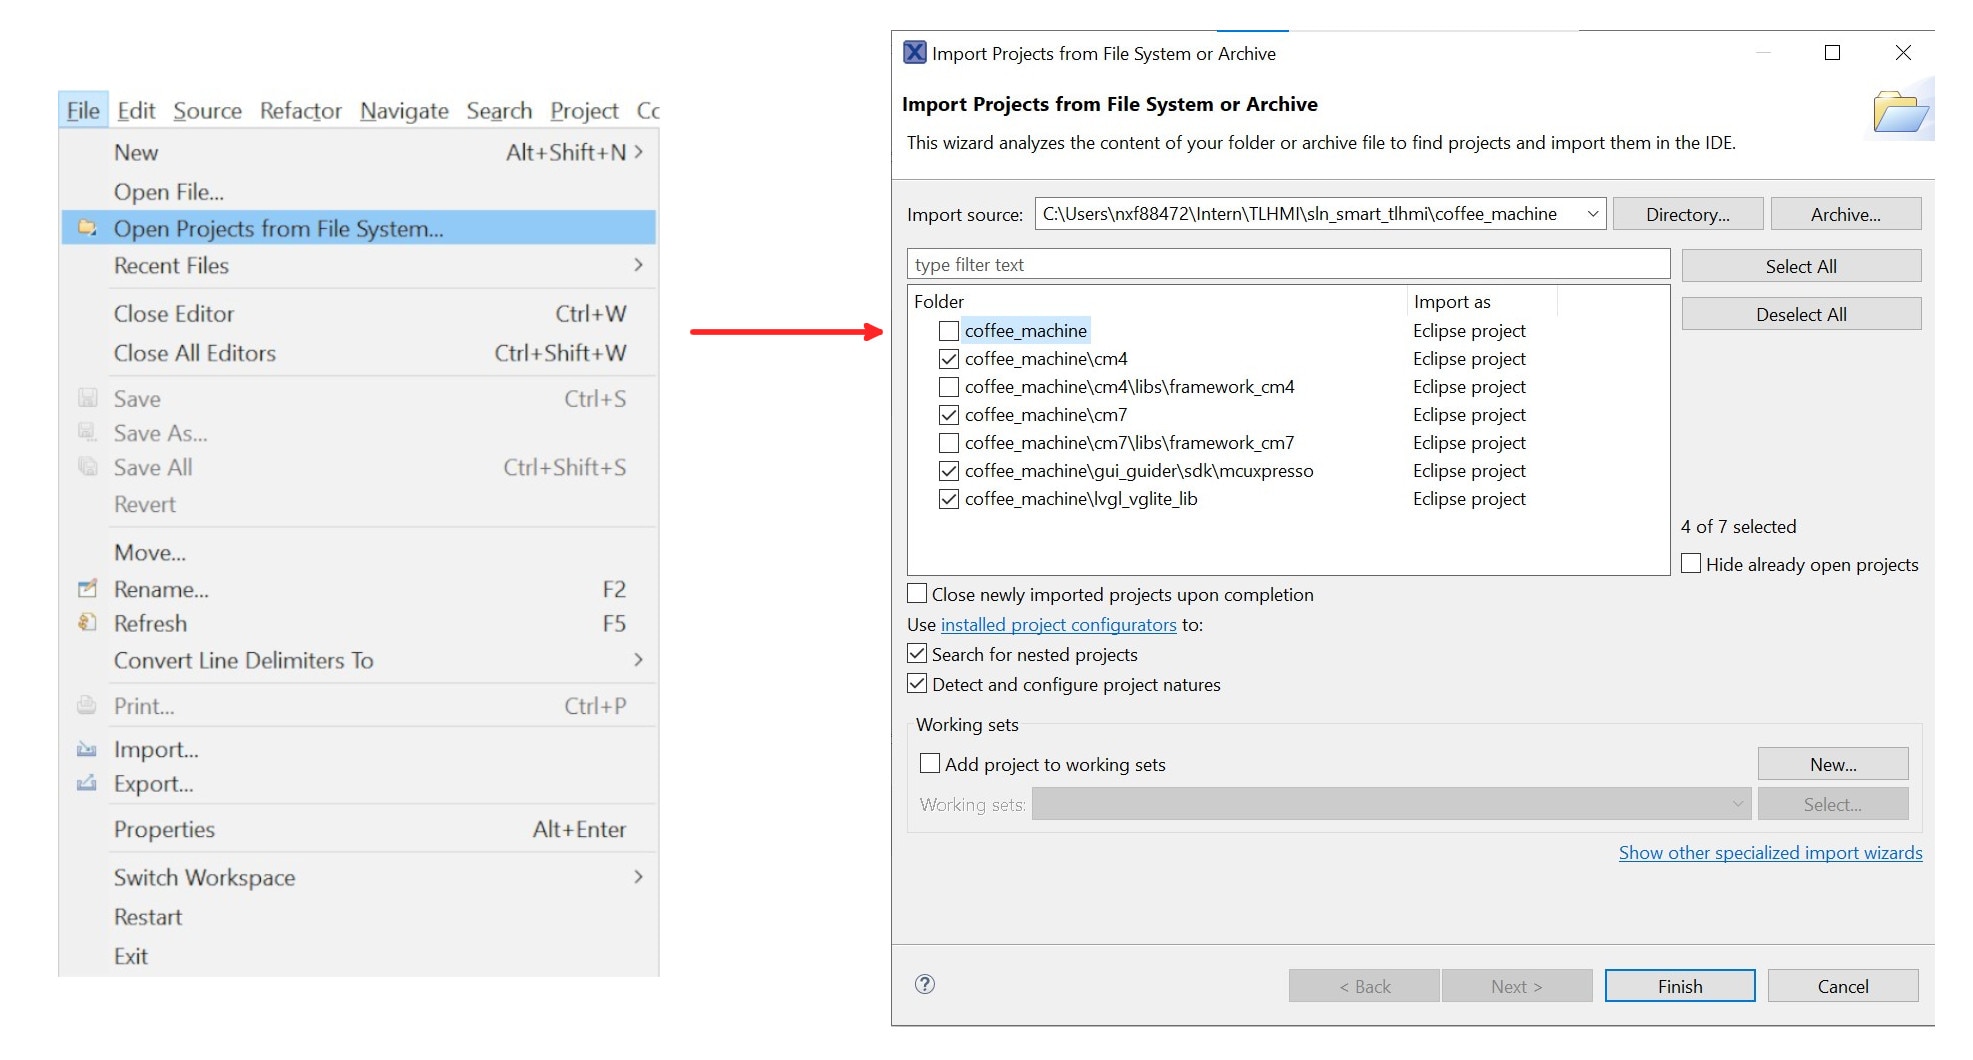
- Open the File menu in the top left corner of the IDE and select the Open Projects from File System … option
- From the screen displayed, navigate to the location where you unzipped the sln_tlhmi_iot source code. Now, import the files listed in Figure 41
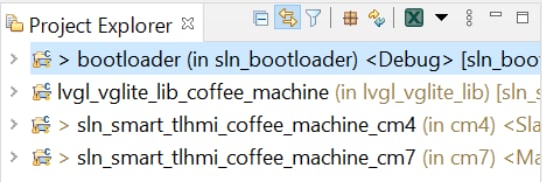
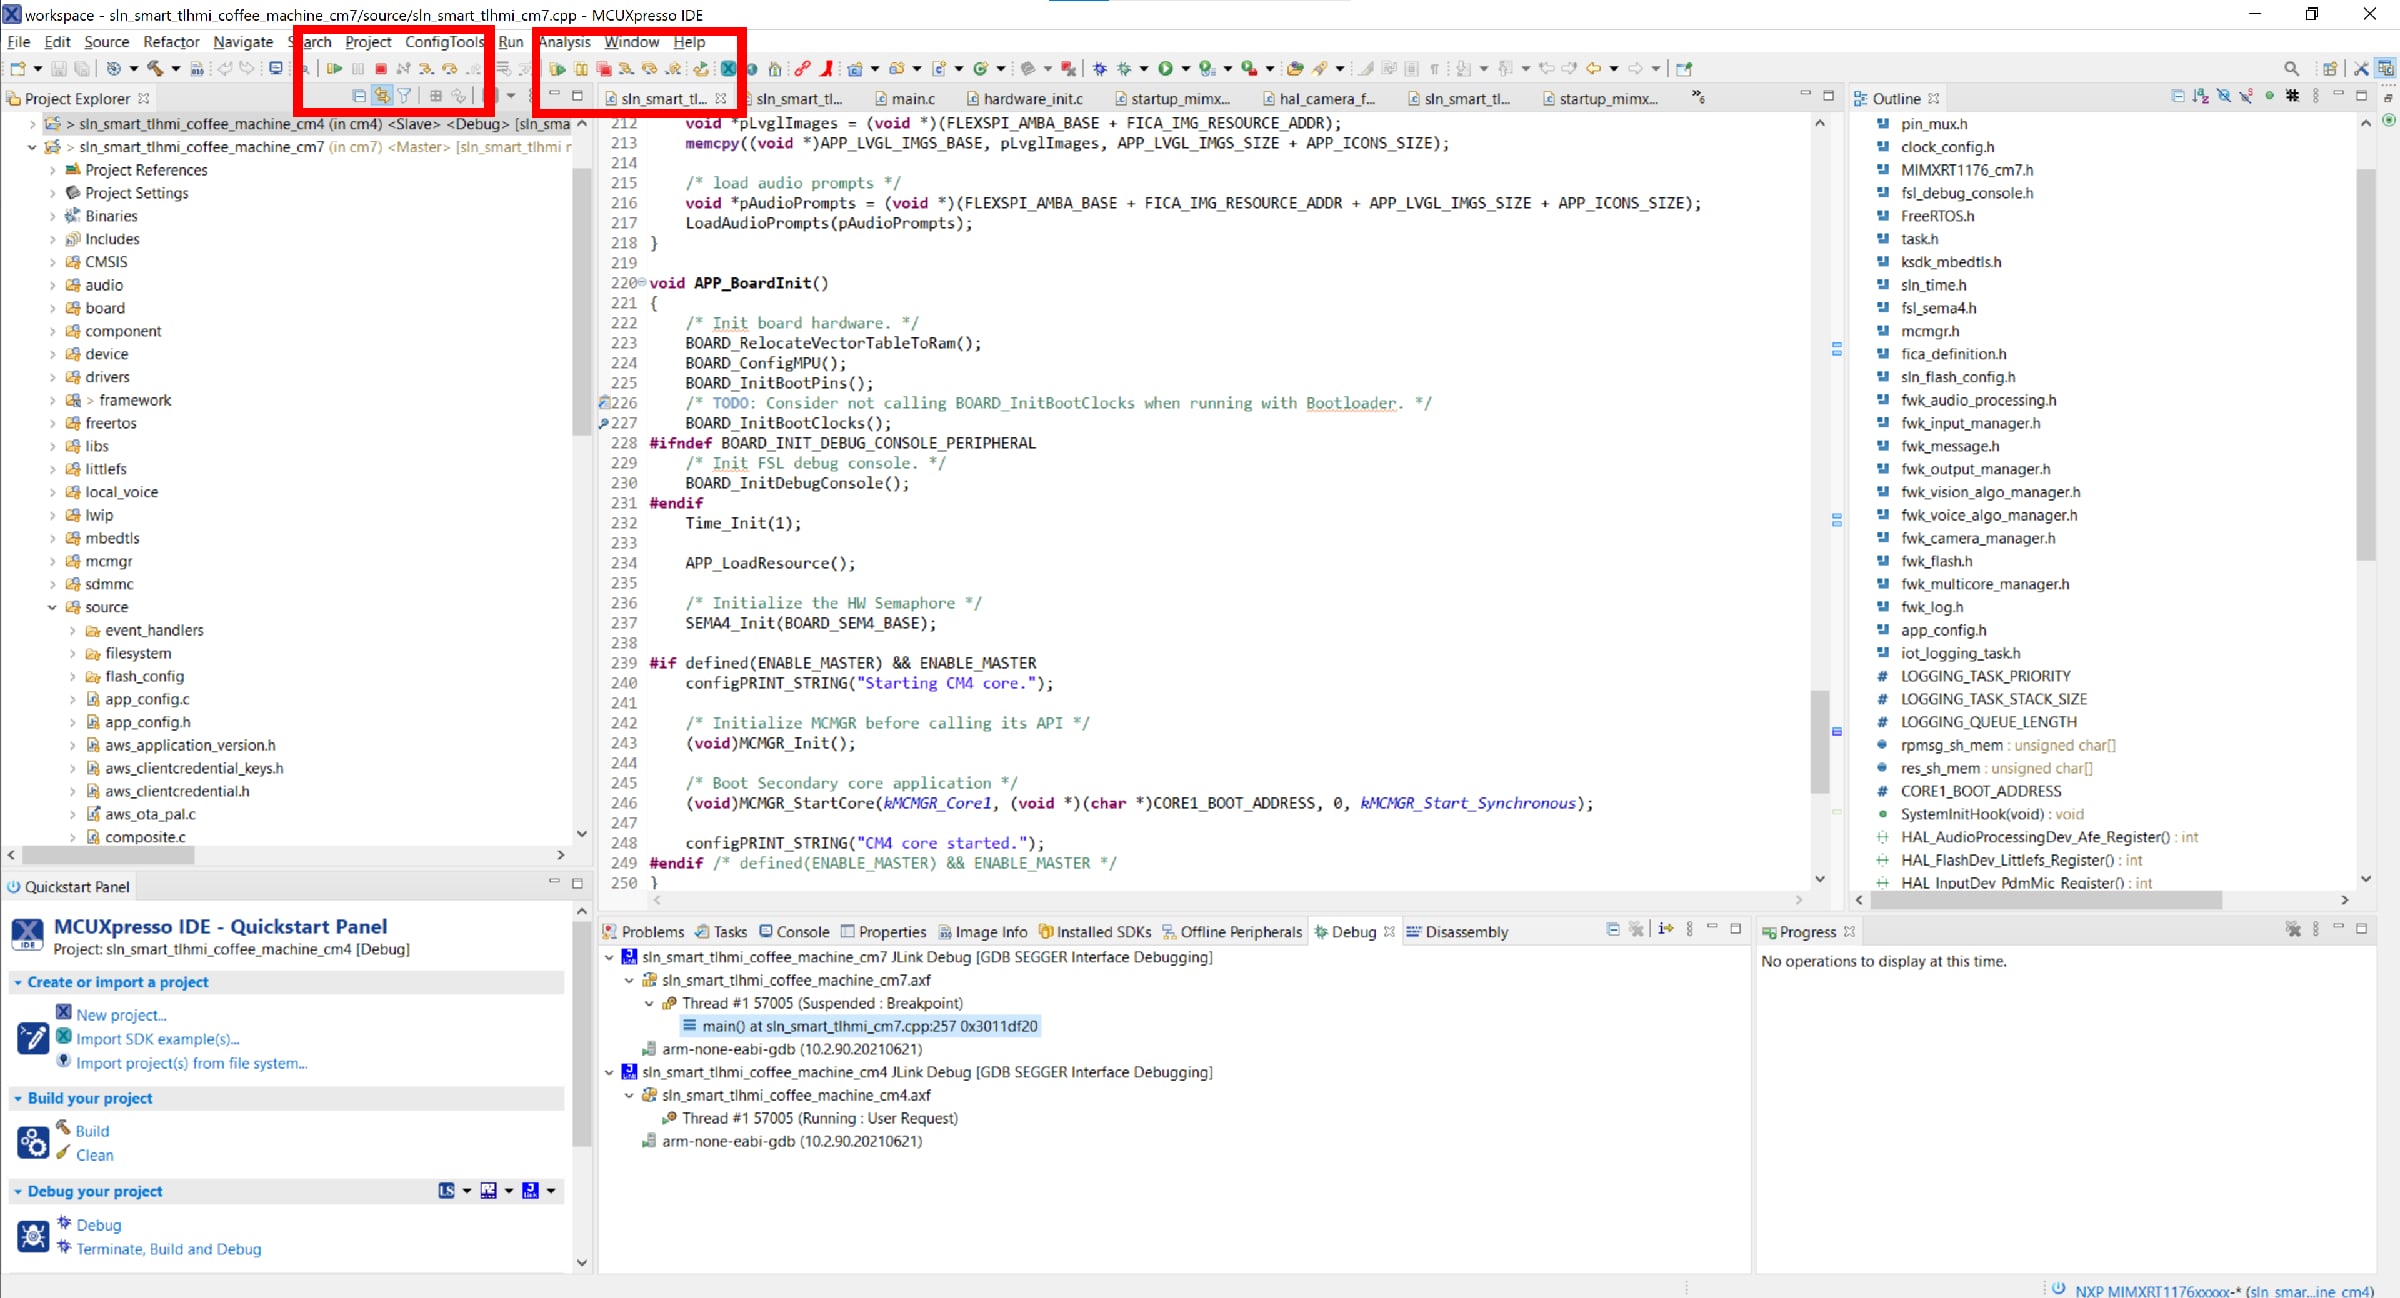
- Once successfully imported, you should see the projects open in the Project Explorer pane on the left side of the IDE
Note: The sln_tlhmi_iot source code repository contains multiple projects including each of the out-ofbox demos included with the kit (coffee machine, elevator, and so on). The following sections only focus on flashing and debugging the coffee machine application. The steps for flashing and debugging the other outof- box demos should be nearly identical.
3.2 Building the SLN-TLHMI-IOT Project
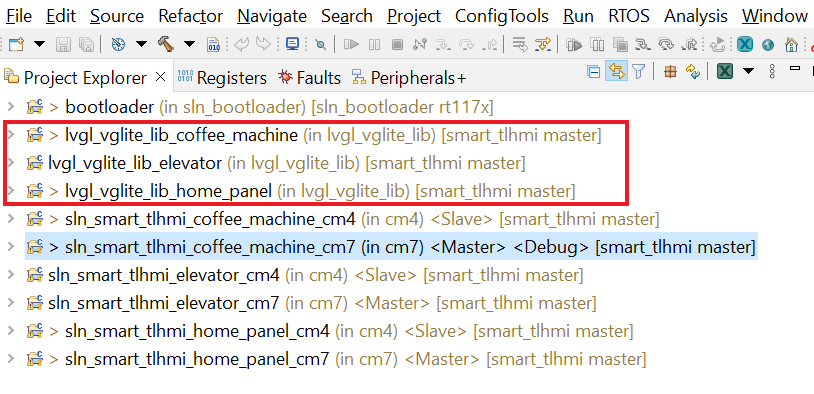
The SLN-TLHMI-IOT SDK allows you to build the coffee machine application directly. The application is made up of four subprojects: bootloader, dual core xxx_cm7 and xxx_cm4 projects for the chosen application demo (coffee machine in our case), and a Light and Versatile Graphics Library (LVGL) library project.
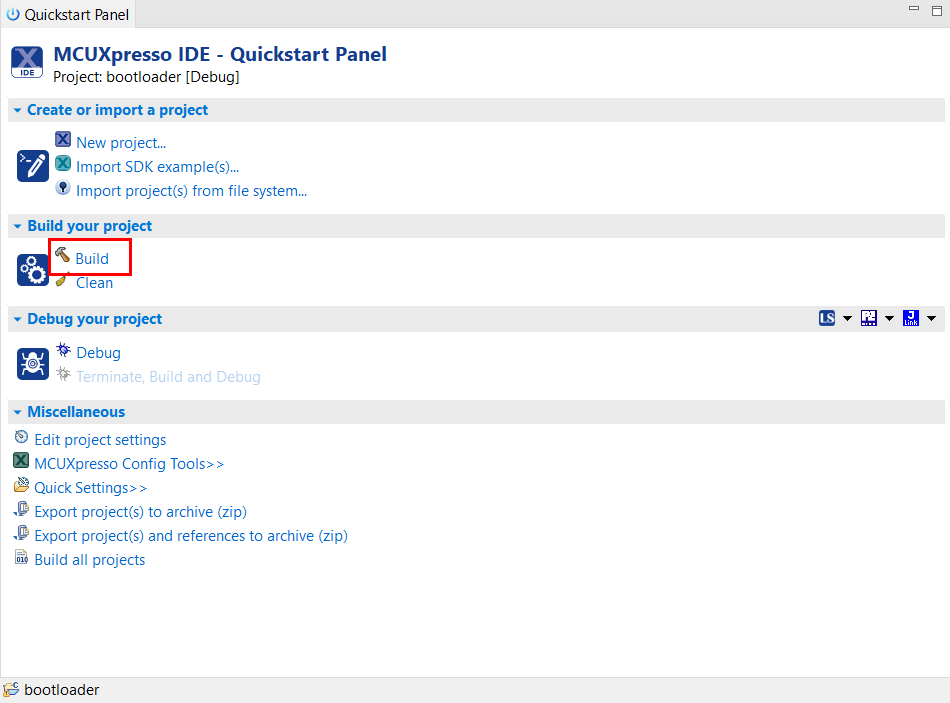
The bootloader project is a first-stage bootloader that manages to jump into the Coffee Machine, Elevator, and Smart Panel Applications. This application can be used for any additional bootloader functionality needed for the product. In the Project Explorer pane, select the bootloader project file and navigate to the QuickStart Panel. Select the Build option to start the compilation and linking of this application.
Each of the SLN-TLHMI-IOT applications utilizes LVGL for its UI design. Recompiling the code associated with the UI can add significant time and cost to the build process. In MCUXpresso, this process must be done every time the cm7 project is built. This can be especially inconvenient when no UI code has been modified because the rebuilding of LVGL’s
To help alleviate this issue, a library project named
lvgl_vglite_lib_coffee_machine has been created to allow more explicit control over when the UI files should be
rebuilt. Essentially, the lvgl_vglite_lib_coffee_machine project only needs to be rebuilt whenever changes have
been made specifically to the UI code, otherwise, the lvgl_vglite_lib_xxx project can safely be ignored. Whenever
the library project is rebuilt, MCUXpresso IDE automatically links the newly created UI library code.
The sln_smart_TLHMI_coffee_machine_cm4/cm7 projects are the out-of-box applications we used earlier to demonstrate
the SLN-TLHMI-IOT's face and voice recognition capabilities. These applications (in addition to the bootloader) are flashed onto
your SLN-TLHMI-IOT kit by default.
The cm4 project acts as a subproject for the main cm7 project and handles things like the UI display, camera control and more. As a subproject to the cm7 project, building the cm7 master application automatically builds the cm4 and create a combined binary containing the code from both projects.
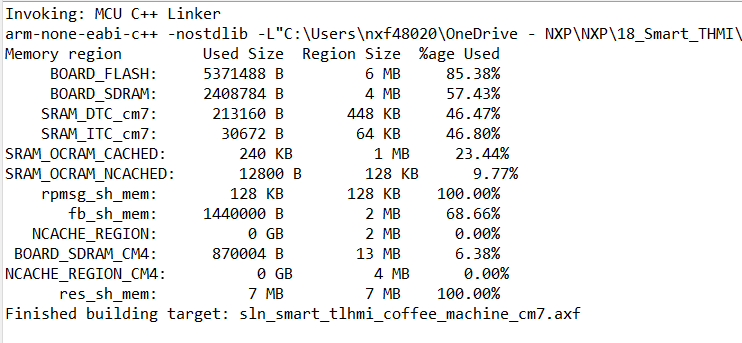
To build the coffee machine application, click the Build icon in the Quickstart Panel.
Building may take a few minutes to complete, but do not worry, this is normal for applications of this size. Once finished, a message like the following can be seen at the bottom of the IDE.
3.3 Flashing and Debugging SLN-TLHMI-IOT Projects
With the SLN-TLHMI-IOT application project compiled, it is now time to program its associated binaries into flash.
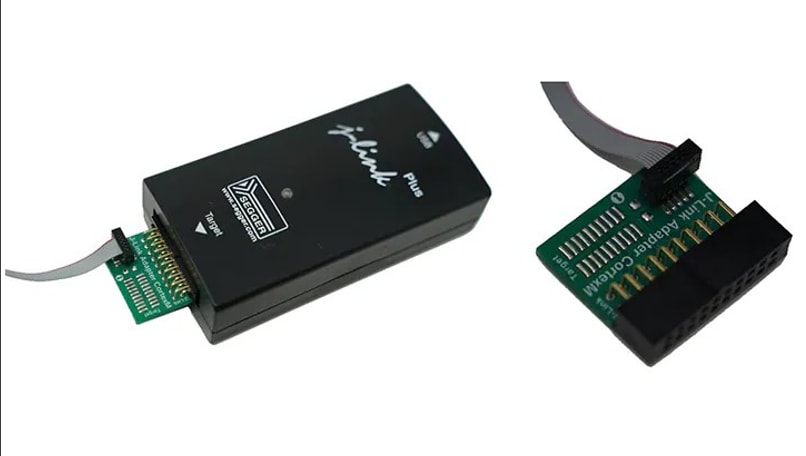
Flashing and debugging the SLN-TLHMI-IOT kit requires a SEGGER J-Link with a 9-pin Cortex-M adapter and V7.84a or newer of the J-Link Software and Documentation Pack which can be found on the SEGGER website.
To flash the kit, follow the steps below:
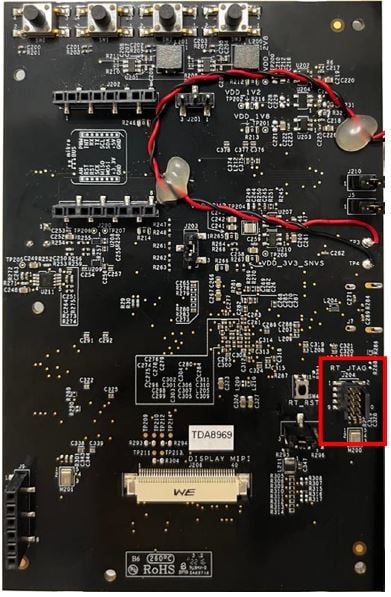
- Attach your J-Link debug probe into the J204 header as shown in Figure 50 and connect your J-Link to your computer via USB
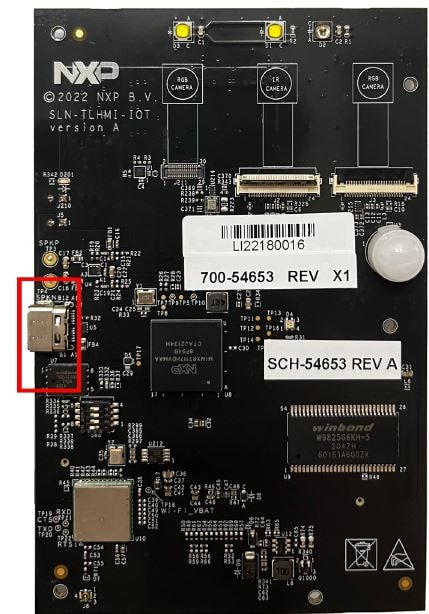
- Next, provide power to the kit by plugging a USB-C cable into the kit’s USB-C port and plug the other end into your laptop/PC
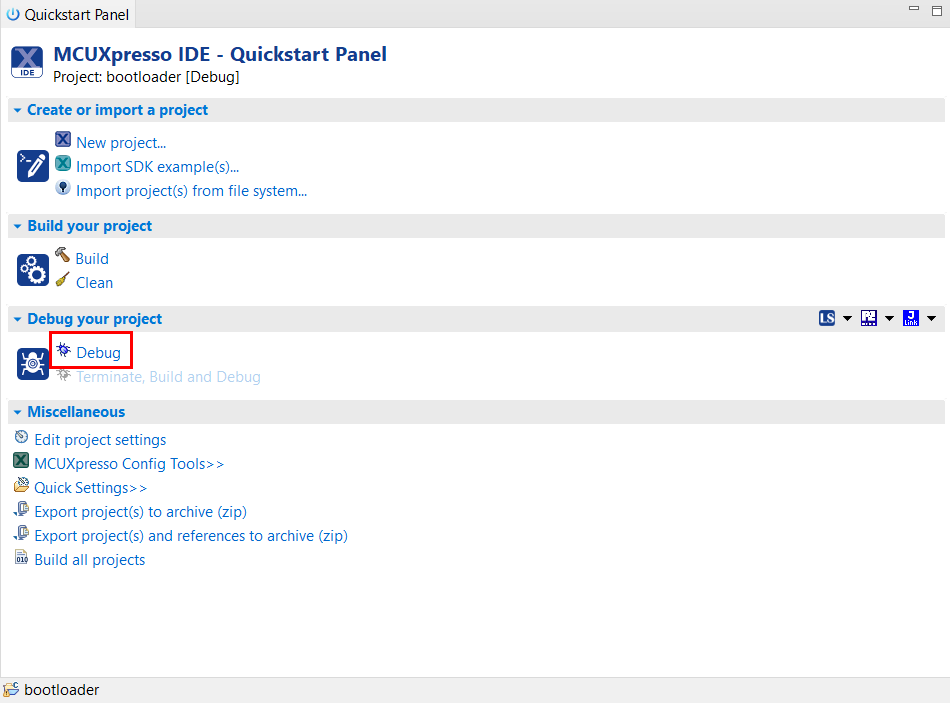
- Select the bootloader project in the Project Explorer pane
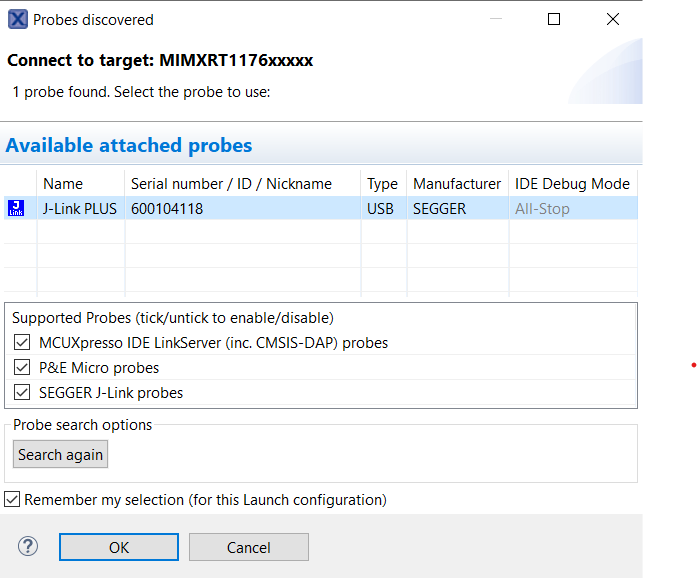
- To start the process of loading the binary into flash and begin debugging, choose the Debug option in the QuickStart Panel
- Select the J-Link probe that is connected to your kit and click the OK button
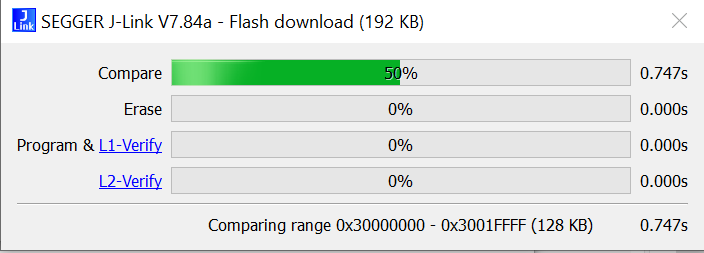
- This launches the flashing tool. Now, proceed to flash the binary associated with the currently selected project
-
Once you have flashed the Bootloader, repeat the same processes for the
sln_smart_TLHMI_coffee_machine_cm7project -
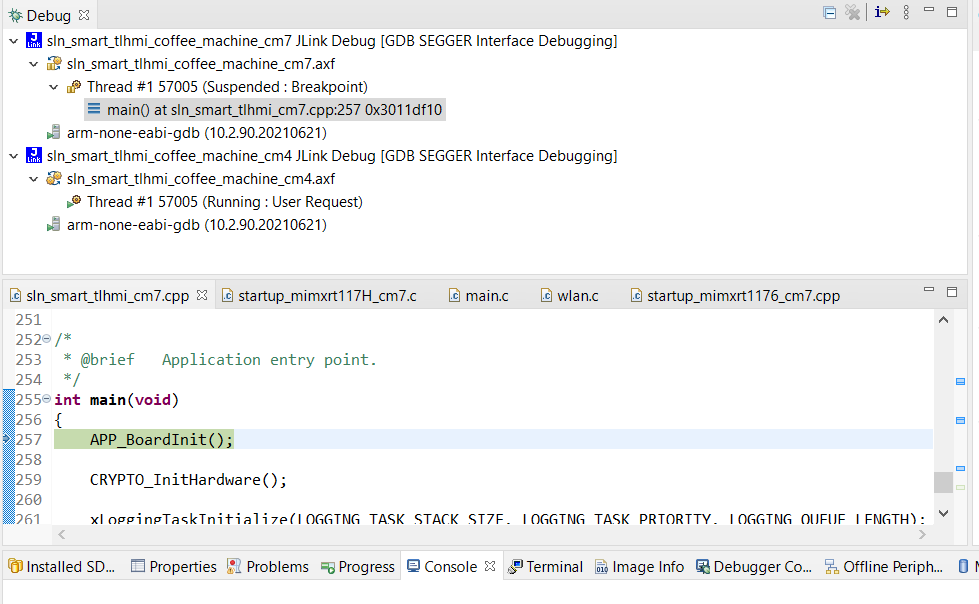
After successfully debugging the application, the program breaks at the cm7 master project main (found in
sln_smart_TLHMI_cm7.cpp). The cm7 and cm4 projects then launch into the GDB debug process -
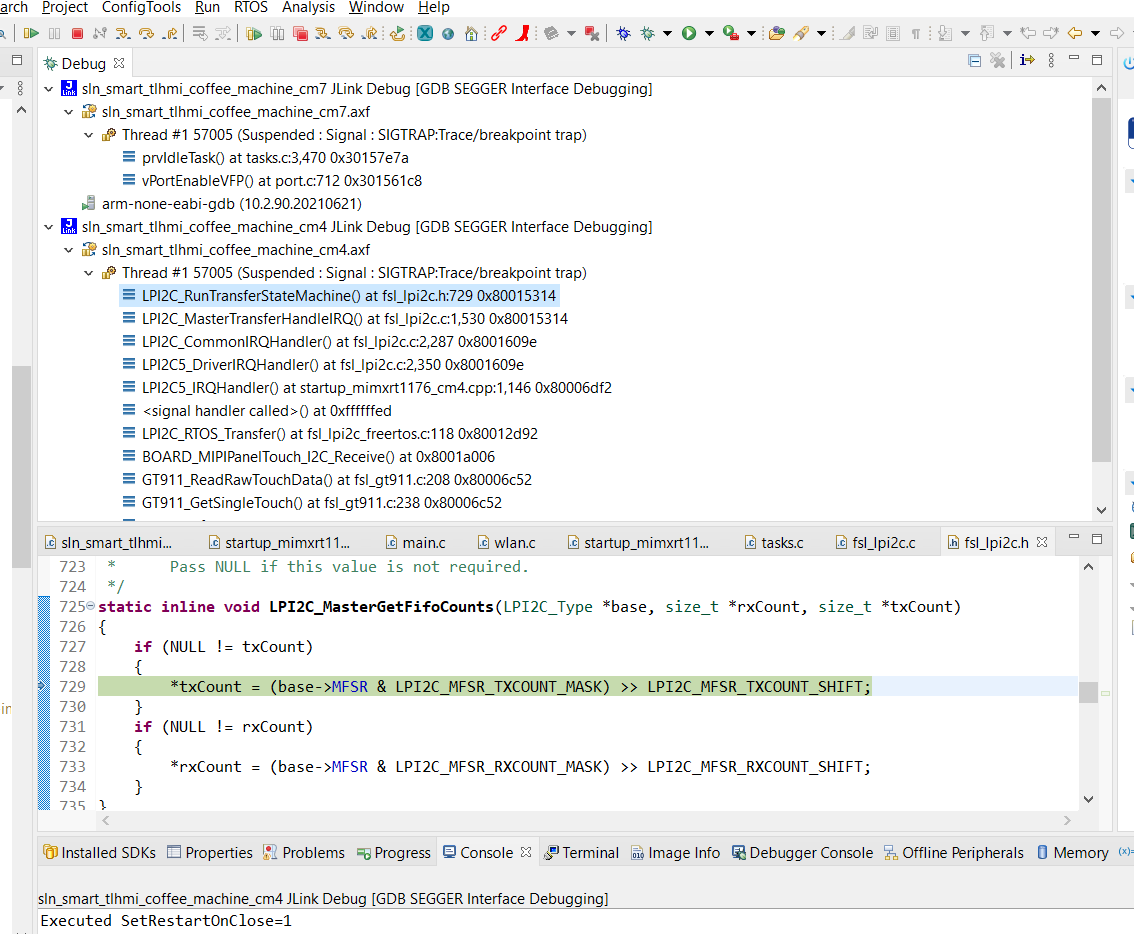
To suspend the debug session, click the pause/play button on the top of the screen
-
To suspend the debug session, click the pause/play button on the top of the screen
Note: If you are upgrading your board’s firmware for the first time, it is recommended that you erase the flash completely before updating the firmware image. This helps to ensure that there are no version mismatches with your existing firmware and its associated face database layout. Instructions for erasing the flash using a SEGGER J-Link can be found in the J-Link section of the Smart HMI Software Development User Guide. When using the MCUXpresso GUI Flash Tool to erase the whole chip, it will report an error when trying to get information about bank 1 @ 0x60000000. This error can be ignored since the only used bank 0 has been erased correctly.

3.4 Additional Resources
By making it this far, you have successfully completed the getting started experience for the SLN-TLHMI-IOT
For a comprehensive understanding of all the Out-of-Box Experience (OoBE) features, including the additional demo applications that come flashed with the kit, be sure to check out the SLN-TLHMI-IOT User Guide.
To start building your own applications and learn more about the software architecture, available developer tools, and more, head over to the Smart HMI Software Development User Guide.