Getting Started with the SLN-SVUI-IOT
Contents of this document
-
Open the Box
Sign in to save your progress. Don't have an account? Create one.
1. Open the Box
This guide walks you through the process of getting up and running with your SLN-SVUI-IOT board. The guide explains the steps for the initial board setup, describes the out-of-the-box demo applications and how to switch between them. The MCU smart voice development kit (part number: SLN-SVUI-IOT) is a comprehensive, secure and cost-optimized turnkey solution from NXP. The kit widely adopts its development environment that enables customers to quickly get to market with a production ready end-to-end software application.
1.1 Open the Box
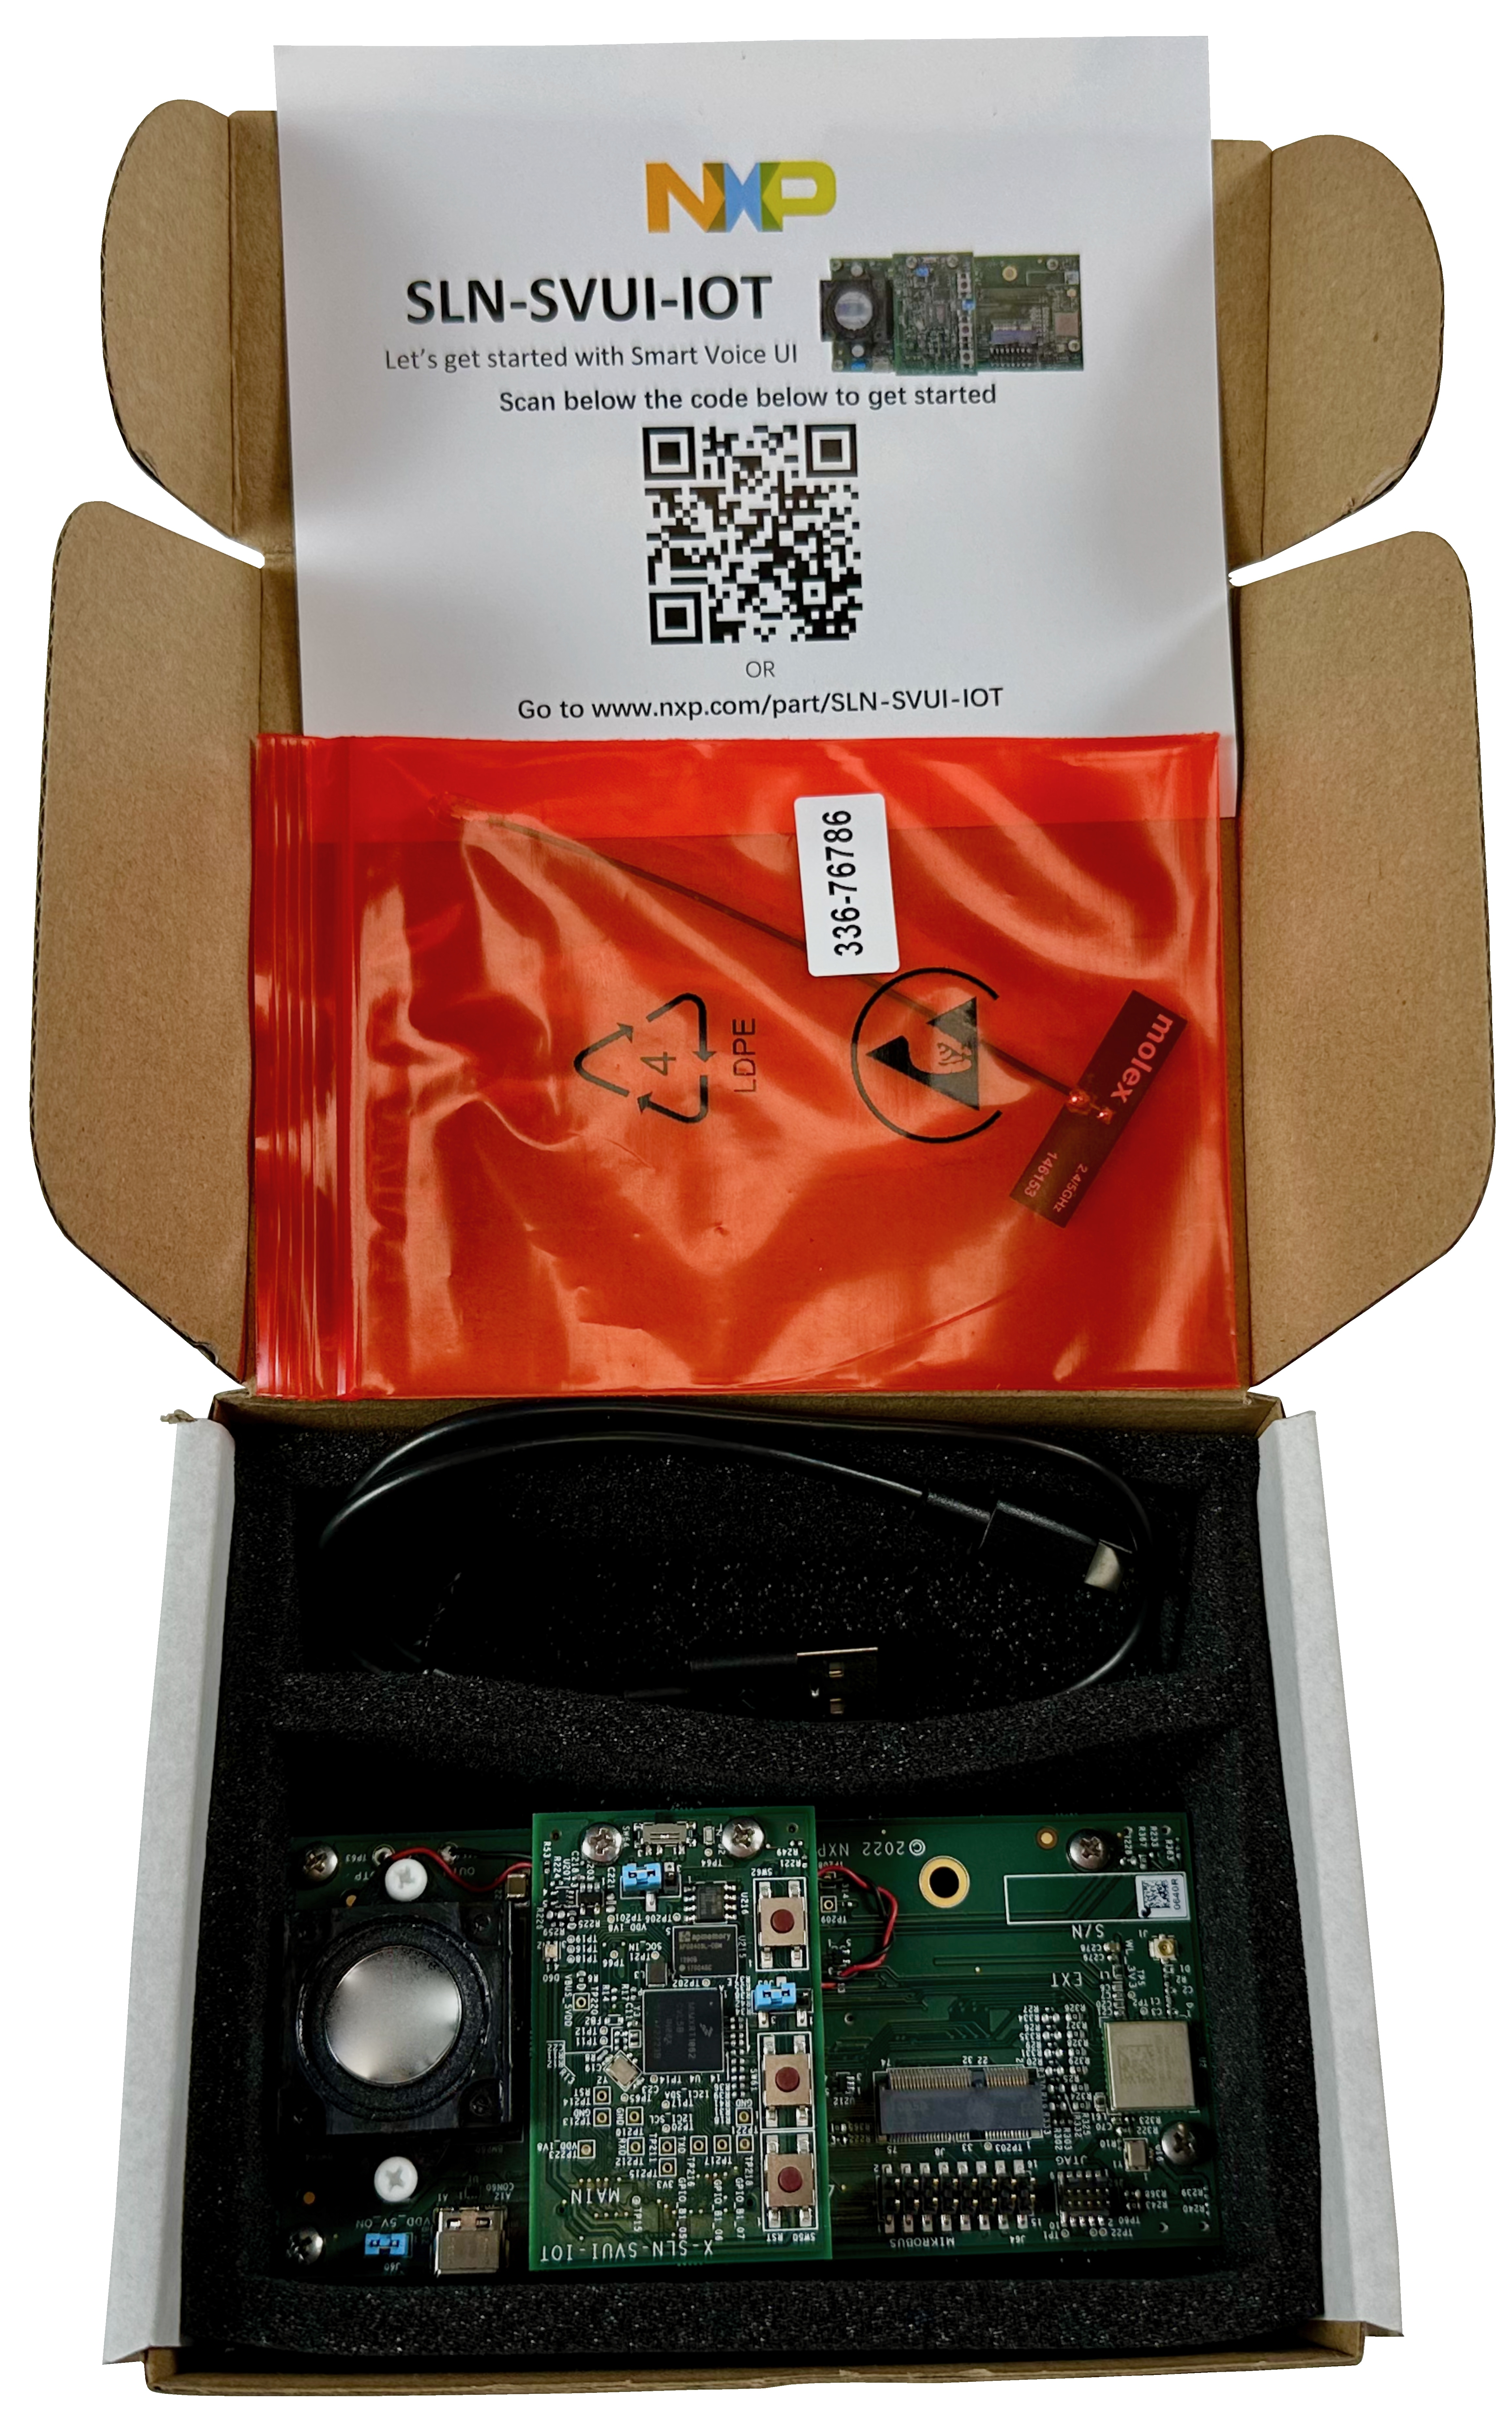
The SLN-SVUI-IOT kit comes with a printed quick start guide, a USB-C cable and a Bluetooth/Wi-Fi antenna.
1.2 Initial Update
To ensure you have the latest NXP software, an initial update is required (follow the steps below):
- Download the "sln_svui_iot_tools" zip package and extract its contents
- To make the initial update, put the board in serial download mode by moving jumper J61 to connect pins 2 and 3
- Plug the USB Type-C connector into the SLN-SVUI-IOT kit and the USB type-A connector into your computer
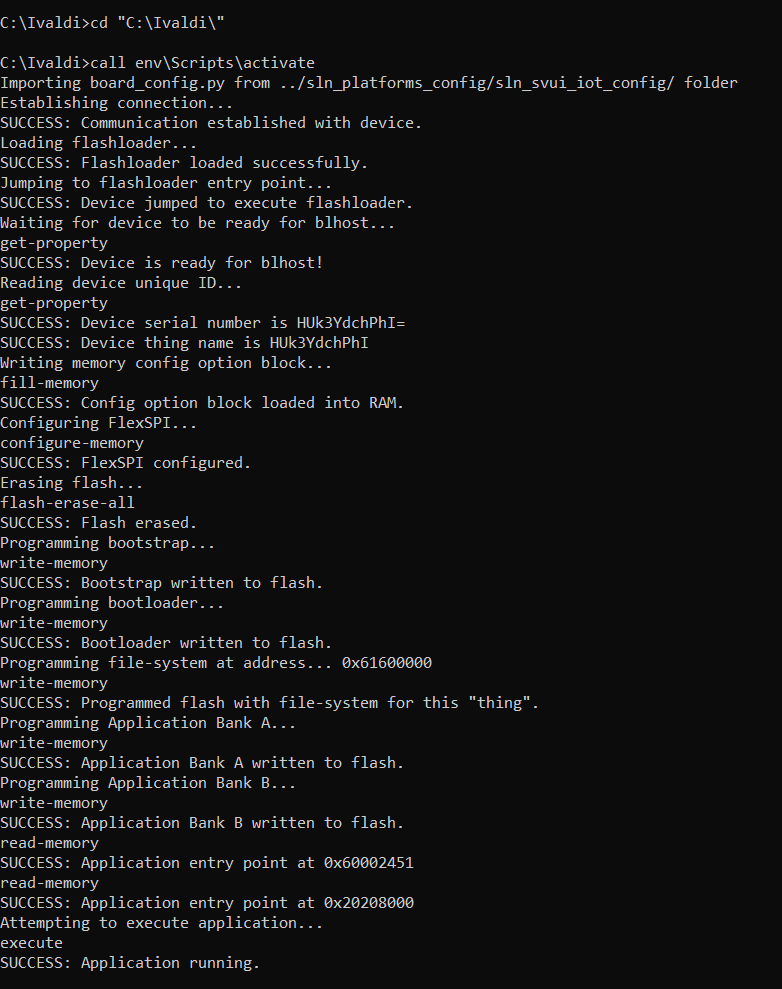
- Navigate to
tools/Ivaldi_updater/and start theFLASH_SVUI_BOARD.batscript by double-clicking it. The output is shown in the figure below
1.3 Power On
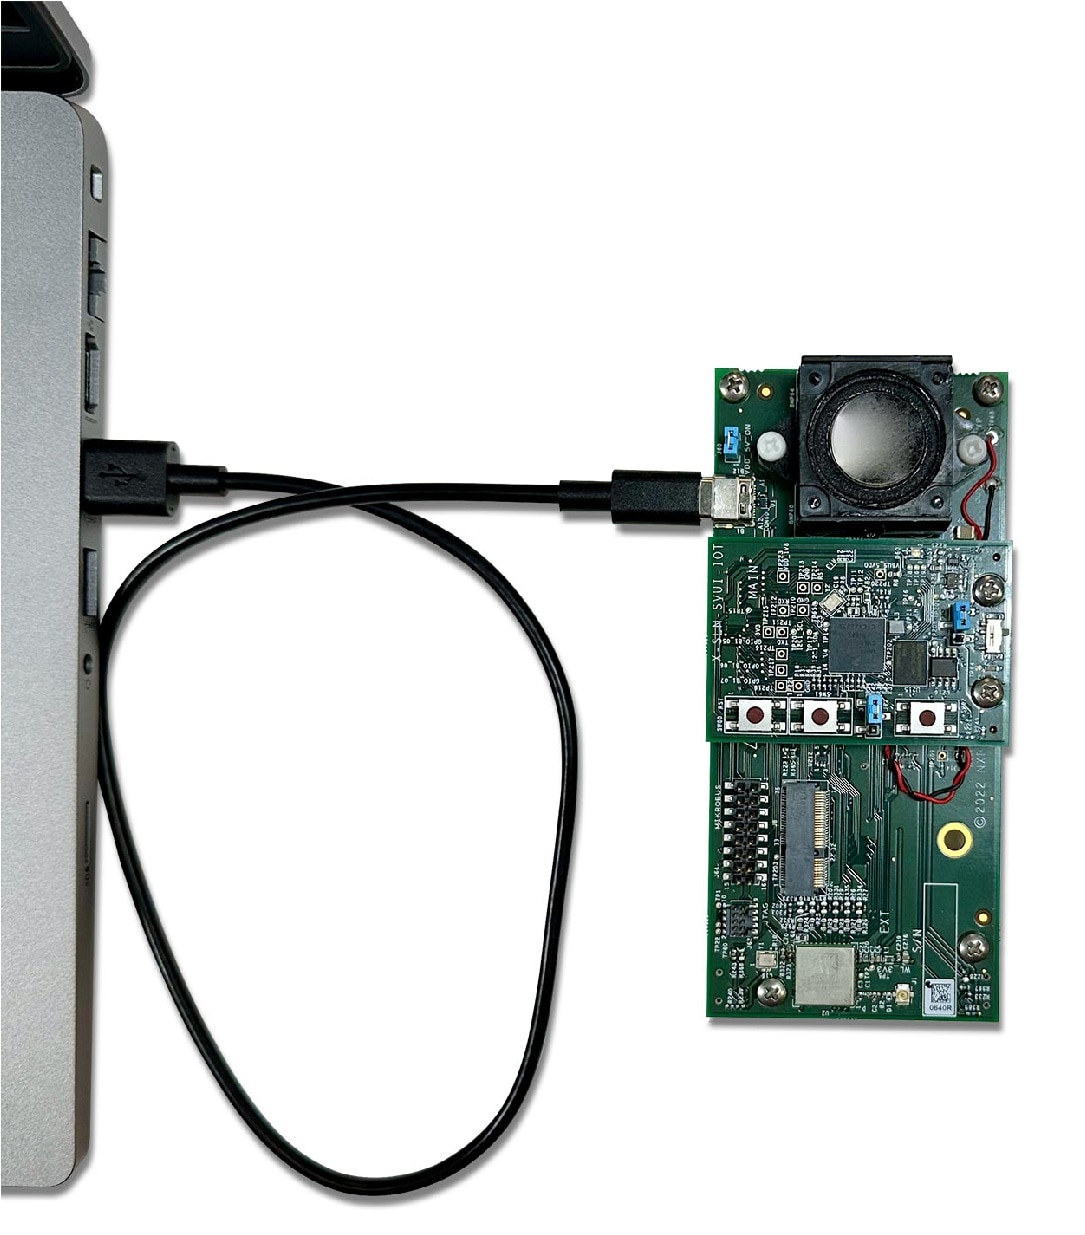
Plug the USB Type-C connector into the SLN-SVUI-IOT kit and the USB type-A connector into your computer. The figure below shows how to connect the kit using a USB cable.
When you power on the kit for the first time, the LED blinks green light. Then, prompts you to ask for a demo selection. The available demos are:
- Oven
- HVAC
- Smart Home
After making the selection (by saying one of the demo names), a confirmation tone plays, saying, "HVAC/Oven/Smart home demo". If you do not say any demo name until the timeout period expires (by default, 8 seconds), the default demo, HVAC, is selected automatically. The board boots automatically into demo application #1.
1.4 Out-of-the-Box Demo Applications
Two types of SLN-SVUI-IOT out-of-the-box demo applications are included:
- Demo application #1: HVAC/Oven/Smart home(IoT) voice control – S2I-based:
- Language: English
- Demo application #2: Smart home (IoT)/elevator/washing machine voice control – DSMT-based:
- Language: Multilingual (English, Hindi, Thai, Vietnamese by default, can also choose from Chinese, French,German, and Dutch. Only four languages are supported in parallel)
Demo application #1: HVAC/Oven/Smart home(IoT) voice control – S2I-based
After powering on and making your demo selection, as described in Section 1.3, the SLN-SVUI-IOT kit is up and running and waiting for voice commands. Start by saying the wake word "Hey, NXP". The board responds by playing a confirmation sound and turns the LED blue while waiting for a voice command. The demos are available in English only and depending on what demo you chose at the boot time, some examples of commands are:
For Oven
- Set the convection function
- Activate defrost
- Preheat the oven to one hundred twenty degrees
- Bake at one hundred ninety five
- Raise temperature by five degrees
- Reduce temperature by ten
- Decrease the heat to seventy five degrees
- Put to two hundred degrees
- Update the temperature at one hundred seventy
- Launch a timer to one hour
The full list of commands can be found at sln_svui_iot_local_demo/local_voice/S2I/en/VIT_
Model_en_Oven_expressions.txt.
For HVAC
- I am feeling really cold today
- I get quite warm now
- It is very heated now
- I am very freezing today
- Set fan speed to low
- Turn speed to auto
- Set the temperature to fifteen degrees
- Increase the temperature by three
- Lower temperature by five degrees
- Set a timer for two hours and ten minutes
The full list of commands can be found at sln_svui_iot_local_demo/local_voice/S2I/en/VIT_
Model_en_Hvac_expressions.txt.
For Smart Home (IoT)
- Set the brightness level to max in the kitchen
- Turn up light brightness by twenty percent in the bedroom
- Set the bedroom lamps to blue
- Change the living room light to orange
- Switch the bathroom lights to pink
- Set lamps to purple in the bedroom
- Turn the lighting in the bathroom to green
- Yellow lights in the kitchen
- Open middle window shades
- Pull up the shades halfway
The full list of commands can be found at sln_svui_iot_local_demo/local_voice/S2I/en/VIT_
Model_en_Home_expressions.txt.
If the kit detects your voice command, it changes the LED color and plays a confirmation prompt. If the kit does not detect any of the commands within a period, the device turns the LED purple and plays a chime to indicate that the waiting time has ended. By default, the response waiting time is 8 seconds, but you can change the value with the shell command "timeout N", where N is the time value in milliseconds.
You can always change between HVAC/Oven/Smarthome(IoT) demo by saying the wake word "Hey, NXP!", followed by the "change demo" voice command. Again, a prompt asks for a demo selection. Also, you can switch between demos by pressing the SW2 button on the board.
Connecting to a serial terminal
Another way to change the language and the active demo is by using a shell command. To open a SHELL terminal, follow the steps below:
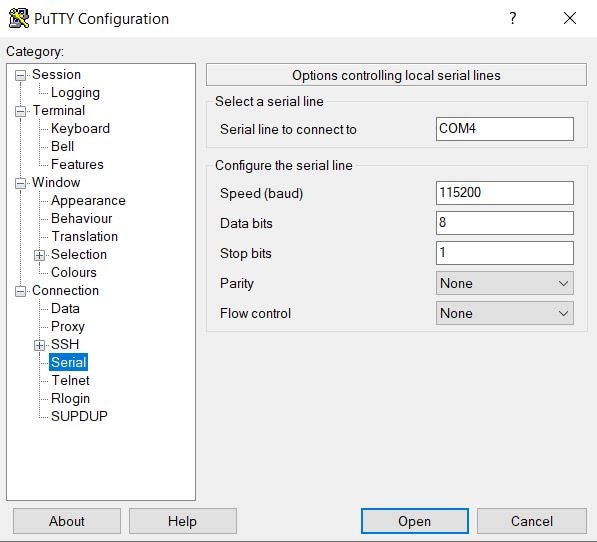
- Connect a serial terminal application to the USB serial device interface that enumerates (115200-8-N-1), as shown in the figure below
- Press Enter on the keyboard. The
SHELL>> promptappears - Type “help” to show the available commands at the shell with a description of each.
- Type “commands” to ensure which demo is set in selected languages. The figure below indicates that the current demo is set to the HVAC demo
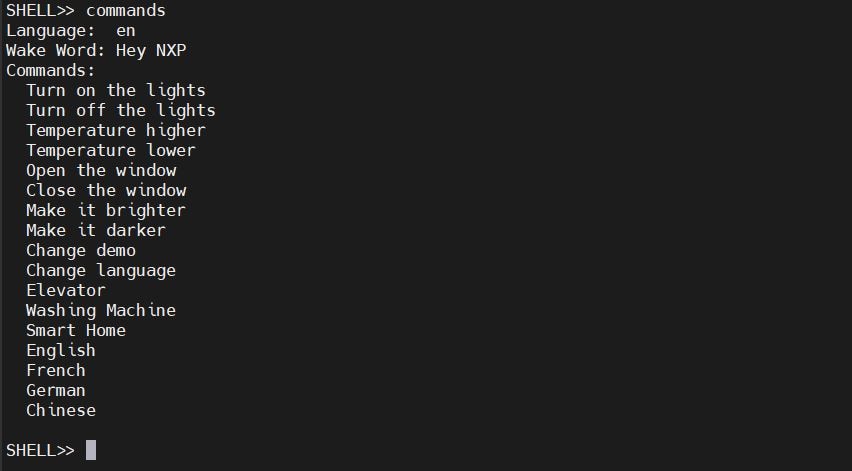
The language and the active demo can be changed using shell commands.
Switching to demo application #2
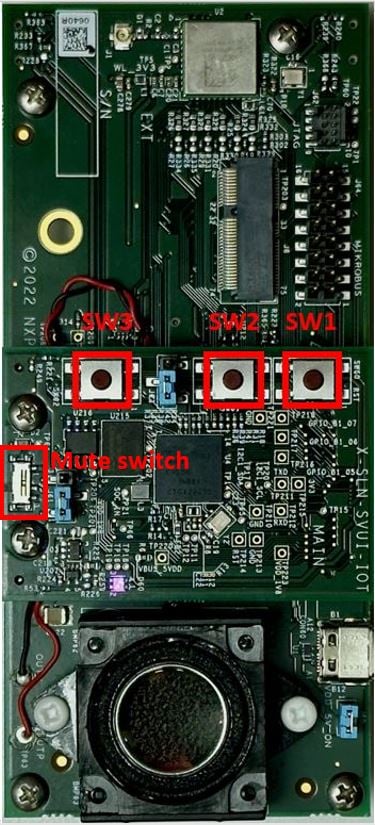
To switch to the second application demo, hold SW3 and press SW1. The figure below shows how the buttons are placed. The board is reset and automatically boots into the second application. Then, a voice prompt asks for a demo selection (smart home (IoT), elevator or washing machine). After choosing it, a prompt confirms your selection, while also confirming that you switched to the multilingual demo (Demo application #2 – DSMT-based).
Demo application #2: smart home (IoT)/elevator/washing machine voice control - DSMT-based
The DSMT-based application supports smart home (IoT)/elevator/washing machine voice control. By default, the board listens for the wake word in four languages in parallel (English, Hindi, Thai, and Vietnamese). It can be easily configured to listen in any combination (a maximum of four) of the eight languages supported (English, Chinese, French, German, Hindi, Dutch, Thai, and Vietnamese) using the changelang command, followed by the list of languages you want to enable.
If a wake word triggers the SLN-SVUI-IOT kit, the LED turns blue and the board starts listening for commands in the selected language based on the wake word. Depending on your demo selection, you can use the commands listed in Section 1.4.
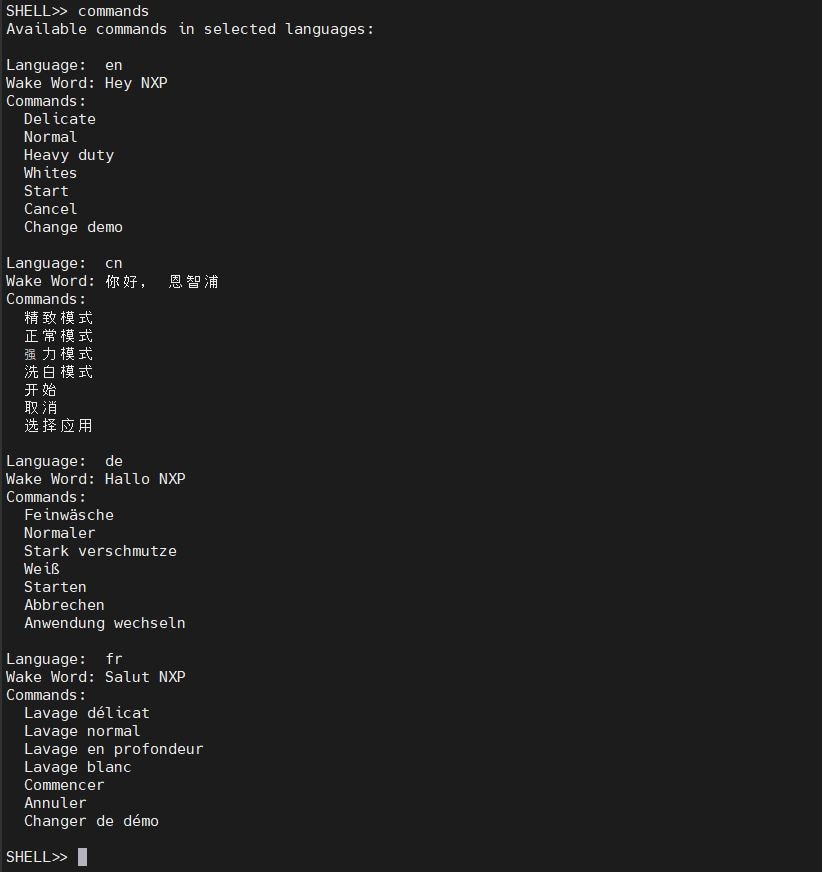
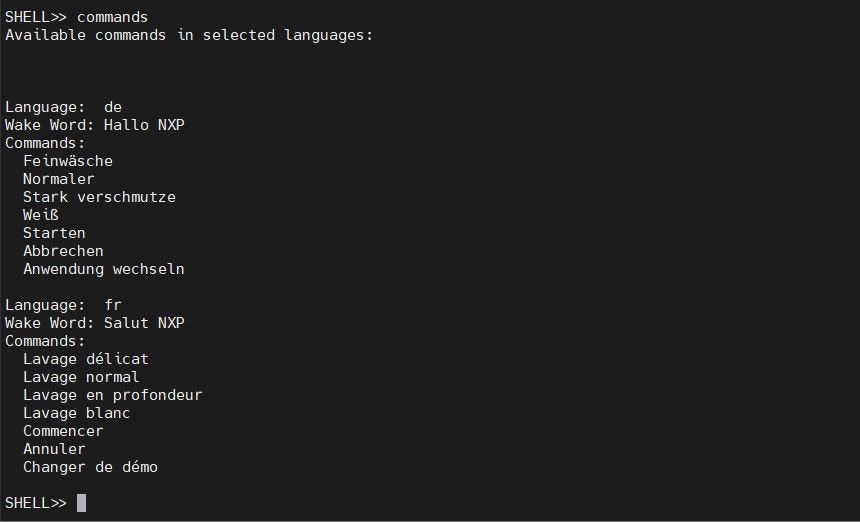
You can always check available wake-words and commands using shell, by typing commands, as shown in the figure below.
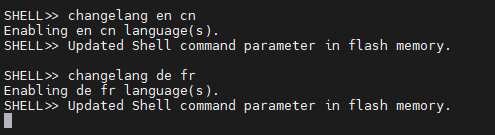
However, the DSMT-based demo application allows you to select any combination of these eight different languages. This can be done using “changelang” command in shell followed by the languages you want to enable. For example, if you want to enable German and French, then enter “changelang de fr” where 'de' and 'fr' are the language codes of German and French, respectively. You can also enable one language only. To enable one language, type changelang followed by the language you want to enable. The figure below shows the examples. All the language selection is saved in flash memory and retained even after the kit is rebooted.
Type commands to ensure that the current demo is set in selected languages. The figure shows the commands of the washing machine in the selected two languages.
1.5 Get the code
Full source code is available on the SVUI GitHub page .
The repository can be cloned manually and then the projects can be imported in MCUXpresso. Examples on how to import and customize the projects can be found in the examples folder.
Another way of getting the code is via NXP's Application Code Hub as the solution has its own page:
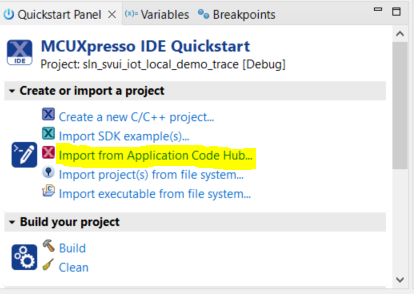
MCUXpresso has a dedicated Application Code Hub plugin, allowing users to easily import projects from ACH (see image below). For more details, check Chapter 7 of the MCUXpresso User Guide.
