Getting Started with the EasyEVSE EV Charging Development Platform (FreeRTOS, Wi-Fi 4)
Contents of this document
-
Solution Hardware
-
Get to Know the Software
-
Unbox and Setup
-
Assembly
-
Plug it In
Sign in to save your progress. Don't have an account? Create one.
1. Solution Hardware
Get the required hardware and miscellaneous hardware and tools
1.1 Required Hardware
The EasyEVSE EV Charging Development Platform (FreeRTOS, Wi-Fi 4) with ISO 15118-2 implementation requires an Electric Vehicle Supply Equipment (EVSE) and an Electric Vehicle (EV) side, with related hardware, software and miscellaneous hardware, to run the setup.
The hardware required to assemble, wire, and run the EasyEVSE is listed below:
For the EVSE side:
- 1 x MIMXRT1060-EVK/MIMXRT1060-EVKB/MIMXRT1060-EVKC or MIMXRT1064-EVK host controller board
- 1 x OM-SE050ARD-E security development board
- 1 x TWR-KM35Z75M, TWR-KM34Z75M, or TWR-KM34Z50M development board for metering
- 1 x CLEV6630ARD NFC board
- 1 x RK043FN02H-CT 4.3-inch TFT 480*272 LCD touch display
- 1 x EVSE-SIG-BRD1X or 1 x EVSE-SIG-BRD2X EasyEVSE EV charging signal board
For the EV side:
- 1 x MIMXRT1060-EVK/MIMXRT1060-EVKB/MIMXRT1060-EVKC or MIMXRT1064-EVK host controller board
- 1 x EVSE-SIG-BRD1X or 1 x EVSE-SIG-BRD2X EasyEVSE EV charging signal board
By using Wi-Fi connectivity:
- 1 x Murata Wi-Fi module: 1XK M.2 module
- 1 x uSD-M2 Adapter: LBEE0ZZ1WE-uSD-M2

1.2 Miscellaneous Hardware and Tools
The miscellaneous hardware and tools required to assembly the platform is shown below:
- 1 x RJ45 Ethernet UTP cable (for using Ethernet connection to the cloud)
- 2.54-mm jumper cables: 15 x male-to-female cables and 2 x male-to-male cables
- 1 x male-to-male 2.54-mm jumper cable (when not using a coaxial cable)
- 1 x NFC passive device; for example, blank NFC MIFARE or NTAG sample cards
- Electronic diagonal cutters
- Soldering Iron and solder core wire
- Double sided foam tape
- ESD tweezers
- 4x 2 ½’’ standoff screws

Optional, if the Wi-Fi is to be connected additional miscellaneous hardware and tools are required:
- 1 x FPC FFC PCB converter connector board 24P 0.5 mm to Female Side 1 mm Back to DIP 2.54 mm
- 1 x FFC Loop Cable 24 Pin 0.5 mm
- 1 x coaxial cable (when not using a single male-to-male 2.54-mm jumper cable)
NOTE: If using the Wi-Fi only, there is no need for soldering iron and solder core wire, ESD tweezers and RJ45 Ethernet UTP cable
2. Get to Know the Software
Get the required software
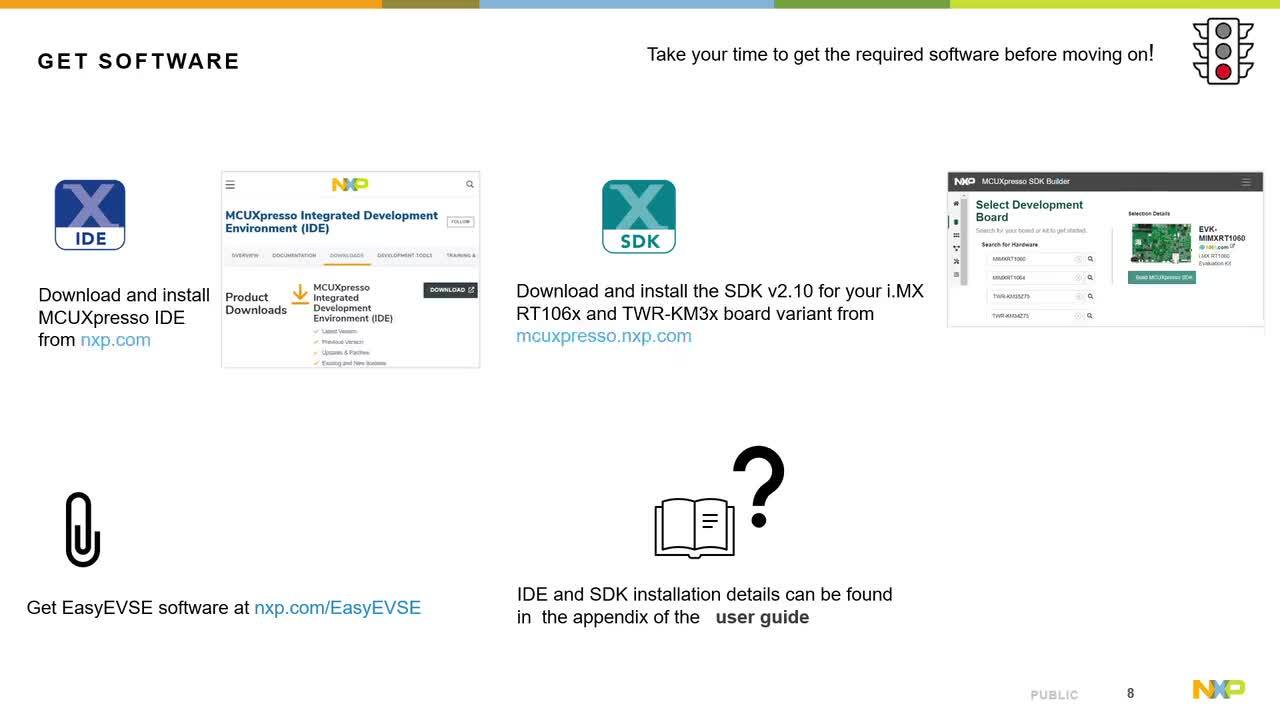
This short video list all the required software for this initial simplified setup.
The below sections provide links to the required software.
2.1 Install the MCUXpresso IDE
Download and install the latest version of the IDE for your operating system.

2.2 Install the MCUXpresso SDK
Build, download and install the MCUXpresso SDK for your MIMXRT1060-EVKB or MIMXRT1064-EVK and TWR-KM3x board variant.

2.3 Get the EasyEVSE Development Platform (FreeRTOS, Wi-Fi 4) Software
The EasyEVSE Development Platform (FreeRTOS, Wi-Fi 4) has an EVSE and an EV software part. The software for the EV and EVSE side comes in one zip file.
Download the software for your used RT106x EVK: Releases · nxp-appcodehub/rd-nxp-easyevse-imxrt106x
In addition, also download the software for the EasyEVSE EV charging signal board (EVSE-SIG-BRD1X/2X). Here are two software packages to download, one software for the EVSE and one software for the EV side.
EVSE-SIG-BRD1X/2X software for the for the EVSE side: Releases · nxp-appcodehub/dm-lpc5536-evse-sigbrd
EVSE-SIG-BRD1X/2X software for the for the EV side: Releases · nxp-appcodehub/dm-evse-sigbrd1x-ev-software-on-lpc5536
3. Unbox and Setup
3.1 Ethernet Solution
This video describes the unboxing and setup of each one of the EasyEVSE development boards and LCD. Including the creation and setup of Azure IoT Central application, using a shareable link template and the configuration of a mutually secure and authenticated connection with the Azure IoT Central.
The communication with the server is done over the Ethernet.
4. Assembly
This chapter shows how to assembly all the components which are part of the development platform.
4.1 Ethernet Solution
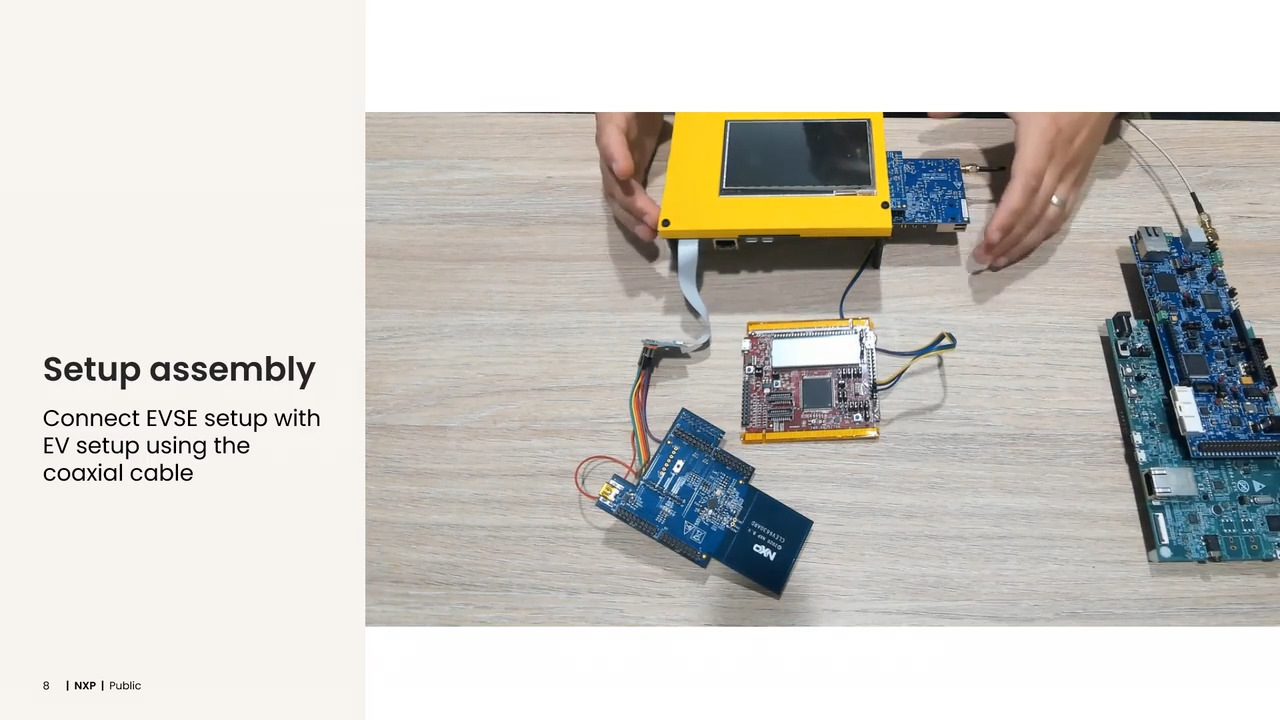
This video shows the steps to stack and connect all the boards of the platform.
4.2 Wi-Fi Solution
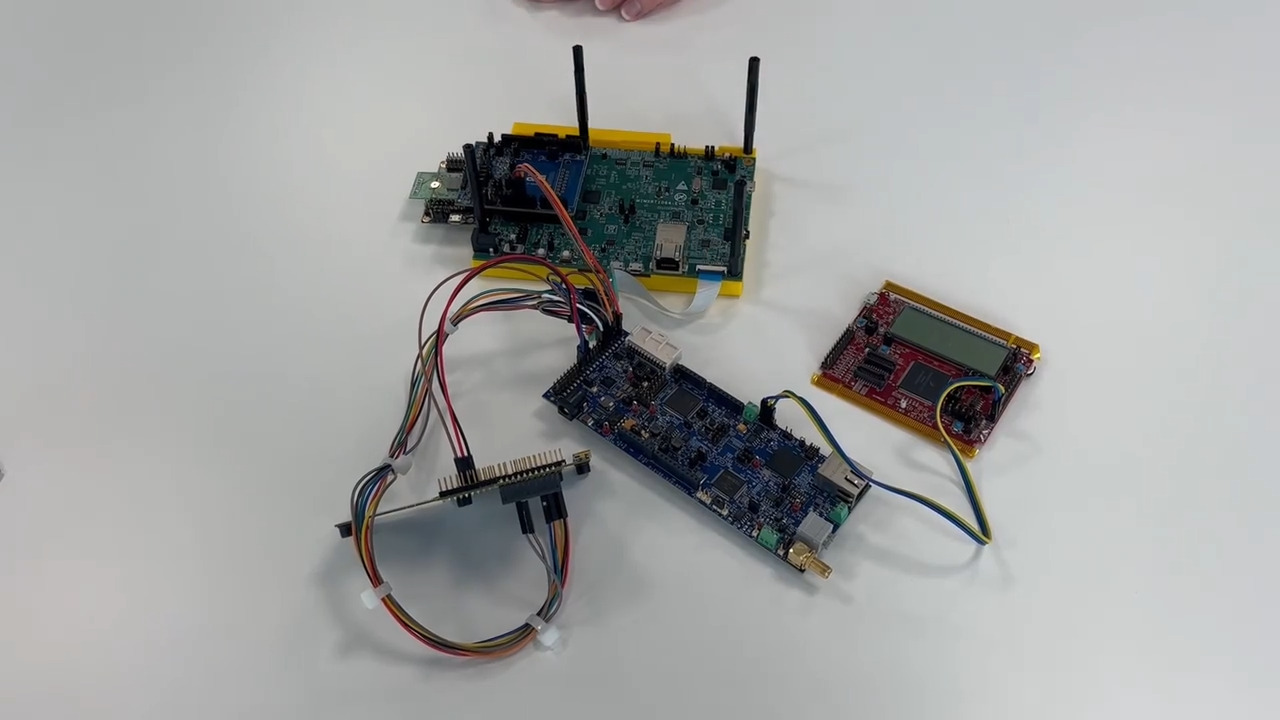
The video shows how to connect the EasyEVSE EV charging signal board (EVSE-SIG-BRD1X/2X), the metering board (TWR-KM35Z75M or TWR-KM34Z75M, or TWR-KM34Z50M), Wi-Fi (with the 1XK M.2 Module together with the LBEE0ZZ1WE-uSD-M2), the NFC board (CLEV6630ARD) and secure element board (OM-SE050ARD-E) with the host controller bord (MIMXRT1060-EVK/MIMXRT1060-EVKB/MIMXRT1060-EVKC or MIMXRT1064-EVK). Check the User Guide to know how to connect the touch display to your host controller board.
5. Plug it In
This chapter show cases the EasyEVSE Development Platform (FreeRTOS, Wi-Fi 4) with ISO 15118-2 implementation.
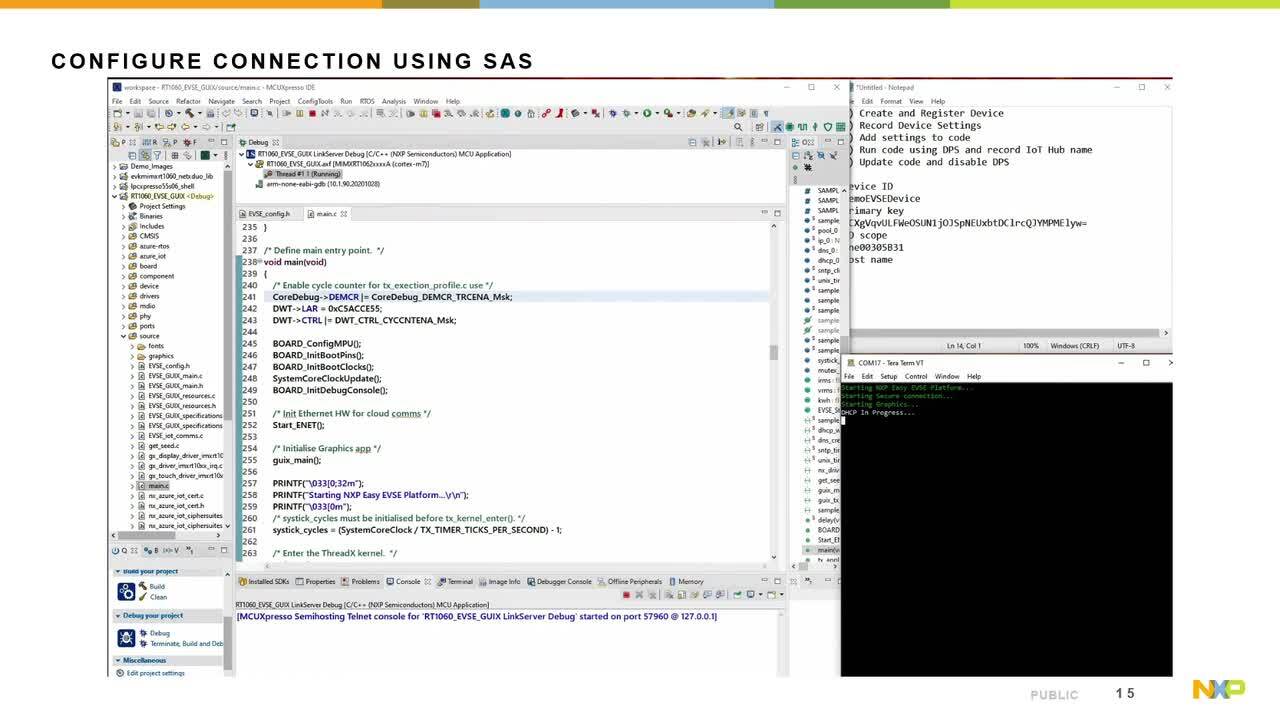
5.1 EasyEVSE EV Charging Development Platform (FreeRTOS, Wi-Fi 4) with ISO 15118-2 implementation demonstration
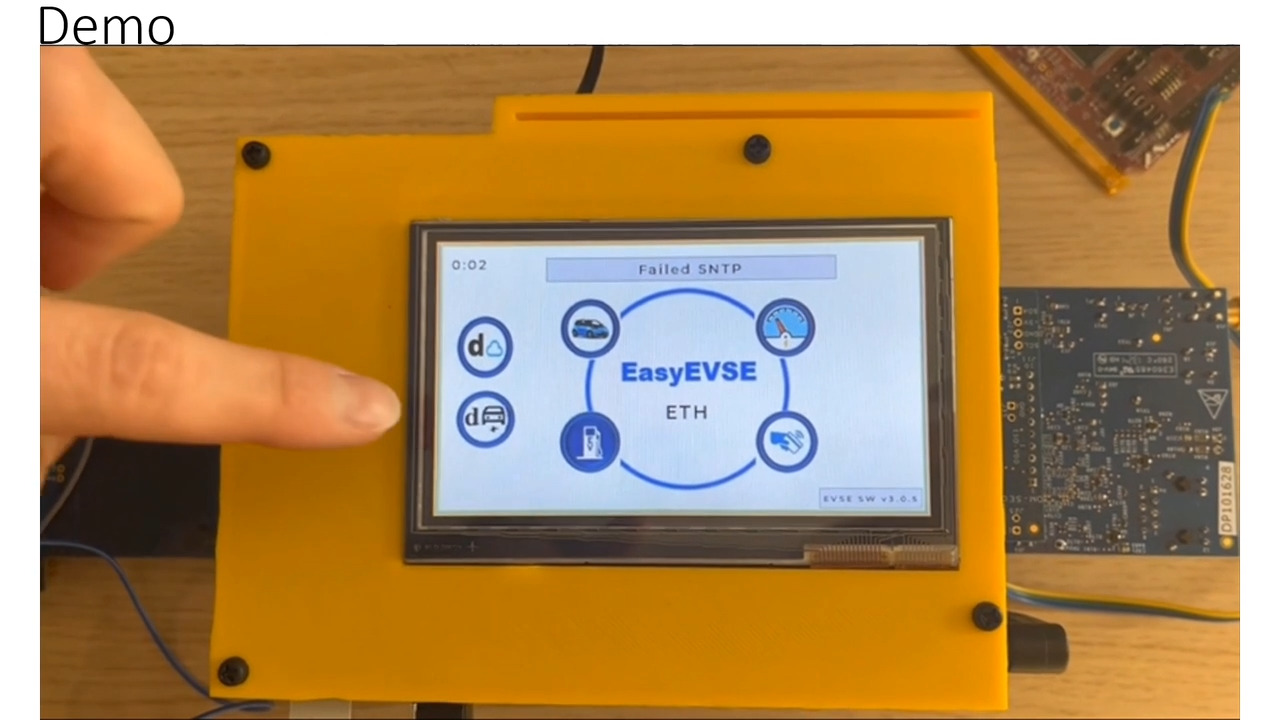
This video shows how the solutions works after successfully enabled the development platform, including required software settings, driving the ISO 15118-2 stack between the EVSE and EV side, cloud connection and the graphical user interface (GUI), presenting on the touch display.
Once you successfully completed this getting started setup, refer to the available design resources.
The User Guide provides additional information on how to use your Azure IoT Central application to monitor telemetry, update properties and send commands to your EasyEVSE device.
To simplify the start-up process, the Plug and Trust SE050 secure element was not implemented in this Getting Started setup. Refer to the User Manual to learn how to implement it and to get a detailed description of each building block of the platform.