Getting Started with the MPC5775B/E low-cost development board for Battery Management and Inverter
Contents of this document
-
Get Software
-
Plug It In
-
Load and Run
Sign in to save your progress. Don't have an account? Create one.

Purchase your MPC5775B/E low-cost BMS and Inverter Development Board
1. Get Software
Let's take your MPC5775B/E-EVB highly-integrated low-cost development boards for Battery Management and Inverter applications for a test drive!
Check the AN12875: Getting started with the MPC5775B-EVB and MPC5775E-EVB
1.1 Get the OpenSDA Serial Driver
Install the OpenSDA serial driver if necessary, in order to make the COM port available as an OpenSDA port. It can be checked under "COM and LPT Ports" as "OpenSDA – CDC Serial Port" in the Device Manager.
Get the Open SDA serial driver
1.2 Get Your Integrated Development Environment (IDE)
MPC5775B/E-EVB performs better when using S32 Design Studio for Power Architecture® IDE
Download S32 Design Studio for Power Architecture
2. Plug It In
2.1 Plug the USB Serial Cable
Connect the micro USB cable to J116 micro USB port.
If the driver is available:
You will be able to see the OpenSDA – CDC Serial Port
If the driver is not available:
Go to the Device Manager and right-click the COM port detected and select
Update Driver Software.
Select Browse > My Computer for driver software and select the downloaded OpenSDA driver.
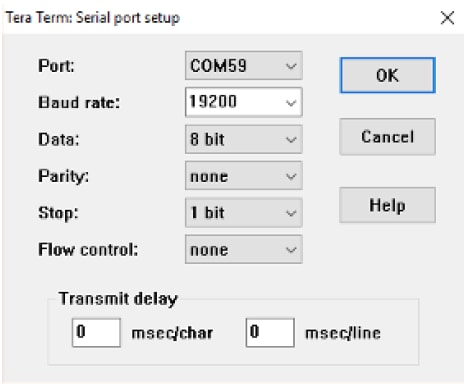
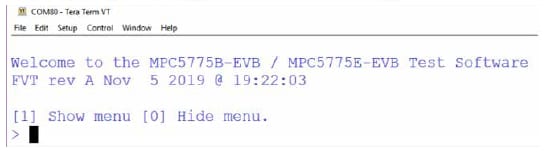
2.2 Setup Tera Term Console
Open Tera Term on Windows® PC.
Select the serial port to which the micro USB of the development board is connected and click OK. Go to
Setup > Serial Port and select 19200 as the baud rate.
3. Load and Run
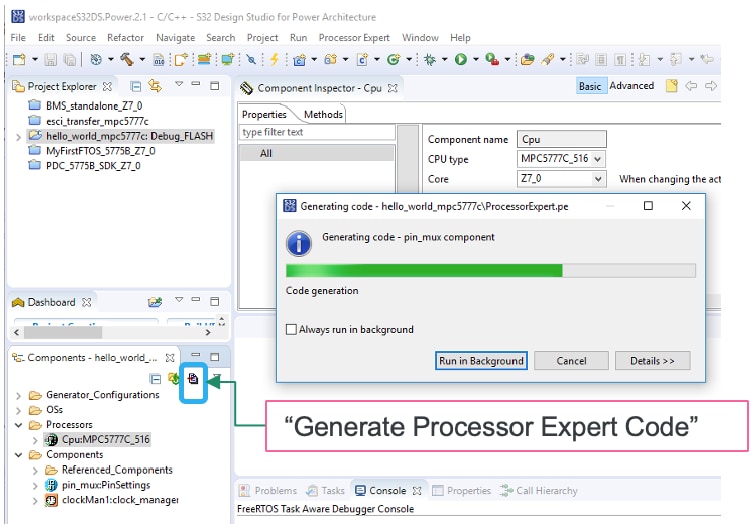
3.1 Load Example in S32 Design Studio for Power Architecture® IDE
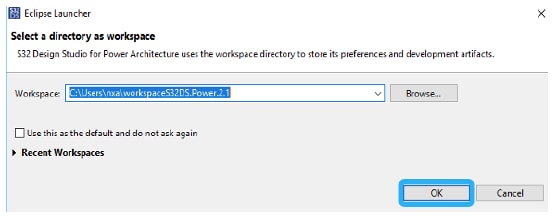
Open S32 Design Studio IDE and make or select a workspace, then click OK
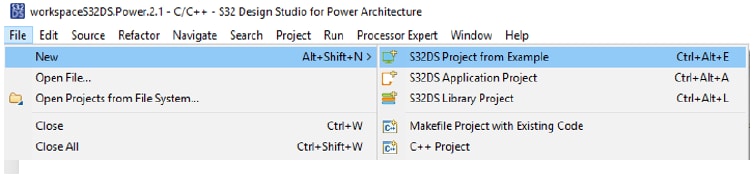
Go to New > S32DS Design Project from Example from the File menu
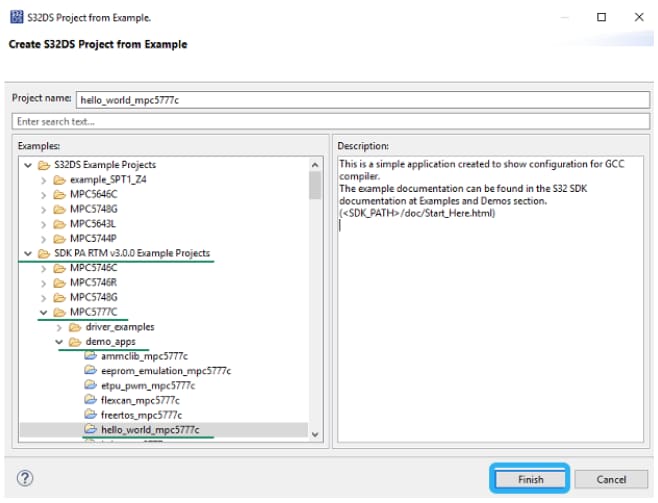
Scroll down to the SDK PARTM v3.0.0 Example Projects and select MPC5777C
Then select Hello_world_mpc5777c and click Finish
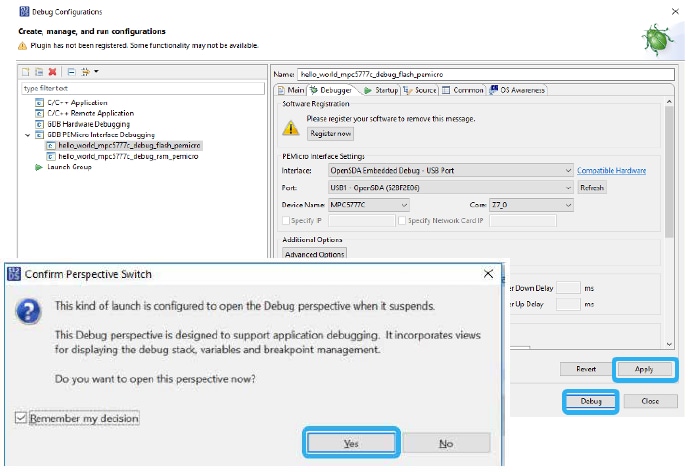
3.3 Debug the Code by Using the Debug Configuration Wizard
Click on Run > Debug Configuration…
Select the Debugger tab and then select the OpenSDA Embedded Debug – USB Port interface
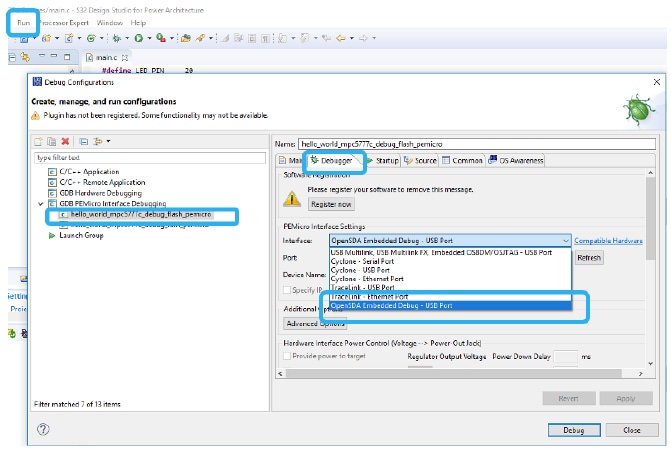
The "Port" should automatically be selected if the EVB is connected to the computer.
Click Apply, then click Debug, and finally click Yes.